
[Reading time: 10 minutes]
Overview
The Invoices module lets an advisor create an invoice for a customer, present it to them through the channel of their choice (typing the card directly into the Banner, SMS or email link, IVR during a call) and follow the payment from end to end.
Every invoice is attached to a payment module, which defines the processor (Ino pay or Stripe), the payment terms allowed and the channels available. The configuration of these payment modules and the underlying banking contracts is described in the articles:
- Payment modules — configuring the payment module.
- Bank contracts — set them up — adding the underlying banking contract.
- Stripe — the specific case of a Stripe contract.
1. Access and permissions
The Invoices module appears in the Banner as soon as the account has a Smart licence and the advisor’s profile has the Access invoices right.
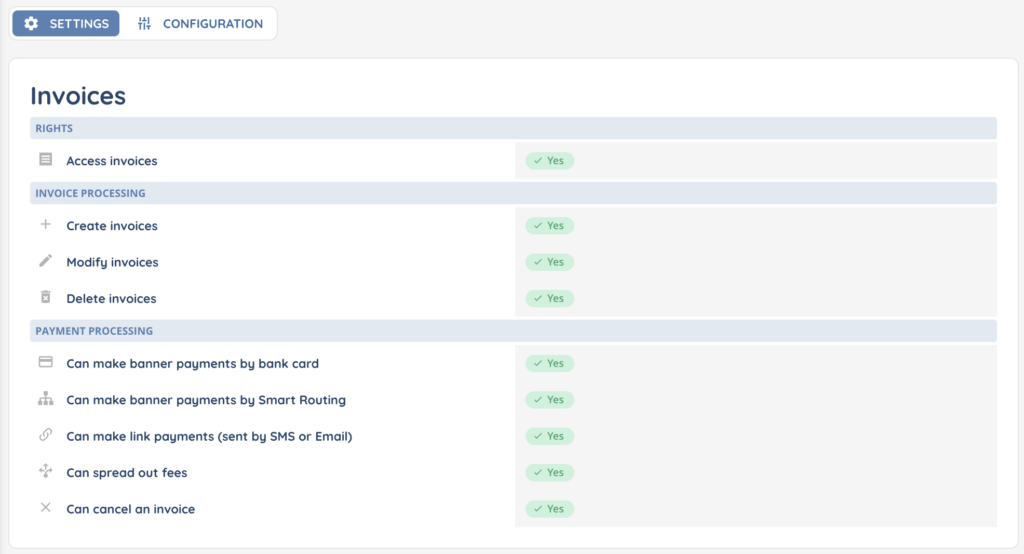
The rights linked to the module (set on the advisor profile, section Invoices) are:
| Right | What it enables |
|---|---|
| Access invoices | See the Invoices module and its list. Without this right, the module is hidden. |
| Create invoices | Create a new invoice, duplicate an existing one, merge invoices. |
| Modify invoices | Enter edit mode and modify an invoice. |
| Delete invoices | Delete an invoice (one or several at a time). |
| Can make banner payments by bank card | Take a payment by typing the card details into the Banner. |
| Can make banner payments by Smart Routing | Trigger IVR payment during a call. |
| Can make link payments (sent by SMS or Email) | Send a payment link by SMS or email. |
| Can spread out fees | Spread the fees across all installments in installment payments. |
| Can cancel an invoice | Cancel an invoice. |
2. The Invoices list
The Invoices module list shows the following columns:
- Status — a coloured tag (see section 3).
- Title — the invoice title.
- Created on — creation date.
- Last payment on — most recent payment date.
- Invoice No. — the invoice reference entered at creation.
- Customer No. — the customer number.
- Amount — the total amount + currency.
- Payment module — the linked payment module (clickable).
2.1. Quick search and advanced search
The search bar filters on the Title, the invoice number and the customer number. The Filters button opens an advanced search form with:
- Status (multi-select across the 10 statuses).
- Sort invoice dates by — created date, last payment date, or none.
- Start date / End date — date range.
- Amount.
- Payment module (multi-select).
- Interaction IDs.
2.2. Bulk actions
Selecting several invoices in the list (up to 10 at once) enables the Cancel and Delete bulk actions.
3. Invoice statuses
An invoice goes through several statuses during its lifecycle:
| Status | Meaning |
|---|---|
| Created | Invoice created but payment not yet prepared. |
| Prepared | Payment preparation has been validated (module, terms, channel chosen). The payment link / QR code is available. |
| Partially paid | Payment ongoing or partial (installment payment with one or more installments already paid). |
| Payment to come | A future payment is planned (scheduled payment or upcoming installment). |
| Paid | Invoice fully settled. |
| Pending confirmation | Awaiting confirmation from the processor. |
| Error | Error during a payment attempt. |
| Suspicion of fraud | The transaction has been blocked by the processor on suspicion of fraud. |
| Canceled | Invoice canceled. |
| Merged | The invoice has been merged with others into a parent invoice. |
4. Create an invoice
From the list, click Create in the top right. A new invoice form opens in the central panel with the following fields:
| Field | Description |
|---|---|
| Payment module | The payment module to use. If filled, the invoice can only be paid using this module. Only internal modules with status On or Sandbox appear in the list. |
| Title | Free-text invoice title. |
| Invoice No. | The invoice reference. The expected format (number, text, regex…) depends on what has been configured on the payment module. |
| Amount / Currency | Total amount and currency. |
| Customer No. | Customer number, format also driven by the payment module configuration. |
| Mobile phone / Landline | Recipient phone numbers. The mobile number is also used to send confirmations and payment links via SMS. |
| Recipient email address, used for email payment links and confirmations. | |
| Comment | Free-text comment. |
| Additional information | Free field for any extra information. |
Click Save. The invoice appears in the list in Created status and stays open in the panel to immediately prepare the payment.
An advisor can only have 10 open invoices at a time in the module. Beyond that, an error message blocks any further creation or opening.
5. Prepare and take a payment
Once the invoice is created, click Prepare the payment.
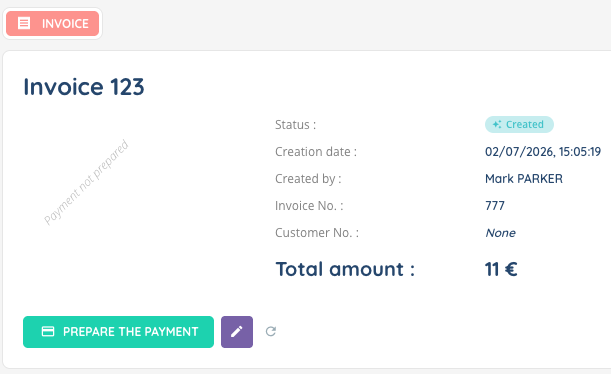
A preparation page opens where you choose, in order:
- The payment module to use (if not already fixed at creation).
- The payment term.
- The payment channel.
5.1. Payment terms
Three payment terms are available, filtered by what is enabled on the payment module:
- Instant payment — the customer pays the full amount in a single transaction. This is the only term available for Stripe modules.
- Scheduled payment — the payment is planned for a future date; you enter the Payment date.
- In installments — payment split into several deadlines. You enter the number of installments, the date of the first one, and optionally (with the Can spread out fees right) whether the fees should be spread across all installments or paid in full with the first one.
For any term with a future date, a warning reminds you to check the customer’s bank card expiry date.

5.2. Payment channels
Five channels are possible, filtered by what is enabled on the module and by the advisor’s rights:
| Channel | How it works |
|---|---|
| IVR — Payment via IVR | Only usable during a live voice call. The customer is redirected to an IVR that asks them to enter their card number, expiry date and CVV on their phone keypad. Requires the Can make banner payments by Smart Routing right. |
| Payment via email link | A payment link is sent to the customer by email. They enter their bank details on a web page. Requires the Can make link payments right. |
| Payment via SMS link | Same, sent by SMS. |
| Banner — Payment via banner | The advisor types in the card number dictated by the customer. Requires the Can make banner payments by bank card right. |
| Save the preparation | No immediate payment: the preparation is saved to be resumed later, or to use a tool outside INO CX. |

Depending on the channel chosen, you then validate the corresponding action:
- Launch payment IVR — the customer types their card on their phone keypad (number, expiry date, CVV). On the advisor side, a 3-steps tracker appears in the Banner to follow progress live, with statuses like Not started, In progress, Finished, Stopped, Error, Entry error, Payment failed, Suspicion of fraud.
- Send the payment link — immediately sends the link by email or SMS to the recorded address or number.
- Pay — opens the card-entry form in the Banner.
Once the invoice is Prepared, a QR code and a payment link become visible in the invoice header. The customer can scan or click them to reach the web payment page.
6. Duplicate and merge
6.1. Duplicate an invoice
In the Options menu of an opened invoice, the action Duplicate the invoice creates a copy with the same fields (amount, reference, contact details, payment module). The copy appears as a draft in the panel with a Created status.
6.2. Merge several invoices
Merging groups several invoices for the same customer into one, so you only take a single payment. Click Merge in the module header, then follow the procedure:
- Open in the module the invoices to be merged (Created or Prepared status only, and not already the result of a merge).
- Go back to the merge page — the eligible open invoices appear in the selection.
- Select the invoices to merge (minimum 2, maximum 10).
- Validate with Merge.
The merge creates a new invoice in Created status with a title starting with “Merge – ”. It takes on the sum of the amounts, the concatenated references and customer numbers, and the first non-empty phone / email. The source invoices switch to Merged status and are listed under Merged invoices in the new invoice.
You can only have one merge in progress at a time.
7. Edit, cancel, delete
7.1. Modify an invoice
The pencil icon in the invoice header enables edit mode. Warning: putting an invoice into edit mode resets it to Created status; the payment preparation must be done again. A warning message reminds you of this before saving.
7.2. Cancel an invoice
In the Options menu, the Cancel action cancels the invoice. A confirmation dialog reminds you that “all pending payments will be canceled”. Cancellation is only available under strict conditions:
- Status Paid, Partially paid or Payment to come, with at least one installment paid today.
- Ino pay payment module only.
- The invoice must not be in edit mode.
7.3. Delete an invoice
The bin icon in the Options menu deletes the invoice. An invoice in Partially paid, Merged or Pending confirmation status cannot be deleted.
⚠️ A paid invoice can be cancelled only if it was paid via INO Pay and on the same day.
8. View the details of an invoice
Invoice details are organised into stacked blocks in the Invoice tab:
- Payment module.
- Invoice — title, reference, amount, currency.
- Customer — recipient details.
- Information — comment, additional information.
- Payment — term, number of installments, total fees.
- Merged invoices — only when the invoice is the result of a merge.
- Installment(s) — table of installments with their status: In progress, Pending, Past installment(s), Installment error(s), Installment(s) canceled.
- Event(s) — chronological timeline of all invoice events (creation, preparation, notification sent, IVR payment, SMS/email received, installment paid, scheduled attempt…).
8.1. Interaction tab
A second tab Interaction appears when the invoice is linked to an interaction. It lets you open the interaction in the History of interactions module (see the article History of interactions) or, if the interaction is still ongoing, in the Banner.
The invoice ↔ interaction link is automatic and permanent: as soon as an invoice is prepared or paid inside an interaction, they become linked and this cannot be changed manually.
9. Smart Routing integration
Two Smart Routing actions (see Voice smart routing actions, Messaging smart routing actions, Email smart routing actions) let you automate operations on invoices:
- Search for invoice — searches an invoice by criteria and stores it in the
billvariable, to be reused by later actions. - Pay an invoice — triggers payment of the invoice from the Smart Routing (typically in an automatic callback or reminder scenario). The available output branches cover every case: Invoice not found, Payment successful, Failed payment, Payment refused, Payment stopped, Fraudulent payment, Instant payment succeeded / failed / canceled, Notification successfully sent, Payment via SMS link, Payment via email link, etc.
When a payment is performed via a Smart Routing, the invoice timeline shows the event IVR Payment and the payment author becomes the Smart Routing icon (rather than an advisor avatar).
10. Confirmations
Payment confirmations sent to the customer after a successful payment are configured on the payment module, not on the invoice. Once configured, they apply automatically to every invoice using that module. See the article Payment modules.
On the invoice side, every confirmation sent appears as an Event in the timeline, which lets you reconstruct the full history of the case.