
[Reading time: 4 minutes]
This article explains where to consult your client account limits, how to request an increase on one of them, and what happens after your request.

Overview
The Limits tab sits in the Maker, in the client account settings. Open your user capsule, click Client account settings, then Limits in the left-hand menu.
For an overview of the client account settings and all of its tabs, see the Client account settings article.
A limit sets the maximum number of items you can create on your account: the number of users, of queues, of voice campaigns, of questions in an evaluation grid, and so on. These values are set by INO cx and suit most cases. This tab gathers them in one place and lets you request an increase on the ones that block you.

Note: you cannot change a limit yourself. The values shown are read-only. You send a request to the support team, who reviews it and grants it case by case, if technical constraints allow.
1. Prerequisites
- A Smart licence.
- The read right on Limits must be enabled on your role to see the tab.
- The edit right on Limits is required to request an increase. Without it, you can consult the values but the request buttons do not appear.
Note: you only see the limits of the items your role lets you read. A role with no read right on voice campaigns, for instance, does not show their limits. Two people with different roles therefore do not see the same list.
2. Open the Limits tab
- In the Maker, open your user capsule and click Client account settings.
- In the left-hand menu, click Limits.
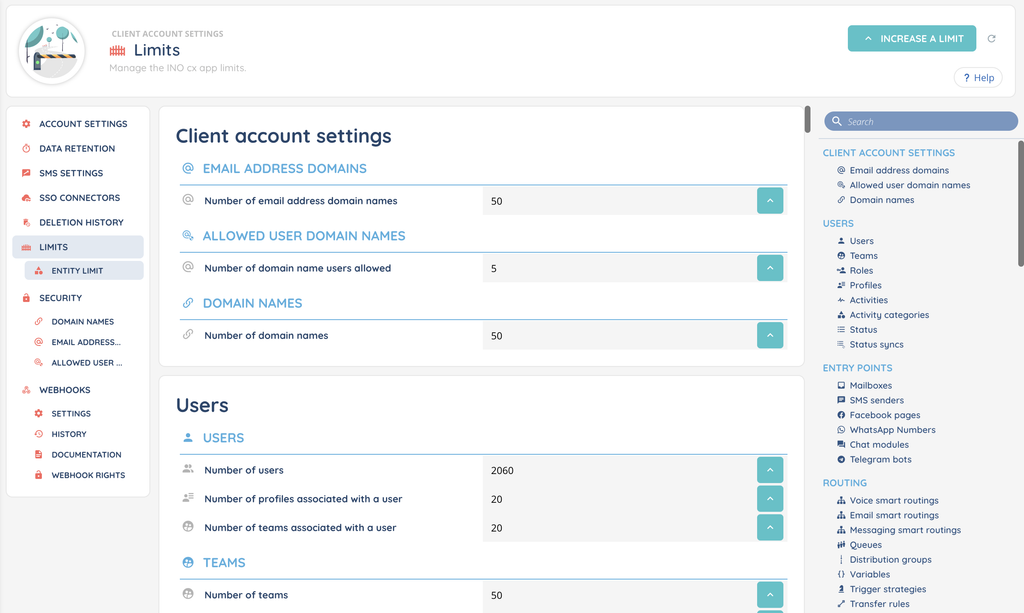
3. Read the page
3.1. How the limits are arranged
Limits are grouped by module, then by item within each module. Each line carries the label of the limit and its current value, for example Number of users or Number of questions in an evaluation grid.
To the right of each line, an Increase the limit button opens the request for that limit directly.
3.2. Find a limit
The list is long. A navigation menu is shown on the right of the page, with the modules and their items: click an entry to jump straight to the matching section. That menu has its own Search field to filter its entries.
The Refresh button at the top of the page reloads the values.
4. Request an increase from the Limits tab
Two entry points lead to the same form: the Increase a limit button at the top of the page, or the Increase the limit button on the line you care about. The second one preselects the limit for you.
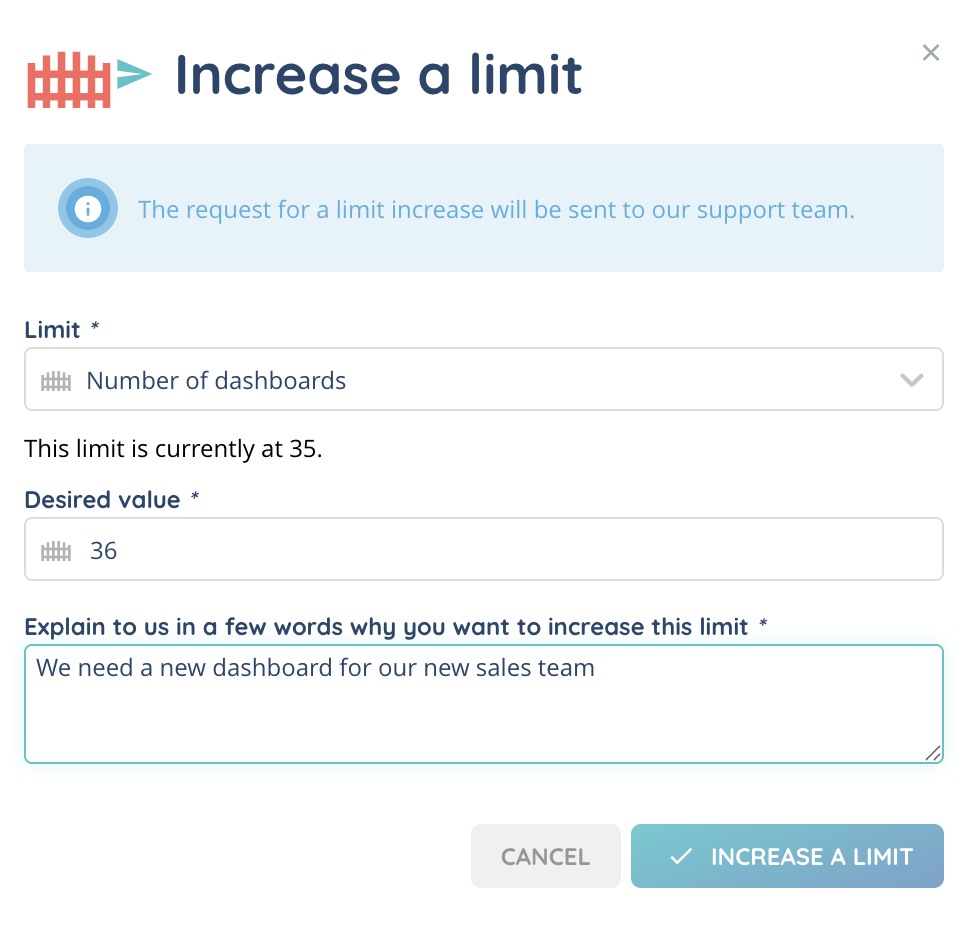
The window that opens first reminds you that “The request for a limit increase will be sent to our support team.” Then fill in:
- Limit: pick it from the list if it is not already filled in. It is required, otherwise the message “The limit is required.” appears. The value in place is shown just below: “This limit is currently at …”.
- Desired value: a whole number, strictly greater than the current value. Below that, the message “The limit must be greater than …” appears. Above the ceiling set for that limit, it is “The limit must be less than …”.
- Explain to us in a few words why you want to increase this limit: required, at least 10 characters. This is the text the support team will read, so give it the context that matters.
Click Increase a limit to send. The message “Your request has been submitted to our support team and will be processed as soon as possible.” confirms it went out.
Note: when a limit has already reached its ceiling, the Increase the limit button on its line stops responding and shows “This limit has reached the maximum limit of …”. There is no headroom left to ask for on that limit.
5. Request an increase when you hit the limit
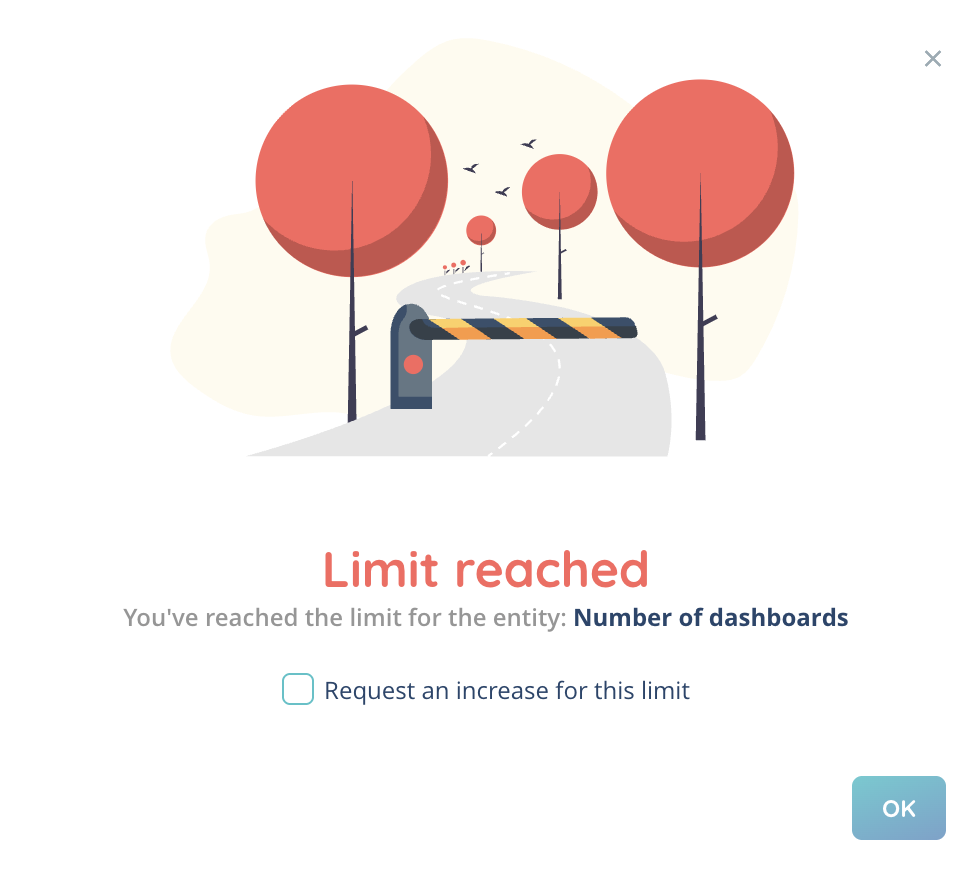
You do not need to come back to this tab. When you try to create an item while its limit is reached, a Limit reached window opens and says “You’ve reached the limit for the entity:” followed by the label concerned.
- With the edit right on Limits, tick Request an increase for this limit. The Desired value field and the explanation appear, exactly as in section 4, then confirm.
- Without that right, an information message shows instead: “Contact your administrator to increase the limit.”
6. What happens after your request
An email goes out to the support team. It contains your name, your email address, your client account name, the limit concerned, its current value, the value you are asking for and your explanation.
Your request does not change the limit. The value shown in the tab stays the same until the support team processes the request.
Each request is reviewed case by case and granted if technical constraints allow.