[Reading time: 3 minutes]
Overview
Queues are used to organize and manage incoming and outgoing interactions for Voice, Email, and Messaging channels. They allow you to control how interactions are distributed to advisors, manage waiting times, and handle overflow or post-interaction processing.

Each queue can be configured with specific settings, waiting strategies, distribution rules, and supervision options to ensure interactions are handled efficiently.
The Queues module contains two main tabs. The first tab, Queues, displays a list of all queues in your system and provides tools to search, filter, and manage them. The second tab, Distribution groups, is covered in a separate documentation article.
Once a queue is created, it must be added to the profile, configuration tab, to be available for the advisors.
1. Queues tab
In the Queues tab, you can search for a queue by its name, reference, or alias. You can also filter queues using tags to quickly locate specific queues. Advanced search allows filtering queues by direction (Incoming or Outgoing) or by flow type (Voice, Email, or Messaging).
The list of queues displays several columns, including the queue’s name, reference, alias, type, and the status of each channel’s flow (Ready or Not configured). At the end of each row, there are action buttons:
- The arrow icon allows you to enter the queue and configure it.
- The cogged wheel icon provides queue-level actions such as history, dependencies and tags, or duplicate queue.
- The pencil icon is used to edit the queue.
- The trash bin icon allows you to delete the queue. If the icon is greyed out, it indicates that the queue has dependencies and cannot be deleted.

2. Configuring a queue
When you enter a queue, you will see two tabs: Settings and Configuration. The Settings tab is used to configure general queue properties, waiting strategies, distribution rules, processing options, and statistics. The Configuration tab is used to set up response mailboxes and templates (SMS, email).

2.1. Settings tab
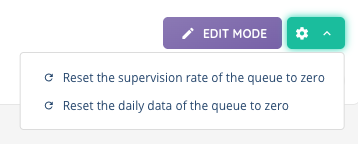
Top action buttons
At the top of the Settings page, there are two action buttons:
- The pencil icon allows you to edit the queue settings.
- The cogged wheel icon lets you reset the supervision rate or reset the daily data for the queue.
General section
The general section contains the main properties of the queue. You can set the queue’s name, reference, and alias. The reference is a unique identifier for the queue, and alias is used for statistics.
The retention time determines how long interactions are kept in the queue. It can be set to the default defined in your client account settings, a specific number of days (between 1 and 365), or unlimited.
The type of the queue (Incoming or Outgoing) is displayed but cannot be modified at this stage.
The queue weight allows you to prioritize interactions between queues. The value can range from 1 to 100, where higher numbers indicate higher priority.
The load calculation mode determines how the system calculates the number of waiting interactions. In Real mode, the algorithm uses the actual number of targets waiting in the queue. In Fixed mode, you can define a custom number of targets (between 1 and 100 000) to influence prioritization.
The refresh time sets the daily reset time for queue data, which is used to calculate SLA and QS metrics. You can also reset this data manually using the cogged wheel icon. Note: If the interaction begins before the reset time and ends after the reset time, all statistics will be set to 0 except for the processed interaction, which will count as 1.
The transfer to number option allows you to redirect interactions to an external number. If enabled, you must define the external number to which calls will be transferred.
Waiting section
The waiting section defines how interactions are handled while advisors are unavailable. It is divided into three columns for Voice, Email, and Messaging.
The welcome message is played or sent when an interaction enters the queue and is optional. For Voice, this is a sound played to the caller. For Email, this is an acknowledgment email sent to the sender. For Messaging, this is a welcome message displayed to the sender.
The waiting playlist determines the audio heard by callers while waiting.
The waiting time indication can be set to None, Estimated waiting time, or Position in the queue. If you select Position in the queue, you must define the repetition timeout in HH:MM:SS format.
The strategy when no advisor is connected controls what happens if no advisor is available. You can either transfer the interaction to the queue or use overflow which automatically ends the interaction, or allow dissuasion, where the user can voluntarily leave the queue. An option allows you to count the advisors who do not have the flow enabled.
For overflow, ou can also enable checking the number of waiting interactions. If enabled, you can define limits by the number of interactions or by the percentage of logged-in advisors.
The maximum estimated waiting time defines the threshold beyond which interactions are automatically sent to the “Maximum estimated waiting time” branch of the smart routing (between 30 ad 3600 seconds).
For the dissuasion, the key for leaving the queue allows users to exit the queue and proceed to the next action in the routing.
The enable maximum waiting time before dissuasion option determines whether waiting time is limited. If enabled, you can set a maximum waiting time in HH:MM:SS.
Distribution section
The distribution section controls how interactions are assigned to advisors. You can prioritize advisors with the longest available time or those who have processed the fewest interactions.
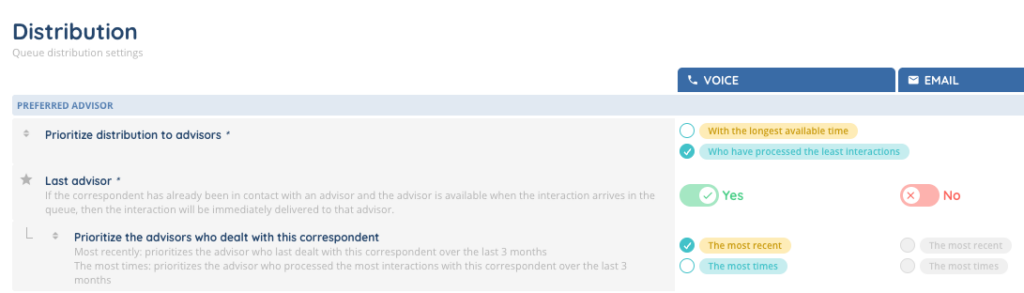
The last advisor option ensures that if a correspondent has previously interacted with an advisor and that advisor is available, the interaction will be delivered to them. You can choose to prioritize the advisor who most recently or most frequently handled interactions with the correspondent over the last three months.
The default response mailbox is automatically selected when an advisor starts answering an email from this queue. Response mailboxes are configured in the Configuration tab.
Processing section
The processing section manages how interactions are presented and handled by advisors.
The presentation time sets the maximum time an interaction is presented to an advisor (between 10 seconds and 30 minutes).
The can refuse presented interaction option allows advisors to refuse interactions if they have the required permission on their profile.
The automatic acceptance of SMART interactions ensures that interactions in this queue are automatically accepted according to the settings on the queue and the advisor profile. You can also define a time before automatic acceptance in HH:MM:SS.
The open interaction processing time defines whether advisors have unlimited time or a limited time to process an interaction. The number of proceedings possible controls how many times an interaction can be processed.
Other options include hold-on playlist, automatic supervision of interactions (with supervision rate in %), recording configuration (Mono / Stereo), maximum recording time, repository connector, generate public link, post-interaction mode, post-interaction options, and whether to insert history at the end of the email.
Options section
The options section allows you to configure additional features such as qualification questionnaires, scripts, speech analytics, customized buttons, and permission to switch interactions to video conference.
Statistics section
The statistics section allows you to configure SLA and QS metrics. You can define a customized SLA time, a maximum time interval for SLA calculation, and color-coded levels indicating whether the queue is in a red, yellow, or green status. You can also set high QS levels for Voice and Messaging, and define high waiting levels for Call, Email, and Messaging channels.

The different stages and color changes can be seen in the small banner and the supervision.
2.2. Configuration tab
The Configuration tab allows you to manage templates and mailboxes associated with the queue. It contains several sub-tabs depending on the direction of the queue (incoming or outgoing).
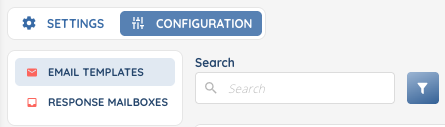
Email templates
The Email templates sub-tab is available for both incoming and outgoing queues. You can add email templates that have already been created in the dedicated module. For each template added, you can assign permissions for users of this queue. The permission can be set to Modification, allowing advisors to edit the template, or Read only, which only allows advisors to complete the variables in the template without modifying its content.
SMS templates
The SMS templates sub-tab is available for outgoing queues only. It works similarly to the email templates. You can add SMS templates created in the dedicated module and assign Modification or Read only permissions to the advisors using the queue.
Response mailboxes
The Response mailboxes sub-tab is available for incoming queues only. You can add mailboxes that have already been created and select one as the default mailbox for the queue. This sub-tab displays the status of each mailbox, the email address, and the displayed name, making it easy to manage incoming email responses for the queue.
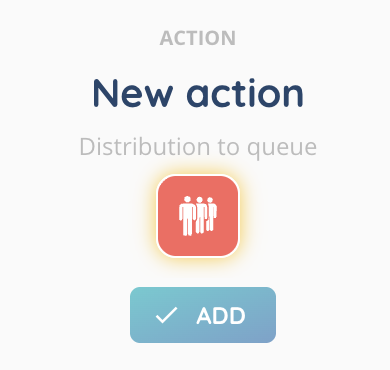
You can now use your queue in smart routing by using the “distribution to queue” action.