
[Reading time: 4 minutes]
Overview
The Evaluations module is part of the Quality Management module in the Banner. It allows managers and supervisors to assess agent performance by scoring interaction records against structured evaluation grids. With this module, you can create evaluations, score questions organized by categories, and add timestamped comments on specific moments of a record.

Note: Evaluation grids are created and configured in the Maker. This article focuses on using evaluations in the Banner. For grid configuration, see Evaluation grids (Maker).
1. Prerequisites
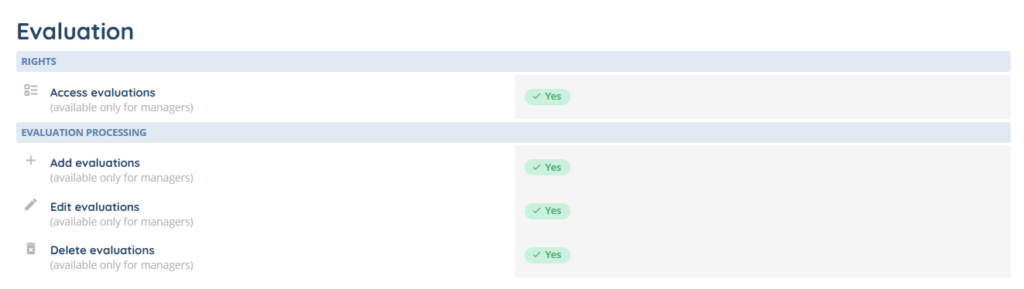
To access and use the Evaluations module, the following permissions must be enabled on your active profile:
- Access Evaluations — set to Yes to access the module. Only available to managers.
- Add Evaluations — allows creating new evaluations.
- Edit Evaluations — allows editing evaluations’ answers and comments
- Delete Evaluation — allows deleting evaluations.
Additionally, at least one evaluation grid must be assigned to your active profile. If no grid is assigned, you will not be able to create evaluations.
Managers can view evaluations for all users in their managed teams. Non-manager users can only view the evaluations created from their records.
2. Accessing the evaluation list
Open the Evaluations module from the Banner menu.
The list displays all evaluations you have access to, with the following information:
- Evaluation creation date
- Creator
- Evaluation grid
2.1 Filters
You can refine the list using the available filters:
- Evaluation grid — filter by all grids available in your active profile.
- User — filter by evaluated user(s).
- Interaction IDs — filter by ID (you can find it in the Interaction History module for example).
2.2 Sorting and pagination
The list supports column sorting and pagination. Results are displayed with a default page size of 50 evaluations.
3. Creating an evaluation
To create a new evaluation:
- Open a record or click on the Evaluation button when you access the module.
- Select an evaluation grid from the ones assigned to your profile.
- (optional) Add more records with the Options button.
- Edit the grid with the Edit mode button.
- Save your changes.
The evaluation is created with all questions initialized to a score of 0. You can then score each question individually.
Note: The number of records you can attach to a single evaluation is limited by your client account configuration.
4. Scoring an evaluation
When you open an evaluation, the questions are organized in a tree structure by categories and sub-categories.
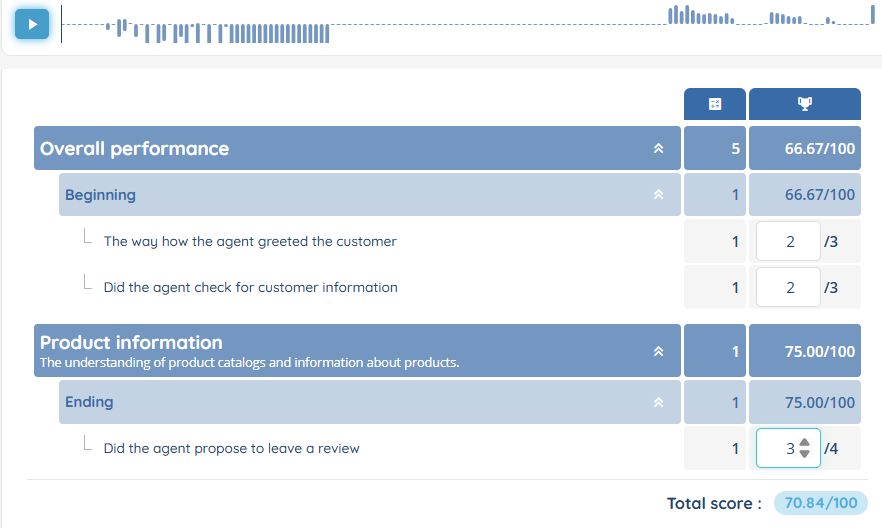
For each question, enter a score between 0 and the maximum scale defined for that question (up to 100).
Each question and each category has a coefficient (from 1 to 100) that determines its weight in the overall score calculation. The weighted scores are calculated automatically.
To save your changes, click on Save.
Note: If new questions have been added to the evaluation grid after the evaluation was created, they will appear automatically when you edit the evaluation. Their initial score will be set to 0.
5. Managing recordings in an evaluation
5.1 Adding records
You can associate additional records to an existing evaluation, and switch between them:
1. Open the evaluation.
2. Click on the Option button, then select Add records.
3. Select the records to add.
4. Confirm.
5.2 Removing records
To remove a record from an evaluation, click on the Delete button next to the record you want to remove.
Note: Removing a record from an evaluation does not delete the record itself.
6. Comments on records
Comments allow you to annotate specific moments in a record with a timestamped note and a comment type, which serves as an appreciation rating.
6.1 Adding a comment
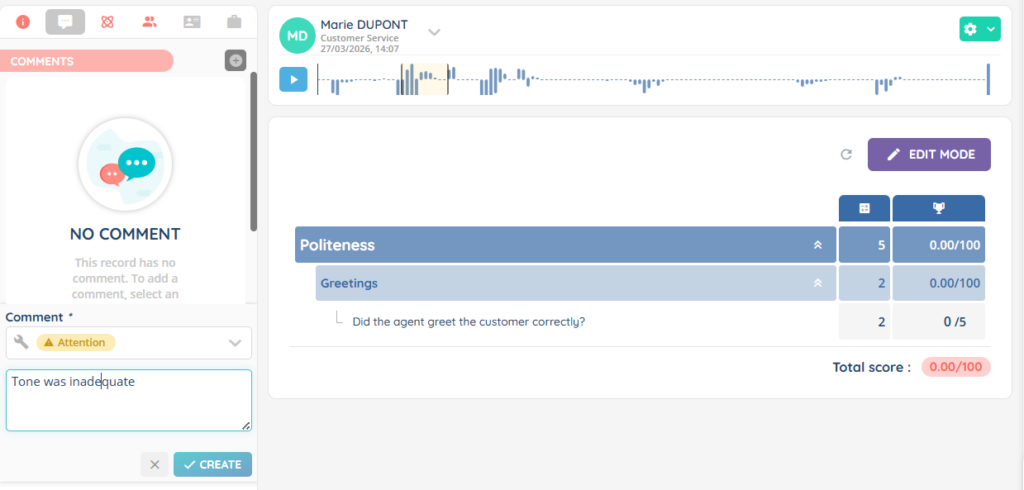
To add a comment on a record:
1. Open the evaluation.
2. Select the record you want to comment on.
3. With your cursor, set the start time and end time to define the moment in the record.
4. Enter your comment text in the left panel.
5. Select a comment type.
6. Click on Create.
6.2 Editing a comment
To edit an existing comment, click on the modify button next to the comment. You can modify the time range, text, and appreciation rating.
6.3 Deleting a comment
To delete a comment, click on the delete button next to the comment.
Note: Comments are stored within the evaluation. Deleting an evaluation also deletes all associated comments.
7. Deleting evaluations
7.1 Single deletion
To delete an evaluation:
1. Open the evaluation or select it in the list.
2. Click on Delete.
3. Confirm the deletion.
7.2 Bulk deletion
You can delete multiple evaluations at once:
1. Select the evaluations in the list.
2. Click on Delete.
3. Confirm the deletion.