
[Reading time: 5 minutes]
Overview
An evaluation grid defines the criteria used to assess your advisors on their voice recordings. Grids are built and maintained in the Maker, then made available to supervisors and managers, who use them from the Quality Management module to score interactions, write comments and follow up on agent performance.
This article focuses on how to build a grid. To learn how supervisors then use a grid to evaluate advisors, see Evaluations – Use them.
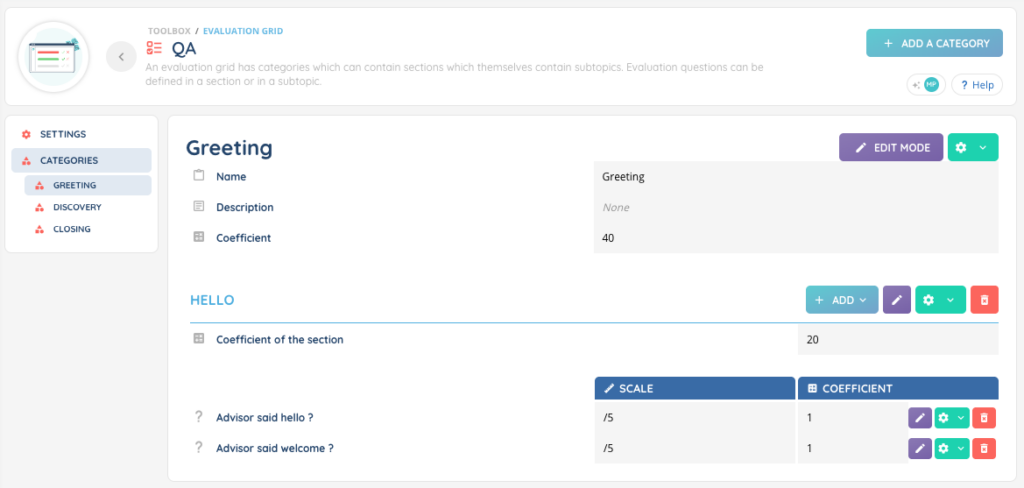
A grid is organised as a hierarchy of four levels. Each level can be weighted with a coefficient so that the total score reflects the relative importance of each topic.
| Level | Description |
|---|---|
| Category | Top-level container of the grid (e.g. “Greeting”, “Discovery”, “Closing”). |
| Section | Optional subdivision of a category, used to group related questions. |
| Subtopic | Optional subdivision of a section, for finer breakdowns. |
| Question | The actual evaluation criterion. Graded by the supervisor on a numeric notation scale defined here (e.g. x/10). |
Questions can be attached either directly to a section or to a subtopic of that section.
Prerequisites
- A Smart license.
- Access to the Maker
- The Evaluation grid permission enabled in your role (read, create, edit, and/or delete).
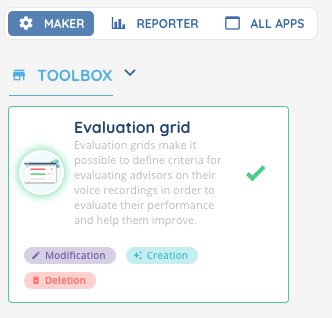
1. Creating an evaluation grid
- In the Maker, navigate to Toolbox > Evaluation grids.
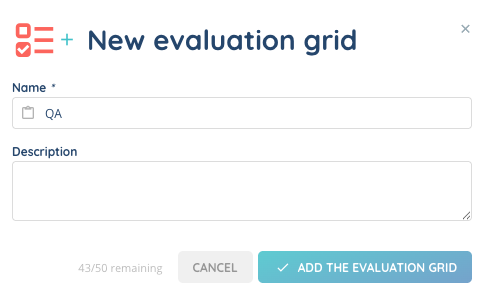
- Click New evaluation grid.
- Fill in the following fields:
| Field | Description |
|---|---|
| Name | Name of the evaluation grid. |
| Description | Optional description of the grid’s purpose. |
- Click Save.
Note: You can also create a grid by duplicating an existing one using Copy the evaluation grid.
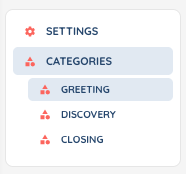
2. Building the grid content
Once the grid is created, you build its content from the grid’s detail page by adding categories, sections, subtopics and questions. The left-hand navigation reflects the grid hierarchy in real time.
2.1. Adding a category
- From the grid detail page, click Add a category.
- Fill in the following fields:
| Field | Description |
|---|---|
| Name | Name of the category (e.g. “Greeting”, “Discovery”, “Closing”). |
| Description | Optional description. |
| Coefficient | Weight of the category in the total score. Must be a positive number. |
- Click Add the category.
2.2. Adding a section
Sections allow you to group related questions inside a category.
- Open a category from the left-hand navigation.
- Click Add a section.
- Fill in the following fields:
| Field | Description |
|---|---|
| Name | Name of the section. |
| Description | Optional description. |
| Coefficient of the section | Weight of the section within the category. |
- Click Add the section.
2.3. Adding a subtopic
Subtopics are optional and can be used to break a section down further.
- From a section, click Add a subtopic.
- Fill in the Name, optional Description and Coefficient.
- Click Add the subtopic.
2.4. Adding a question
Questions can be added to a section or to a subtopic. They are the actual criteria graded by the supervisor during the evaluation.
- Open the section or subtopic that should contain the question.
- Click Add a question.
- Fill in the following fields:
| Field | Description |
|---|---|
| Title | Wording of the question (e.g. “Did the advisor introduce themselves?”). |
| Notation scale | Number of points for the question, for example 10 for a score out of 10. Must be positive. |
| Coefficient | Weight of the question within its section or subtopic. |
- Click Add the question.
2.5. Editing or deleting an element
Categories, sections, subtopics and questions can be edited, duplicated or deleted at any time:
- To edit an element, click the Edition mode button on the corresponding card, change the values, then click Save.
- To duplicate an element, use the Copy action.
- To delete an element, use the Delete action. Deleting a category, section or subtopic also deletes everything it contains.
Important: when a grid that is already in use is modified (a question added, the notation scale or a coefficient changed), the impact on existing evaluations is described in Evaluations – Use them.
3. Making the grid available to evaluators
A grid is only visible from the Quality Management module once it has been associated with the evaluators’ user profile.
- In the Maker, open the user profile in Users > User profiles.
- Open the Evaluation grids tab and click Add evaluation grids.
- Select the grids the profile is allowed to use, then confirm.
Note: a profile can be associated with several grids — for example, one grid per business activity. Only the grids associated with the profile will appear in the grid selector when an evaluator creates a new evaluation. The other prerequisites for an evaluator (the Access evaluations option and the evaluation rights) are detailed in Evaluations – Use them.
4. How the total score is calculated
Every score in the grid is computed on a 0–100 basis, regardless of the notation scales used.
- Each answer is first converted to a percentage of its own scale: note × 100 ÷ scale (so 7/10 and 70/100 give the same value).
- The score of a section, subtopic or category is the weighted average of the elements it contains, using their coefficients as weights.
- The total score of the grid is the weighted average of its categories, on /100.
Note: only the relative weight of coefficients matters. Coefficients of 1, 2, 1 give the same result as 25, 50, 25.
5. Good practices
- Keep category and section names short and recognisable — they appear in the evaluation form filled in by the supervisor.
- Use coefficients consistently across grids so total scores can be compared between teams or activities.
- Use a uniform notation scale (for example /10 on every question) to make the total score easy to read.
- Build a dedicated grid per business activity rather than one large generic grid — it keeps each evaluation short and focused.
- Test a new grid on a few recordings before associating it with the whole team’s profile.