
[Reading time: 8 minutes]
Overview
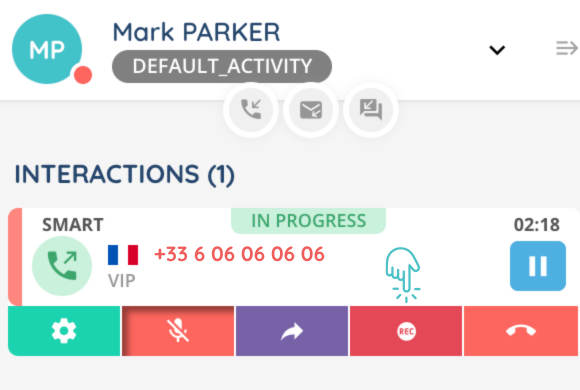
The ‘Profiles‘ module in the Maker allows configuration of what users can do and access in the Banner with an active profile, such as cases, queues, interactions, campaigns, etc.

If certain permissions are not associated with the active profile, some modules may not even be displayed in the Banner.
Users can have multiple profiles and switch between them as needed.
Prerequisites
- Users you want to add to the profile.
- The default activity you wish to set to the profile.
Many items will need to be added to the profile (cases, platforms, queues, transfer rules, layouts etc.). You can always modify the content of your profile later if you need to.
Configuring (Maker)
You can create up to 50 profiles.
On the Maker, go to the ‘Users’ module, ‘Profiles’ sub-module : You will find a list of existing profiles. Click on ‘Create’ or enter an existing profile by clicking on the arrow.
Each profile has two tabs:
- Settings: allow or deny access to interactions, flows, transfers, collaborative tools, supervision, records, campaigns, etc.
- Configuration: allow or deny access to specific campaigns, queues, activities, etc.
All rights granted or revoked will then be reflected in the Banner of users when this profile is active.
Settings
This tab is a grid with sections and a clickable table of contents in the right side panel. This tab lets you set general rights for a profile.
You’ll find 3 buttons at the top of this tab:
- online refresher: to take into account any changes you’ve made, without having to log out and log back in.
- edit mode: to modify settings.
- cogwheel: for supervision, to update counters when the situation changes (e.g. from 1 agent connected to 10).
Click on edit to modify the parameters.
General
The “general” section contains 4 fields: the name given to the profile, the alias (used for statistics), the reference (for searches) and a possible description.
Interactions
You will find 4 fields for the “interactions” section:
- timeout (legal obligation, delay before a new interaction is presented to the agent or before the agent can make a new outgoing interaction),
- maximum number of missed interactions (beyond this, the agent’s activity will change automatically),
- choice of activity that will be assigned automatically if the agent reaches the maximum number of missed interactions (activities must already be configured).
Flow
You’ll find several fields for the “flows” section, divided into 3 columns (voice, email, messages):
- flow (will the user with this active profile have access to the flows, and will he be able to activate or deactivate them himself? This will appear in the small Banner, in the form of 3 flow buttons, which may or may not be clicked, depending on the rights granted),

- outgoing interactions (can the user make smart or direct outgoing interactions, to which countries, is he allowed to make an outgoing interaction to a premium-rate number? This will influence the buttons displayed on the small banner),

- interaction management (access to the pool of pending interactions in the banner, number of interactions the agent can have simultaneously, right to refuse smart interaction, automatic opening of an interaction on screen or only in the small banner, automatic acceptance of smart interaction and after how long),

- interaction processing (supervision rate, right to mute, to start a manual recording (which will be different from discreet listening), permission to start a conference from a voice or message interaction).
Transfers
You will find 5 fields for the “transfers” section:
- assisted transfer to queue right (an agent can transfer a call while remaining briefly on the line to ease the transition. The initial agent provides the receiving agent with call details, introduces the customer, then withdraws when the transfer is complete),
- blind transfer to queue (the agent transfers the call to the queue and then hangs up),
- right to transfer to an advisor,
- right to external transfer,
- right to transfer to smart routing.
Users
Can the user access the “My colleagues” module in the Banner?

Collaborative
Can the user access the conversations in the small Banner?

Supervision
Can the user access the “Supervision” module?


Recording
You will find 3 fields for the “recording” section: can the user access, download and delete recordings?

Evaluation
This section only concerns users who are managers. Car the manager access evaluations ? Can he add, edit and delete evaluations?


Qualification
Can the user access qualifications?


Surveys
Can the user access surveys?

Scripts
Can the user access scripts?

Voice campaigns
You’ll find several fields in the “voice campaigns” section: set up access to voice campaigns, targeting (program, reprogram, remove, and access the pool of waiting targets), enable call blending and choose the delay for its activation (when there’s a low point in incoming calls, advisors will be switched to outgoing calls).

SMS campaigns
You’ll find several fields in the “SMS campaigns” section: set up access to SMS campaigns, targeting (program, reprogram, remove, and access the pool of waiting targets).

Cases
Set cases parameters. Read the full article here.

Tasks
Set tasks parameters. Read the full article here.

Voicemail
Smart voicemails are messages left by contacts in smarts routings. Configure access to smart voicemail, and the right to download or delete a message.

Interaction history
Can the user access interaction history?

Invoices
You’ll find several fields in the “Invoices” section: set up access to invoices, right to create, modify or delete invoices, make different payments (bank card, smart routing, link by SMS or email), spread out fees, cancel an invoices (if it complies with accounting and tax rules ).

Statistics
Can the user access statistics?

Configuration
‘Configuration’ tab has several sub-tabs. This tab lets you select the items to be accessed by users with this active profile.
For some of them, you will be able to add elements to the profile. Example: users, activities, queues, campaigns, custom buttons, transfer rules.
For others, you will determine whether or not access is granted. Example: knowledge base, directories, document center. By default, full access is always disabled.

- USERS: add all the users who will be able to use this profile. Define this profile as the ‘active profile’ for an user, so that it is the default profile at login for the user. Note: if you want to link multiple profiles to a single user, we recommend that you do this via the Users sub-module.
- ACTIVITIES: add all the activities that can be used by the user when this profile is active, and choose the default activity at login.
- QUEUES: associate queues with a profile. For each queue, activate or deactivate voice, email, messaging, supervision and flow. Choose scores for each channel (voice, email, messaging) that will make it possible to prioritise one profile over another in a queue, in particular when several advisors with different profiles can process an interaction coming from the same queue.
Note: this score can range from 0 to 100.
You can also set distribution scores for each user in the profile. - TRANSFER RULES: add the transfer rules you want users with this profile to be able to use.
- VOICE CAMPAIGNS: add all the voice campaigns you want. The status column is used to indicate whether the campaign is active or not.
The mode column offers a choice between ‘progressive’ mode (the platform launches the call as soon as an agent is available) or ‘power dialer’ mode (the customer waits until an agent is available).
The campaign manager column gives access to the ‘my voice campaign’ module in the Banner, which allows you to manage the target, among other things.
The call blending column allows agents who have not subscribed to the campaign to come in as back-up depending on traffic (if subscribed agents are not available).
The supervision column is used to manage campaigns in the Banner supervision module. - SMS CAMPAIGNS: add all the SMS campaigns you want.
- CUSTOMIZED BUTTONS: add the custom buttons you want.
- DIRECTORY: give or deny access to directories, and add the directories you want.
- KNOWLEDGE BASE: give or deny access to knowledge base, and add the knowledges bases you want.
- DOCUMENT CENTER: give or deny access to document center, and add the documents center you want.
- SMS NUMBERS: add the SMS senders you need.
- SMS TEMPLATES: add SMS templates you want this profile can use for direct SMS. Note: for smart SMS, the SMS templates linked to the queue will be taken into account.
- VOICE MAILBOX: add voice mailbox this profile can use to redirect customers in case of unavailability.
- CATEGORIES: add task categories.
- PLATFORMS: add all the platforms you wish to access in the supervision (in Banner) with this profile.
- PAYMENT MODULE: add or delete the payment modules accessible by users with this active profile.
- EVALUATION GRID: add or remove evaluation grids.
- CRMS: choose whether or not users will be able to access CRMs.
If yes, add CRMs. For each CRM, choose whether the user with this active profile can create, modify or delete CRMs. For a CRM outside INO, choose if you want to set up an SSO (to connect to the CRM and INO at the same time using the same login). - SURVEYS: add surveys you want your advisors with this active profile to access.