
[Reading time: 4 minutes]
Overview
Scheduled reports are created from an exploration.
They are used to automatically generate, at a set frequency, a document linked to an exploration, with all the associated statistics.
The report is distributed by email and/or stored on a dedicated ‘history’ tab or a repository connector.
Its content is based on dynamic data.
There are many benefits:
- time savings (no need to generate the report manually)
- improved performance monitoring
- automated information sharing
Up to 30 scheduled reports can be created per exploration.
I- Prerequisites
In the Role, you must have access to the explorations.
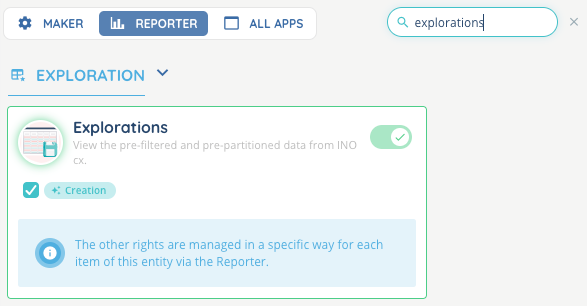
Note: the rights will be the same as for the exploration to which it relates (edit or read only depending on whether the user is the owner or guest of the exploration).
If you want to store your scheduled reports on your repository connector rather than on INO, you will need to have already set it up.
II – Manage your scheduled reports
It can be accessed either :
- by entering an exploration and going to the scheduled reports tab (you will find all the scheduled reports created for this exploration)
- directly in the ‘scheduled reports’ module, which contains all the scheduled reports for all the explorations.
To create a scheduled report, go to the Reporter, Exploration module, enter an exploration, scheduled reports tab.
1.List
The list of scheduled reports appears, if any have already been created.
- Status: Inactive / Active / Currently being configured. You can manually change the status.
- Name
- Different buttons :
- generate and send the export manually
- open
- view history
- edit
- delete
Note: some options, such as manual export, are only available if you are the owner.
If you consult the list of planned reports directly in the dedicated Reporter module, you will see additional columns:

- the exploration from which the scheduled report was created
- the associated rights (editing or read only)
2.Creation button
Click on the “CREATE” button, then choose a name.
3. Search a scheduled report
A search bar lets you search by name.
You can also sort each column alphabetically by clicking on the title.
4.Manage your report
When you click on the arrow, you can manage your scheduled report via 2 tabs.
4.1. Settings
-
general
The name is for internal use only.
The file name is the name of the generated document. You can use text or INO cx variables.
The email address corresponds to the recipient email that will be used to receive the scheduled report. You can add up to 15 email addresses.
Choose how often you want to send the report (hourly, daily, weekly, monthly, on a specific date).
You can choose to store your files on INO cx or on your repository connector.
-
Columns
By default, all the columns linked to the exploration are selected. You can delete certain columns by clicking on the bin, or rename or reorganise them directly using drag and drop.
-
Data
Choose the date on which the data selection is based.
Then, using the slider, choose the start date (start of the month, start of the week, start of the day, start of the hour) and the end date. Using this slider, you can add or remove months, days, hours and minutes by indicating -1 or +1 or any other number of your choice in the boxes.
A live tooltip, at the bottom, shows you the next generation date of the scheduled report and the date range selected.
In the example below, the report will be generated :
- starting 2 days before the current date + 3 hours (= 1 day and 21 hours ago)
- ending exactly 1 day before the current date and time.

-
filters
You can filter the data displayed in the generated files.
Note: 1 filter per column maximum.
4.2. History
This tab contains all the scheduled reports that have been generated, as well as reports that have been generated manually.
This list is made up of several columns:
- Name: the name of the file you have defined
- Date: the date on which the report was generated
- Number of rows: the number of rows that make up this report
- Status: available / error / generation in progress
- Repository connector (optional)
- A button for downloading the report.
5. Webhook
Webhook events are available for scheduled reports:
- Scheduled report sent successfully
- Error when sending the scheduled report
See the Webhooks article for more information about webhooks.