

[Reading time: 3 minutes]
Overview
The “Supervision” module is a unique feature within the Banner, designed to empower managers to monitor and manage their teams in real-time.
This module provides a comprehensive overview of your connected agents’ activities, including:
- Queues
- Connected agents
- Platforms
- Pool of pending interactions
- Campaigns
Supervision also lets managers listen to advisors’ live calls in real time (silent monitoring) and, if allowed, whisper advice to them. See Silent monitoring – Use it.
With the supervision module, managers can open up to five tabs simultaneously, offering flexibility and detailed oversight. The module can also be opened in a new browser tab using a dedicated button, enabling a full-screen view for enhanced monitoring.

Note: the supervision module is not accessible directly from the Maker or the Reporter. Instead, you must access it via the Banner, using either the user capsule or the Supervision module itself.
1. Enable access in profile settings
To grant access to the supervision module, start by enable access to the module. To do this, go to the Maker, Users module, Profile submodule, Settings tab.

Note: if your current profile is modified while you’re connected, you will have to use “online refresher” button to apply the changes.

Still in the user profile, the Discrete listening section controls silent monitoring. It requires Access supervision (above) to be enabled, and listening only works for users who are Managers (see Advisors).
Who can listen?
- Listen to employees discreetly: listen to individual advisors.
- Silent monitoring to queue calls: listen to a queue’s calls (only queues whose Supervision option is set to Yes – see Queues).
- Silent monitoring to voice campaign calls: listen to a voice campaign’s calls (only campaigns whose Supervision option is set to Yes – see Campaigns).
- Whisper during silent monitoring: allow whispering advice to the advisor during a monitored call. Requires at least one of the listening rights above.
How your advisors are informed when they are listened to?
- Automatically accept silent monitoring: the advisor accepts the listening automatically (available for webRTC).
- Time before automatic acceptance: the delay during which a sound and/or visual notification is presented to the advisor before acceptance. Set to 0, no notification is played and listening starts silently. Available only when Automatically accept silent monitoring is enabled.
To learn how managers then use these rights, see Silent monitoring – Use it.
2. Enable access in client account settings
In client account settings, please make sure that ‘Real-time supervision module’ is set to ‘Enable’.

3. Grant access in the maker
Specific permissions must be assigned in the maker for the following five areas:
3.1. Queues
- Navigate to: Maker > Profiles > Configuration > Queues
- Enable supervision for the desired queues.

3.2. Advisors
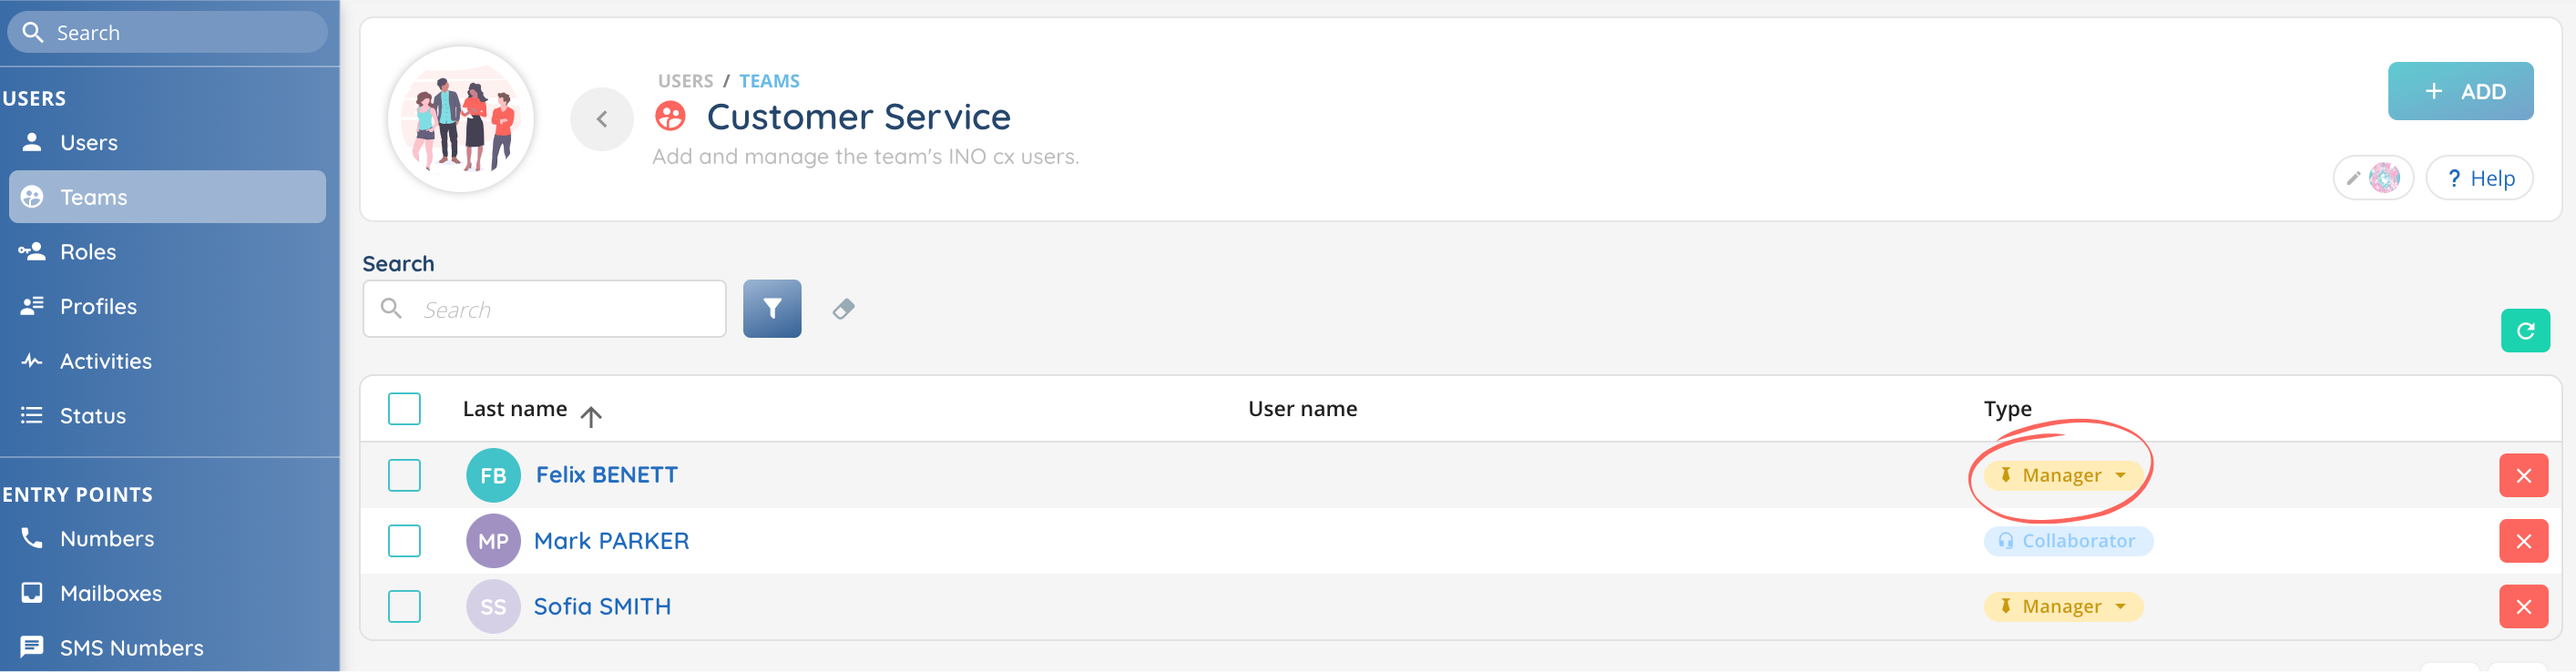
- Users must have a “Manager” user type to view advisors. Being a Manager is also what allows a user to perform discreet listening.
- Navigate to: Maker > Users > Card > Account > Type > Manager
Notes: the “Manager” user type can only be modified by an administrator.

Managers must be associated with one or more teams. Assign managers to teams via: Maker > Teams > Type > Manager.
3.3. Platforms
- Add platforms to the user’s profile.
- Navigate to: Maker > Users > Profiles > Configuration > Platforms
- Multiple platforms can be added as needed.

3.4. Interactions
- Interactions are tied to the queues configured in the profile. Managers will see interactions related to the queues they have access to.
3.5. Campaigns
- Add campaigns to the user’s profile. Enable supervision for the desired campaigns.
- Navigate to: Maker > Users > Profiles > Configuration > Campaigns (Voice or SMS)

Note: to access the campaigns tab in Supervision, access to campaigns must be granted in Maker > Profiles > Settings > Voice campaigns > Access voice campaigns “Yes”.

By following these steps, you’ll ensure that your supervision module is set up and tailored to provide real-time insights into your team’s performance. This setup is crucial for effective management and decision-making within the Banner.
Now you can use supervision in the Banner!