[Reading time: 3 minutes]
Overview
The Zendesk Support API connector allows you to integrate Zendesk Support with INO cx.
The setup involves configuration steps on both Zendesk and INO cx.
Prerequisites
- A Zendesk Support account.
- An INO cx account with the proper rights in the Maker.
- At least one Zendesk user whose username matches the one used in INO cx.
I- Zendesk configuration
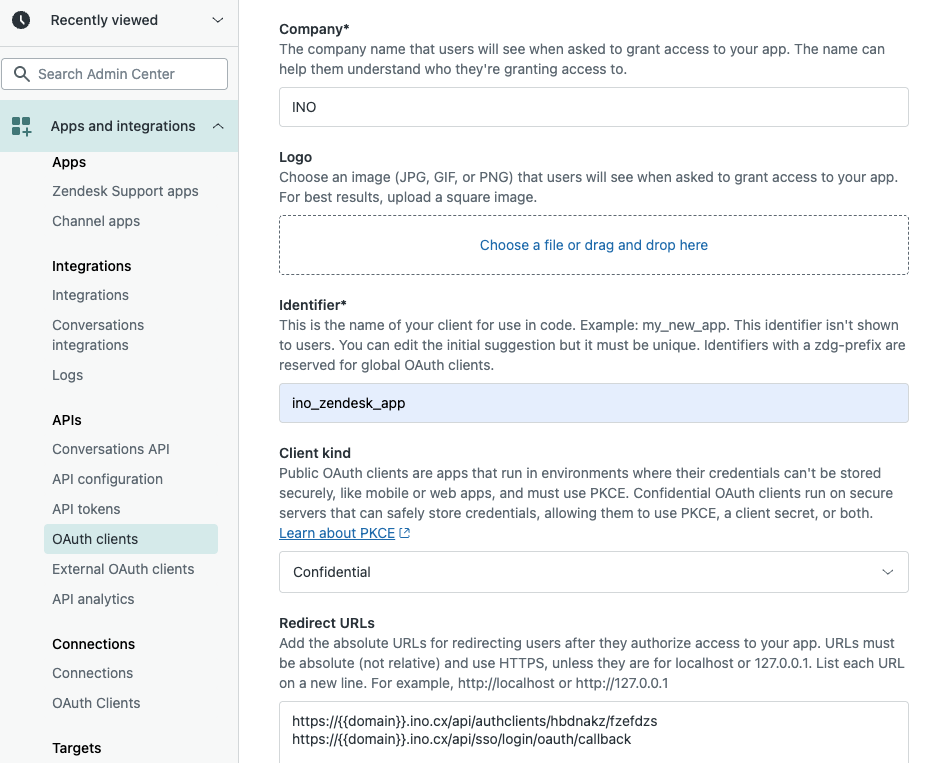
1) OAuth Client
- Go to Admin Center > Apps and integrations > APIs > OAuth clients.
- Create a new OAuth client and fill in the required fields:
- Identifier: will be used as clientID
- Client type: Confidential
- Add the redirect URLs:
https://{{domain}}.ino.cx/api/authclients/hbdnakz/fzefdzshttps://{{domain}}.ino.cx/api/sso/login/oauth/callback - Save – the client secret key is generated and must be stored securely (it will not be visible again).
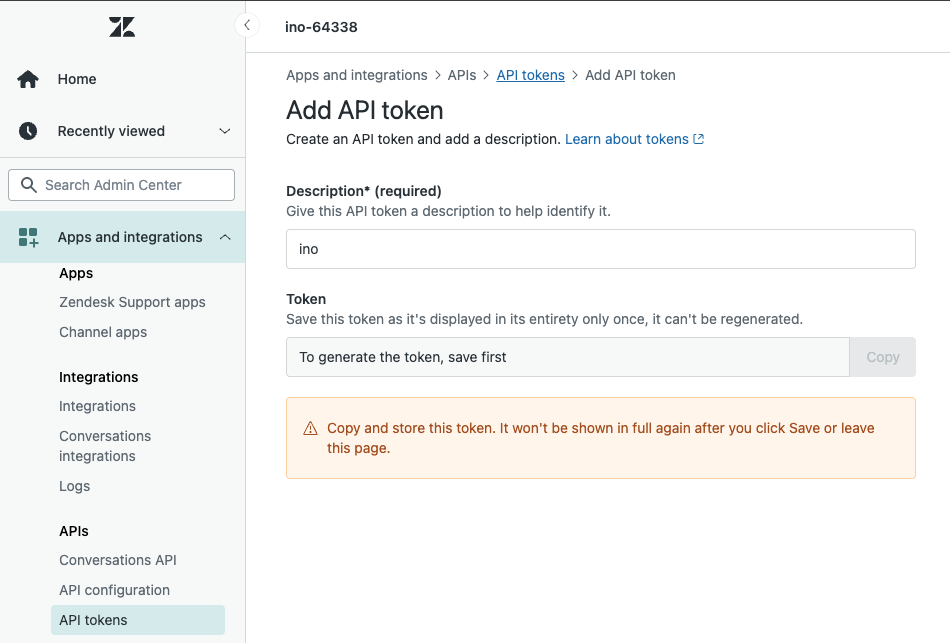
2) API Token
Create an API token to make web service calls on INO cx to the Zendesk API.
- Create a new API Token under Admin Center > Apps and integrations > API > Tokens.
- Save the API token securely (it will not be visible again).
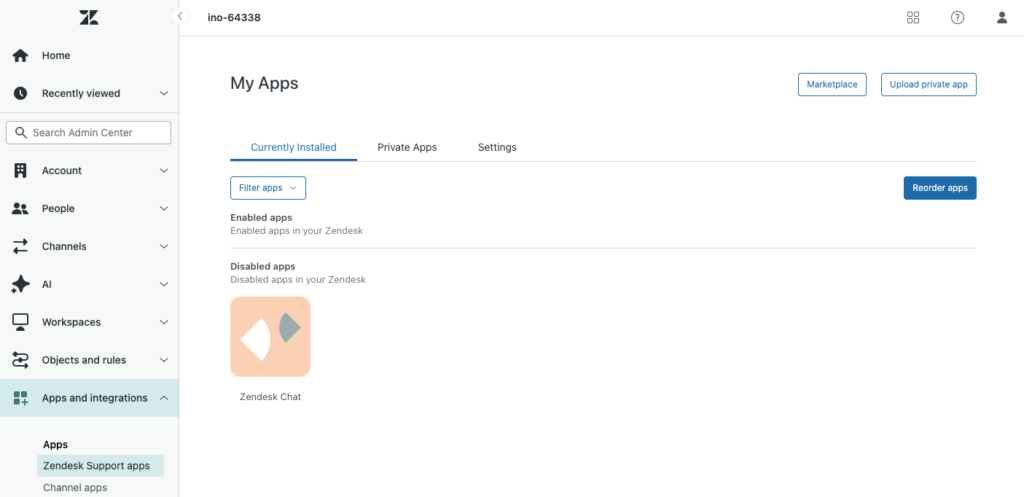
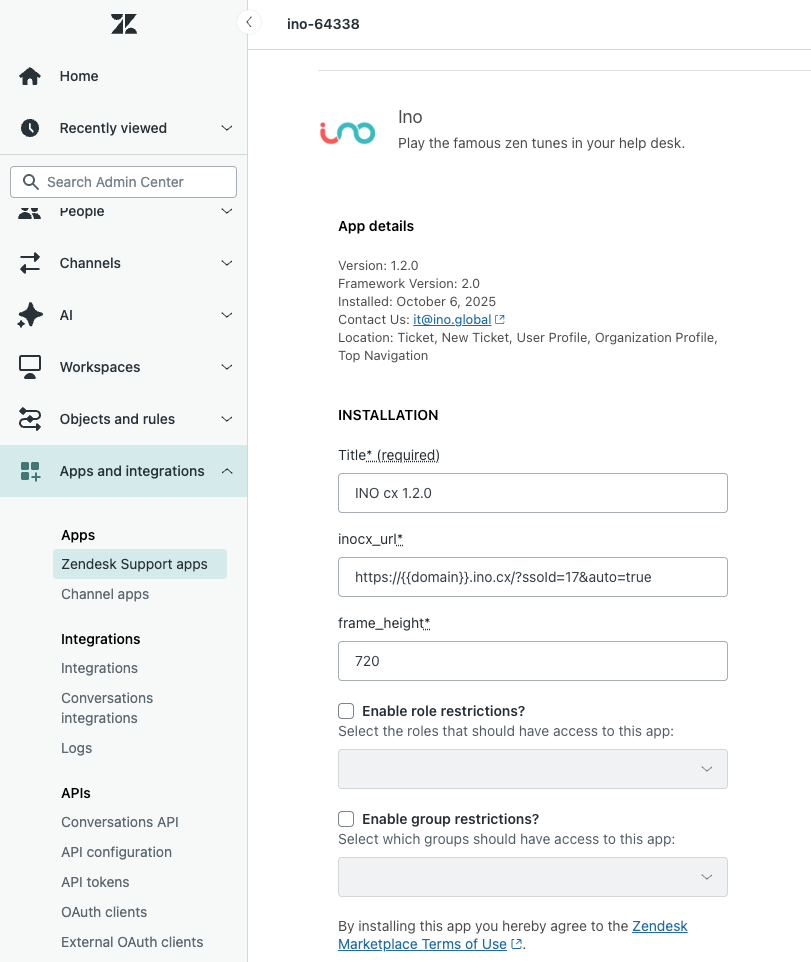
3) INO CX App
- Go to Apps and integrations > Apps > Zendesk Support Apps.
- Click ‘Upload private app’ to upload the INO cx app for Zendesk. The INO cx team will provide you with the package archive.
- Configure it with the SSO login URL previously obtained from INO cx. (see below)
- Add the parameter
&auto=trueif you want automatic login when opening the INO cx app.
- Add the parameter
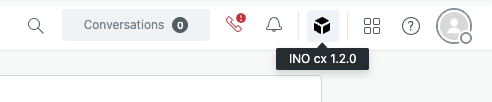
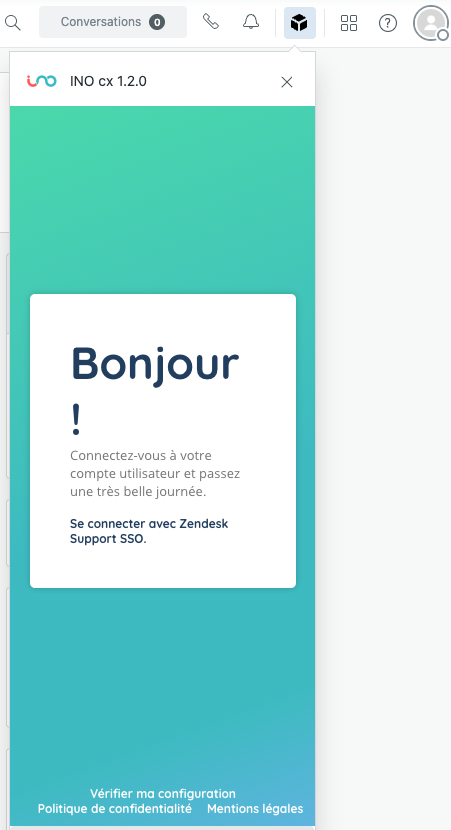
- Open Zendesk Support and launch INO cx from the top bar but will be loaded automatically on the following pages:
- ticket
- new ticket
- user profile
- organization profile.
4) Webhook for Status Sync
Make sure you have enabled omni-channel routing in Zendesk.
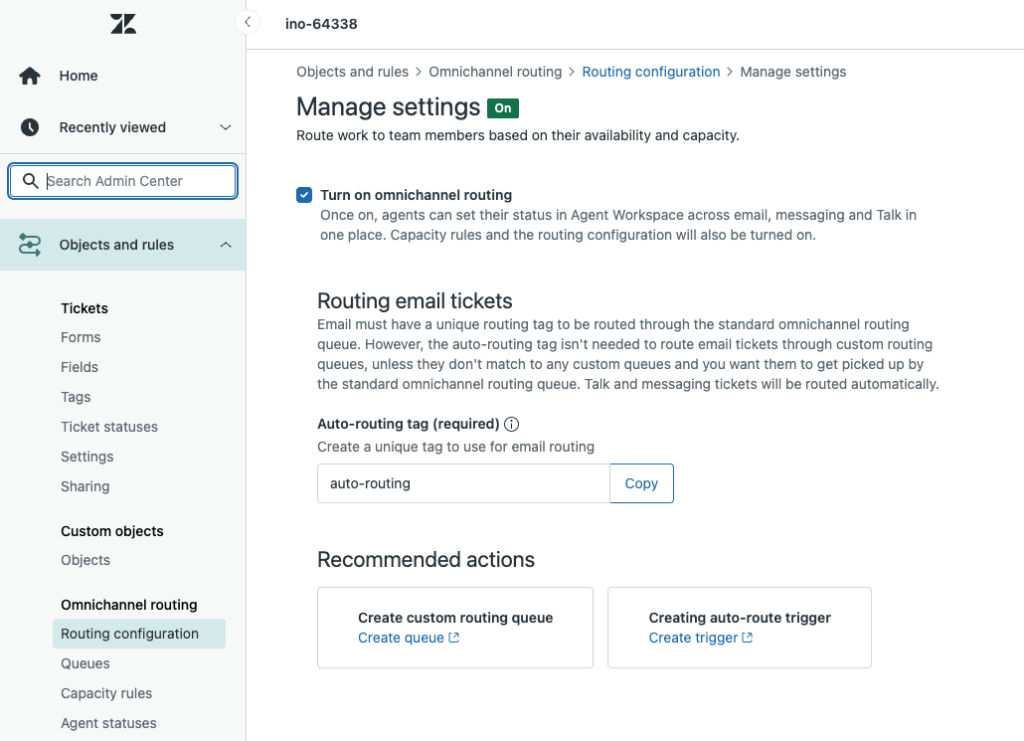
In Zendesk, create a new webhook:
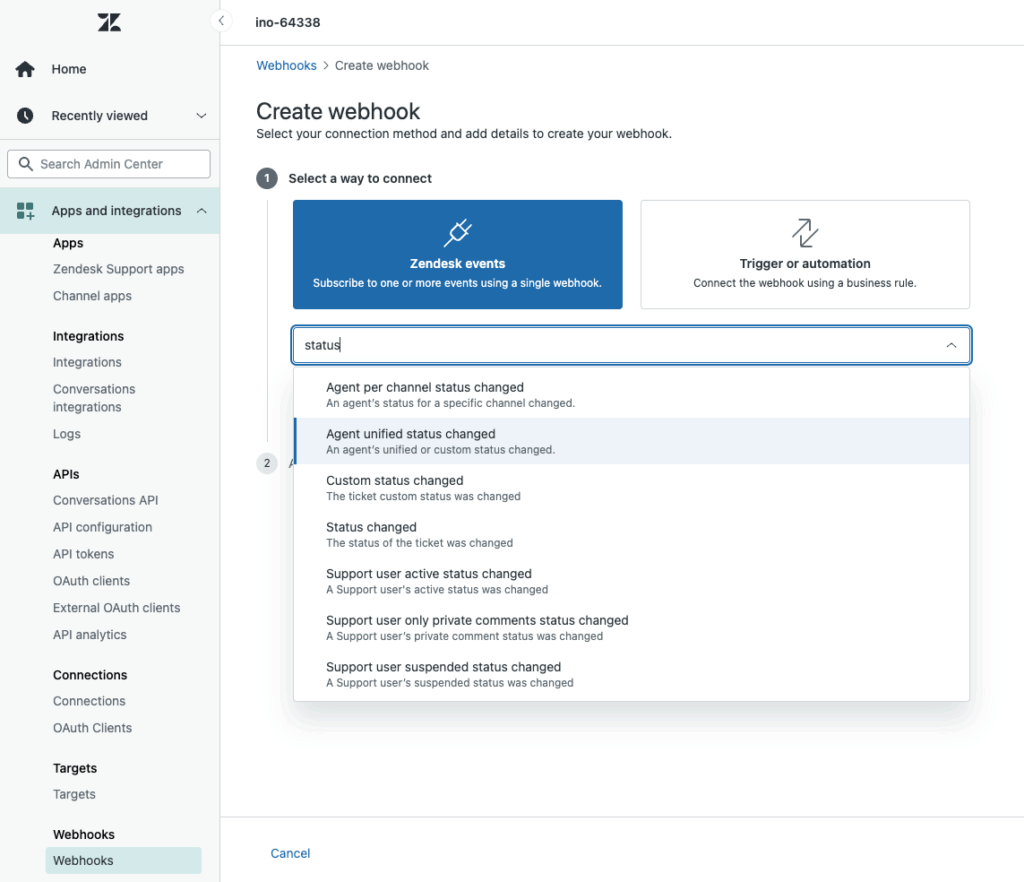
- Event: Agent availability event > Unified agent status changed
- Endpoint URL:
https://{{domain}}.ino.cx/api/statussyncs/notifications/updated - Authentication: API Key
- Header name:
inocx-webhook-token - Header value: token copied from INO cx status sync entity. (see below)
II- INO cx configuration
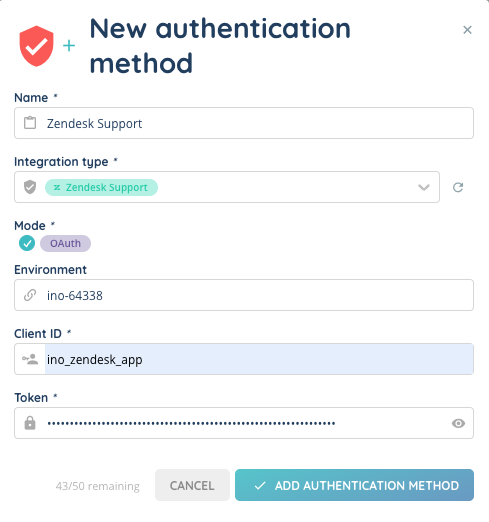
1) Authentication Method
- In INO cx, create a new Authentication Method of type Zendesk Support.
- Enter the Zendesk subdomain as the environment.
- Enable the OAuth client.
- A pop-up window will open to validate the connection.

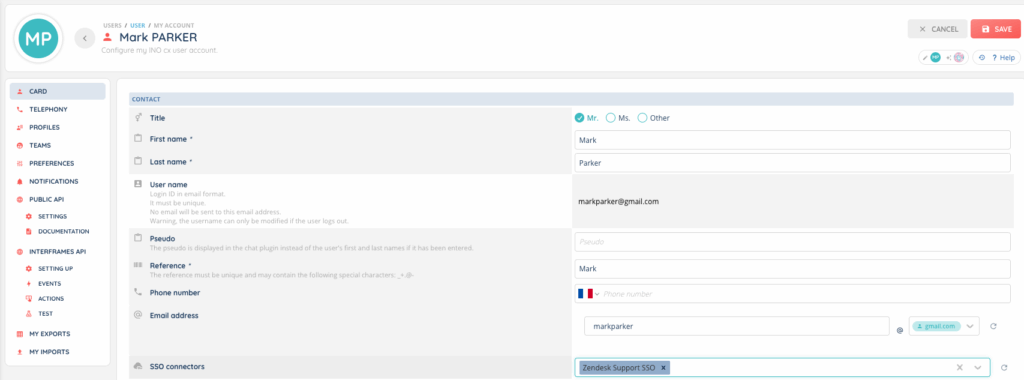
2) SSO Connector
- Create an SSO connector using the Zendesk Support authentication method.
- Associate the connector with your user(s).
- Copy the custom login URL to configure the Zendesk app (step above).
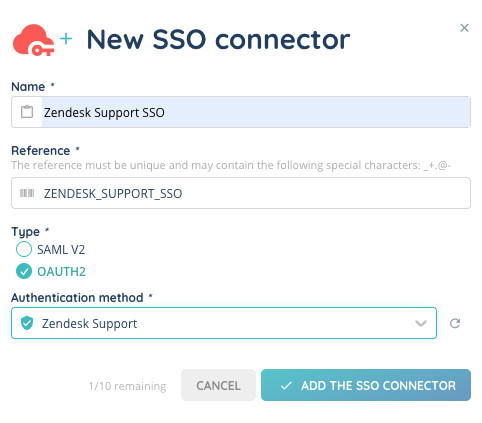
4. Associate the SSO connector with your user to enable you to log in to INO CX directly from your Zendesk Support login.
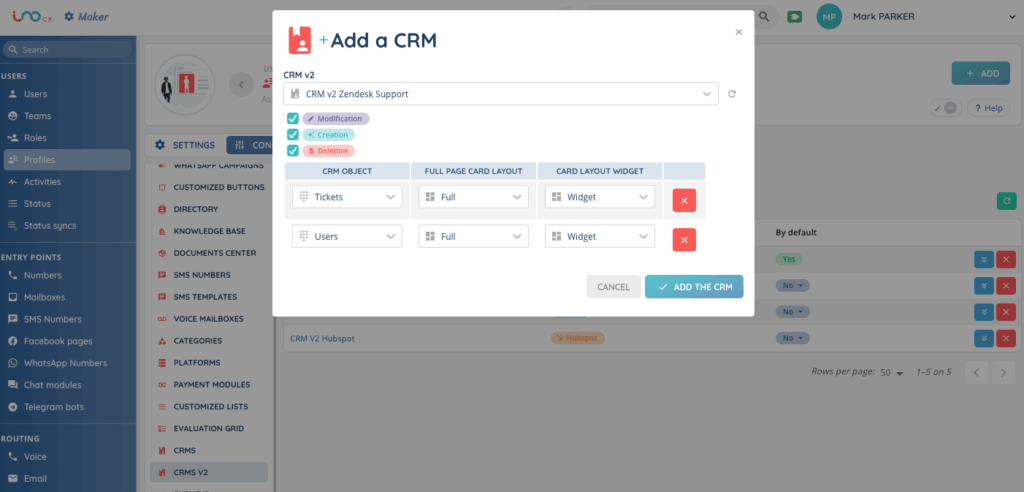
3) CRM v2
- Create a new CRM v2 of type Zendesk Support using the authentication method created earlier.
- Add the Zendesk objects you want to use (Users, Tickets).
You can use API Zendesk Support documentation.
Recommended fields:
- Users
- name (Short text)
- phone (Phone)
- email (Email)
- Tickets
- id ( Short text)
- subject (Short text)
- status (Short text)
👉 Note: Screen pop scenarios can be configured on Users (example: search by phone number).
Interaction assignment is generally handled through web services, as in CRM v1.
If you need more information about CRMs v2, see this article: CRMs v2 – Set them up
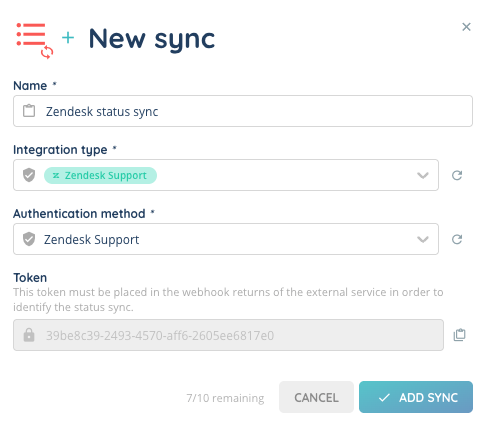
4) Status Synchronization
If you need help with status sync, please read this article: Status syncs – Set them up
- In INO cx, create a new entry under Status Synchronization of type Zendesk Support with the previously defined authentication method.
- Copy the generated token to put in Zendesk (see above).
- Map INO cx activities with Zendesk statuses.
- Associate the status sync with a profile.
- Refresh or log out/in for changes to take effect.
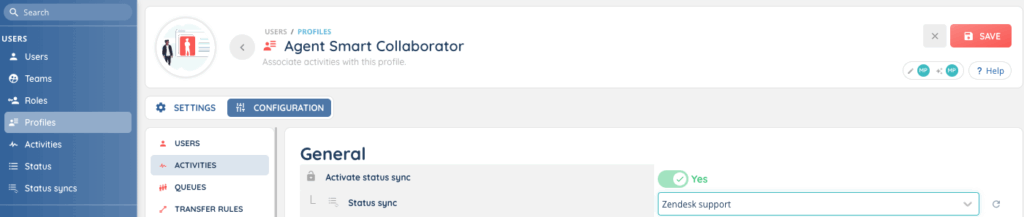
5) Profile Association
- To make Zendesk Support CRM available in the Banner, associate the CRM v2 with the relevant user profiles.