
[Reading time: 9 minutes]
Overview
Voice is a real-time channel: customer and agent are connected at the same moment and the conversation must be handled live. Most voice calls are presented to the agent through an incoming call popup as soon as they are dispatched, so the agent answers (or declines) immediately.

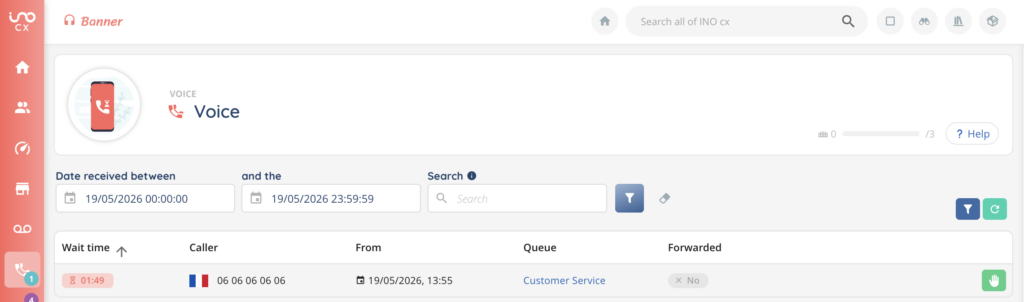
The Banner also has a dedicated Voice module that lists the calls visible to the agent (Calls in pool): calls being presented, calls the agent is currently handling, and calls waiting in queues the agent supervises. From that list a call can be picked up manually with the Take this call action — though in day-to-day work, calls are most often answered directly from the popup.
This article covers how the agent handles voice calls from the Banner, both incoming and outgoing, in Smart and Direct modes. Outbound calls launched through a campaign (power dialer, progressive, preview) follow a different flow and are covered in dedicated articles.
1. How a call arrives in the Banner
1.1. Smart routing
This is the most common mode. When a customer dials one of your inbound numbers:
- The Smart Routing of the voice flow handles the call first (welcome message, IVR menu, DTMF or speech recognition, business rules, etc.).
- The call is qualified and dispatched to a distribution queue (or a distribution group) that matches the request.
- The ACD assigns the call to an available agent of that queue and the agent receives an incoming call popup in the Banner.
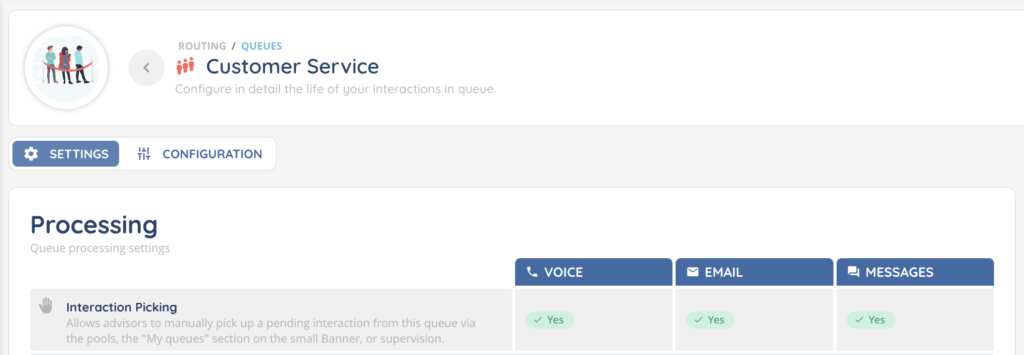
Note: Calls can also be accessed from the small Banner. This right can be enabled/disabled in the queue.
1.2. Direct routing
A call can also arrive directly to a specific agent — for example because the caller dialled the agent’s extension or because an internal call is being placed. The popup is displayed without going through a queue, and only that agent is solicited.
2. The incoming call popup
2.1. Popup content
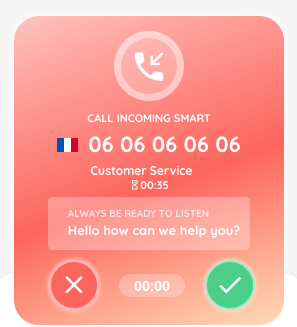
The popup displays the most useful information to qualify the call before answering:
| Field | Description |
|---|---|
| Caller | Caller phone number (and the contact name if it is known in the CRM). |
| Queue | Queue the call has been dispatched from (Smart routing only). |
| Wait time | Time the caller has spent in the queue before being assigned. |
| Transfer | If the call is the result of a transfer: the agent who is transferring it and the type of transfer. |
The path followed in the Smart Routing and any variables collected during the IVR (DTMF entries, speech recognition results, etc.) are not displayed on the popup itself, but are accessible from the Datas tab of the active call panel once the call has been accepted.
2.2. Popup color
The popup color helps the agent identify the type of call at a glance:
| Color | Type of call |
|---|---|
| Raspberry red | Smart routing or campaign call |
| Ocean blue | Direct call from an external contact |
| Sky blue | Direct call from an internal user (colleague) |
| Lilac | Preview call (the agent reviews the call before launching it) |
2.3. Accept or decline
Two buttons are available on the popup:
- Accept (check icon): the agent takes the call. The active call panel opens in the central area of the Banner.
- Decline (cross icon): the agent refuses the call, which goes back to the distribution queue and is offered to another available agent.
A countdown shows the remaining time before automatic redistribution if the agent does nothing.
2.4. Auto-accept
If the agent profile is configured with auto-answer, the call is accepted automatically when the popup is displayed. The agent does not need to click — the conversation starts directly. This is typically used in headset-only environments.
3. The active call interface
Once the call is accepted, the central panel of the Banner displays the active call interface, with the caller’s information at the top and a set of controls to manage the call.

3.1. Call timer
A timer at the top of the panel shows the elapsed duration of the call.
3.2. Mute / unmute the microphone
The Mute my mic button silences the agent’s microphone — the agent still hears the caller, but the caller no longer hears the agent. While muted, the button turns red and changes to Reactivate my mic to restore the microphone.
3.3. Hold / unhold the call
The Place on hold button puts the caller on hold; an on-hold music or message can be played to the caller (depending on the configuration). The button changes to Exit the hold to resume the conversation.
3.4. Send DTMF tones
The Phone keypad opens a numeric pad (0–9, *, #) inside the call interface. Each key press sends the corresponding DTMF tone on the call — useful for navigating an external IVR or providing codes during the call.
3.5. Call recording
If recording is allowed on the agent’s profile and the queue, the agent can manually start and stop the recording with Start the recording / Stop the recording. While recording is active, the button blinks to make it visible.
Some queues are configured to record automatically — in that case, the recording starts on its own when the call begins.
3.6. Hang up
The Hang up button ends the call. The agent then enters the post-call phase (see section 7).
4. Transfer a call
An active voice call can be transferred to four kinds of destinations. In each case, the agent picks the destination from a list (or enters a phone number for an external transfer) and chooses whether the transfer is blind or attended.
4.1. Destinations
| Destination | Description |
|---|---|
| User | Transfer to another agent of the company. |
| Queue | Transfer to a distribution queue, the call goes back through the ACD. |
| Smart Routing | Transfer to a Smart Routing, the call is re-qualified by the routing tree. |
| Directory | Transfer to a contact stored in the directory of the platform. |
| Number | Transfer to an external phone number entered manually. |
4.2. Blind or attended transfer
- Transfer and hang up (blind): the agent transfers the call and disconnects immediately. The recipient has no context other than what is provided by the system (caller info, queue, etc.).
- Start the attended transfer: the agent stays on the line, talks to the recipient first to introduce the caller and the request, then completes the transfer (or cancels and resumes the call).
An ongoing transfer can be cancelled before it is completed; the system shows a status banner with the transfer state and the reason in case of failure.
5. Merge two calls (3-way)
If the agent is on two voice calls at the same time (one active, one on hold), the Merge action joins them into a single 3-way conversation. This is the way to set up a small conference between the agent, the customer and a third party.
If the agent has only one voice interaction in progress, the merge action is not available.
6. Make an outbound call
6.1. Direct outbound call
The agent can initiate a call from the Banner using the New call action:
- Click New call.
- Choose between Make a call to a number (external phone number) and Make a call to an extension (internal user).
- Enter the destination and click to launch the call.
The agent’s outbound caller ID is set according to the queue or profile configuration.
6.2. Smart outbound call
If the agent profile has the right to send Smart outgoing voice interactions, an additional option is offered when starting a new call: launch the call through a Smart Routing. The call then goes through the configured routing tree (for example to apply business rules, opening hours, or to record additional metadata) before being placed.
6.3. Call back from a CRM card
From a CRM contact card or an interaction history entry, the agent can use the Call back action. The phone number is pre-filled from the contact and the call is launched as an outbound call.
Note: outbound calls launched through voice campaigns (power dialer, progressive, preview) follow a different flow and are not covered here. See the Voice campaigns articles of the help center.
7. Post-call processing
When the call ends (either side hangs up), the agent enters the Post-interaction status. During this phase, the agent finalises the interaction without taking new calls.
Available actions during post-call:
- Qualification: fill in the qualification form configured on the queue (categories, reasons, comments, etc.).
- Tags: label the interaction.
- CRM and cases: associate the call to a contact card, create or update a case, etc.
- Extend the post-interaction time: if the configured duration is too short, the agent can extend it. The remaining and total times are displayed.
- End the post-interaction: ends the post-call phase early and makes the agent available again.
8. Missed calls and voice mailbox
If the agent does not answer in time (popup countdown reaches 0) or declines the call, the call goes back to the distribution queue and is offered to another agent. When the popup expires without the agent reacting, a Missed call notification is shown to the agent.
If no agent picks up the call within the queue’s waiting limits, the call can be redirected to a voice mailbox (when the Smart Routing is configured to do so). The customer leaves a message, which is then made available — with optional transcription and email notification — to the configured recipients.
9. Notifications
Voice notifications are configured in Maker > User > Notifications. The most common ones for voice are:
| Notification | Triggered when |
|---|---|
| Incoming call ringtone | A voice call popup is presented to the agent. |
| Missed call | The agent did not answer or declined an incoming call. |
| Transfer requested | A transfer (blind or attended) is initiated by another agent. |
| Call ended | The voice call has just ended. |
Each notification can be enabled, disabled, set to sound only, desktop only, or both, per agent.