
[Reading time: 5 minutes]
Overview
Trigger strategies define the conditions under which a chat plugin is displayed to visitors on your website. Each strategy contains one or more triggers that evaluate visitor behavior or visit context.
A strategy can operate using two logic modes:
- All conditions met (AND): the chat is triggered only when all triggers in the strategy are satisfied simultaneously.
- At least one condition met (OR): the chat is triggered as soon as at least one trigger is satisfied.
Once created, the strategy is associated with a chat module to determine whether the chat icon should appear, the full chat window should open, or both.
Prerequisites
- Access to the Maker
- The Trigger strategy permission enabled in your user profile (read, create, edit, and/or delete depending on the actions you need to perform)
- At least one chat module configured to associate the strategy with
- If using a Schedule trigger, a calendar must have been previously created
1. Accessing trigger strategies
To manage trigger strategies:
- Open the Maker
- In the side menu, click Routing
- Select Trigger strategies
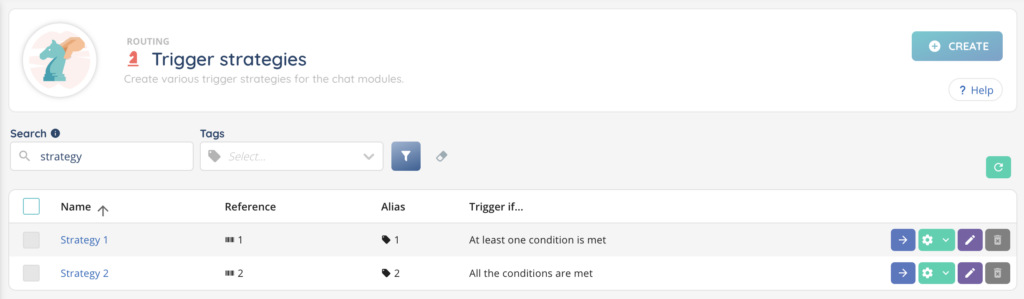
The page displays all existing strategies in a table with the following columns:
- Name – the name of the trigger strategy
- Reference – the unique code identifying the strategy
- Alias – the alias of the strategy
- Trigger if… – the evaluation logic (All conditions met or At least one condition met)
- Actions – buttons at the end of each row:
- Arrow – open the strategy
- Cogged wheel – duplicate the strategy, view history, see dependencies, manage tags
Two search bars are available at the top of the list:
- A name/reference search bar to find strategies by name or reference code
- A tag search bar to filter strategies by tag
2. Creating a trigger strategy
To create a new trigger strategy:
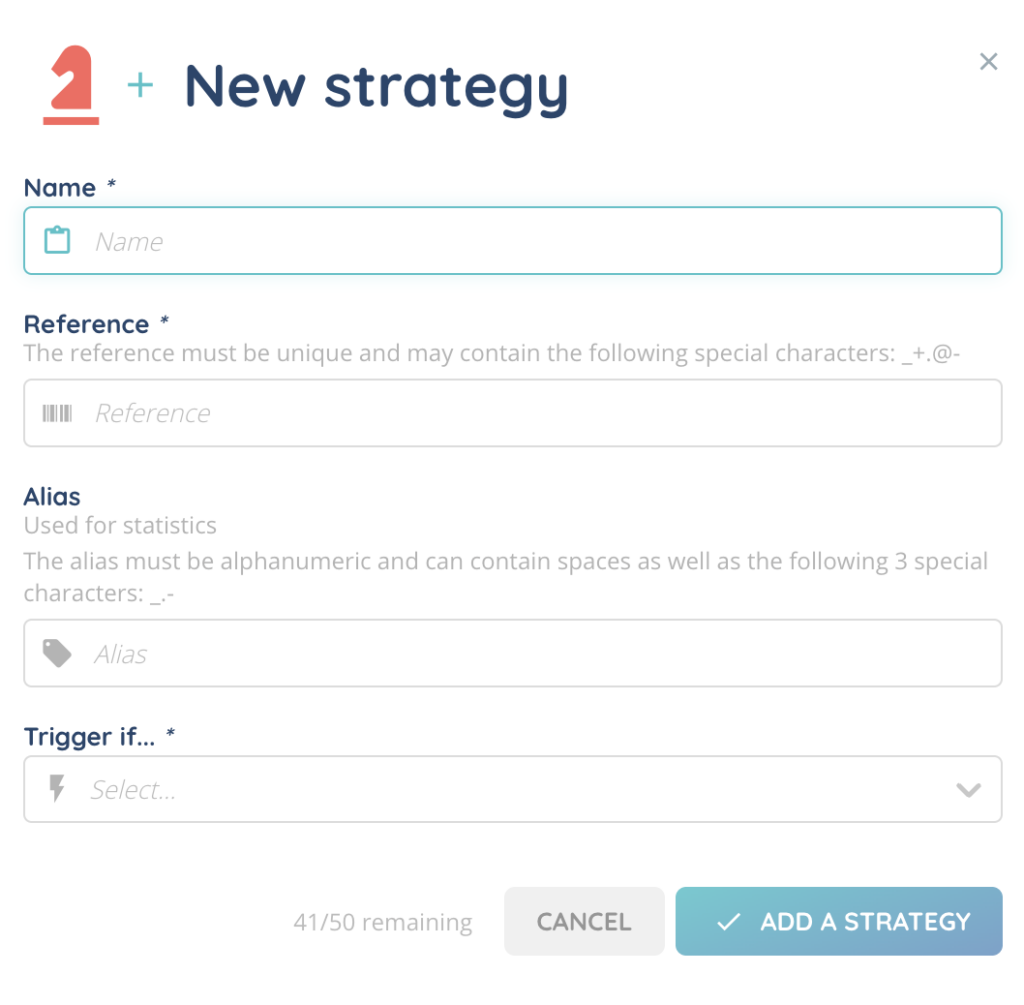
- From the trigger strategies list, click Create
- Fill in the required information
- Click Add a strategy
| Field | Description |
|---|---|
| Name | Name of the trigger strategy. |
| Reference | Unique code to identify the strategy (max. 45 characters). |
| Alias | Alias for the strategy. |
| Triggering if… | Trigger evaluation logic: All conditions met (AND) or At least one condition met (OR). |
3. Configuring triggers
After creating a strategy, open it to access its detail page. From there, you can add one or more trigger conditions.
- From the strategy detail page, click Create
- Select the trigger type, then configure its parameters
There are four available trigger types.
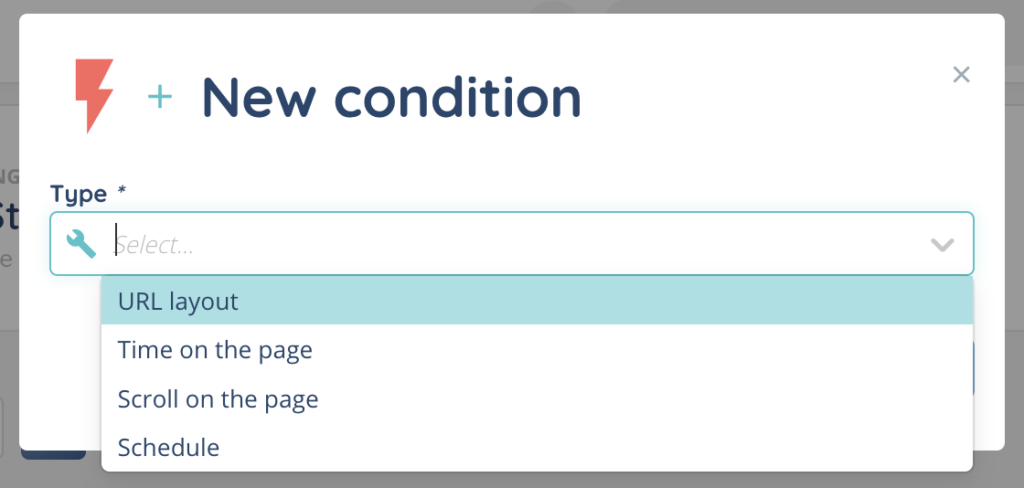
3.1. URL layout
Triggers the strategy when the visited page URL matches (or does not match) a defined pattern.
| Parameter | Options |
|---|---|
| Operator | Corresponds to · Different from |
| Value | Regular expression (regex) representing the target URL |
Example: to trigger the chat on all pages containing /contact, use the Corresponds to operator with the value .*\/contact.*.
3.2. Time on the page
Triggers the strategy when the visitor stays on the page for a defined duration.
| Parameter | Options |
|---|---|
| Operator | Greater than (>) · Greater than or equal to (≥) |
| Duration | Numeric value |
| Unit | Seconds · Minutes |
Example: to target visitors who stay more than 30 seconds on a page, use the Greater than operator with the value 30 in seconds.
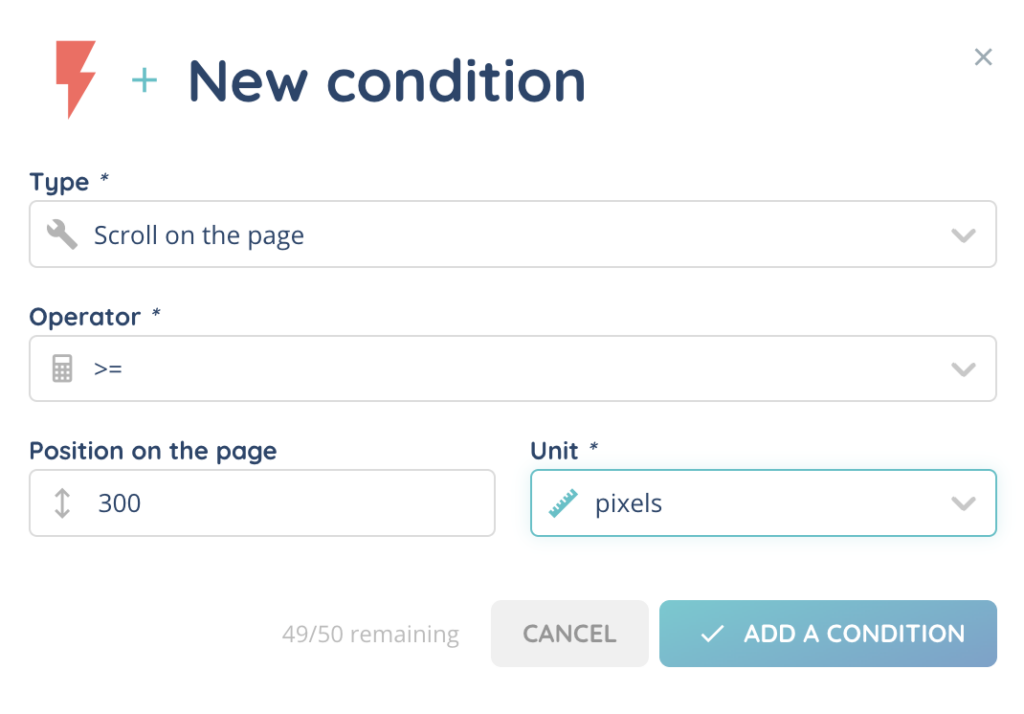
3.3. Scroll on the page
Triggers the strategy when the visitor scrolls to a given position on the page.
| Parameter | Options |
|---|---|
| Operator | Greater than (>) · Greater than or equal to (≥) · Lower than (<) · Lower than or equal to (≤) |
| Position | Numeric value |
| Unit | Pixels · % of the page |
Example: to display the chat when the visitor has scrolled at least 50% of the page, use the Greater than or equal to operator with the value 50 in % of the page.
3.4. Schedule
Triggers the strategy based on the opening periods of a calendar defined in the Maker.
| Parameter | Options |
|---|---|
| Operator | During opening times · Outside of opening times |
| Calendar | Select an existing calendar |
Example: to only display the chat during your support hours, use the During opening times operator and select your support calendar.
3.5. Managing trigger conditions
For each trigger condition added to a strategy, three action buttons are available:
- Cogged wheel – duplicate the condition or view its modification history
- Pencil – edit the condition
- Trash – delete the condition
4. Associating a strategy with a chat module
For a strategy to take effect, it must be associated with a chat module.
- In the side menu, go to Entry point > Chat modules
- Select the desired chat module
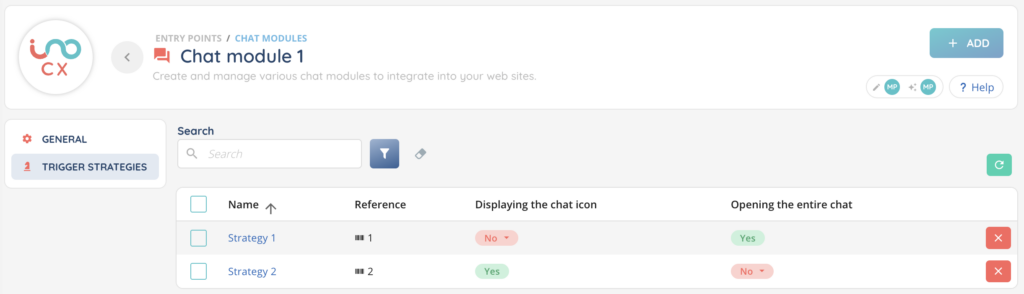
- Navigate to the Trigger strategies tab
- Click Add the trigger strategies and select the strategy or strategies to associate
For each associated strategy, you can configure the display behavior:
| Option | Description |
|---|---|
| Displaying the chat icon | When the strategy conditions are met, the chat icon appears on the visitor’s page. |
| Opening the entire chat | When the strategy conditions are met, the chat window opens automatically. |
Tip: you can combine multiple strategies on the same chat module with different display behaviors. For example, display the icon as soon as a visitor lands on the contact page, then open the full chat if the visitor stays for more than 60 seconds.
5. Managing trigger strategies
5.1. Edit
From the strategies list, click the arrow to open the strategy you want to edit. You can modify the name, reference, alias, or triggering logic, then click Save.
You can also edit individual triggers from the strategy detail page.
5.2. Duplicate
You can duplicate an existing strategy using the cogged wheel button. The copy will include all triggers configured in the original strategy.
5.3. Delete
From the strategies list, select the strategy or strategies to delete, then click Delete.