[Reading time: 4 minutes]
Overview
The Salesforce API connector allows you to integrate Salesforce CRM with INO cx.
The connector requires configuration both on the Salesforce side (package installation, connected app, custom fields) and on the INO cx side (authentication method, CRM v2 setup, scenarios, and profile association).
Prerequisites
- A valid Salesforce account with administrator access.
- Salesforce user(s) with matching username(s) with INO cx.
- An INO cx account with the correct rights in the Maker.
- The INO V4 package for Salesforce (v1.10).
I- Salesforce Configuration
1. Package Installation
- Log in to Salesforce with an administrator account.
- Install the INO V4 package for Salesforce v1.10: CLICK HERE
- (For sandbox: CLICK HERE)
- Follow the installation process.
2. Trusted URLs
Starting from package version 1.10, the package automatically registers the domain https://*.ino.cx as a Trusted URL in Salesforce. This is required to allow the INO CX iframe to load inside Salesforce.
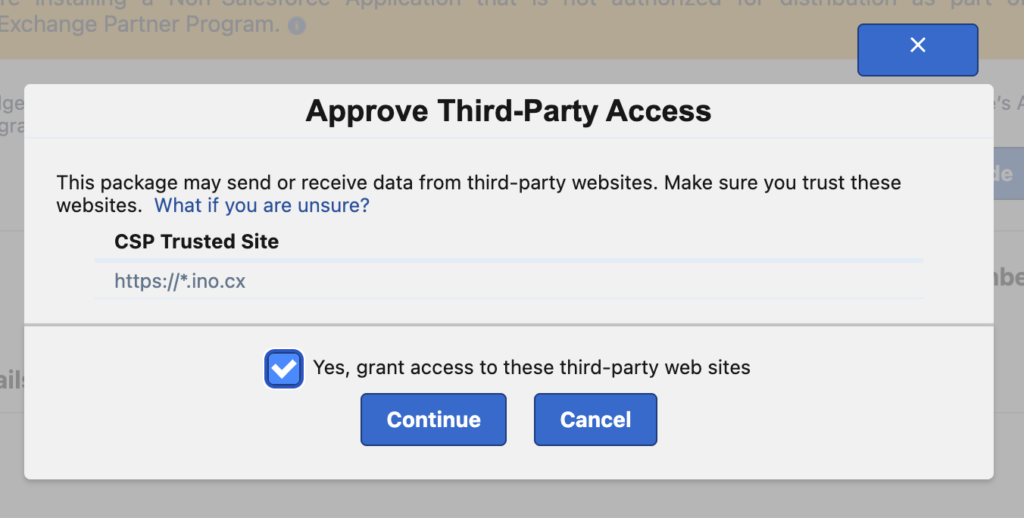
During the package installation, an Approve Third-Party Access dialog will appear. Make sure the checkbox “Yes, grant access to these third-party web sites” is checked, then click Continue.
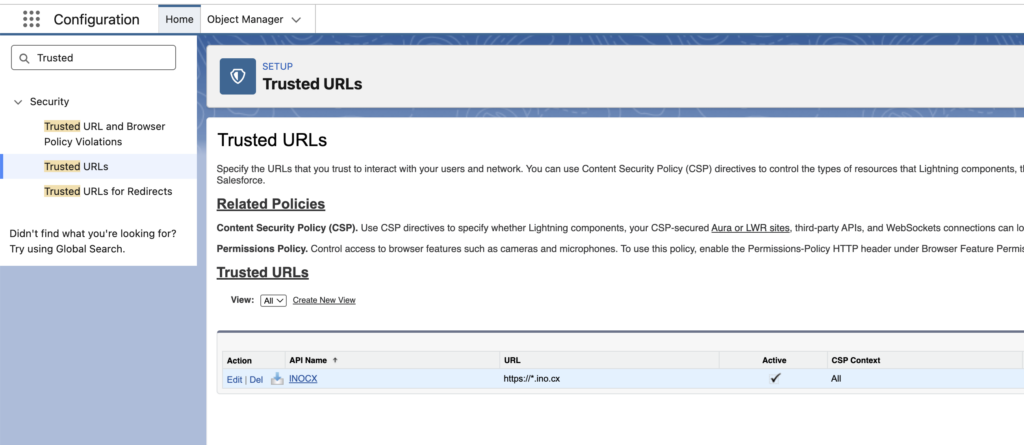
Once the installation is complete, you can verify the configuration by going to Setup > Security > Trusted URLs. You should see an entry named INOCX, with the URL https://*.ino.cx, marked as Active and with CSP Context set to All.
Note: Replace * with your domain name.
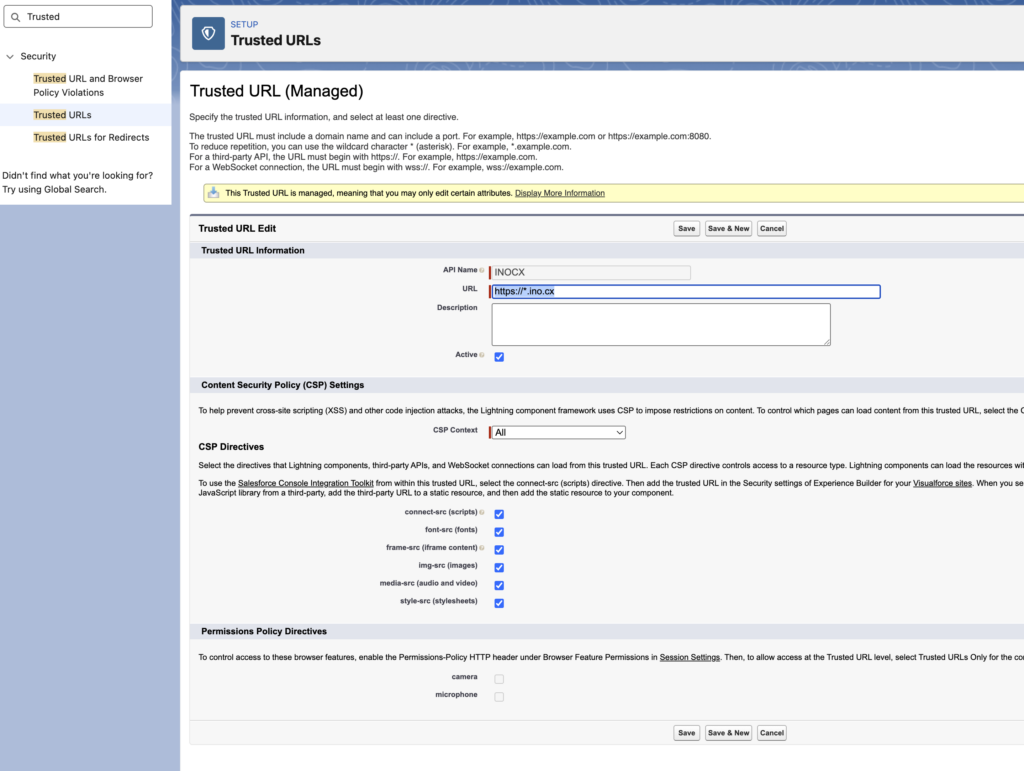
If you click Edit on this entry, you can see that all CSP directives are enabled (connect-src, font-src, frame-src, img-src, media-src, style-src). This is a managed Trusted URL, meaning only certain attributes can be modified.
3. External client app
Once the package is installed, you will need to create an application connected to Salesforce, meaning you will need to create credentials that will allow you to connect to the Salesforce API.
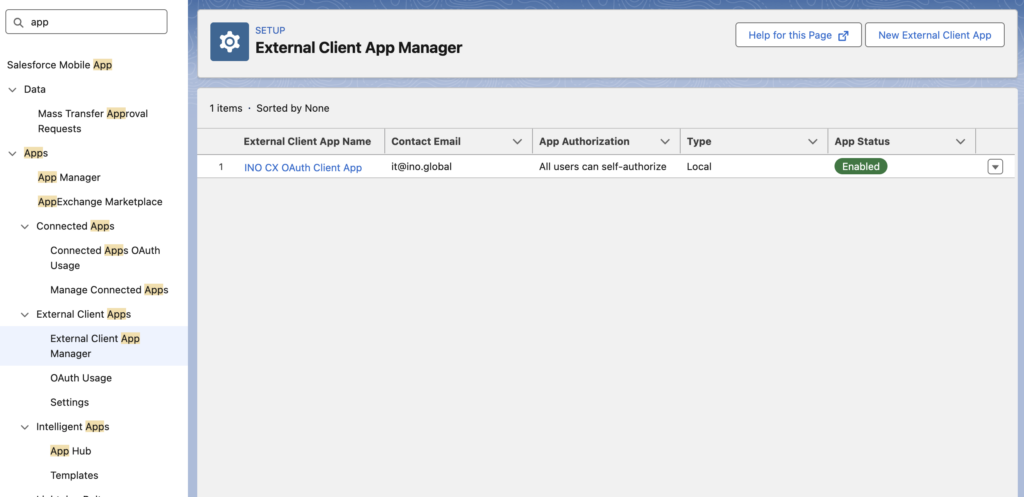
The app INO CX OAuth Client App should appear with the status Enabled and the authorization policy set to All users can self-authorize.
You can review the app settings by clicking on the app name. The configuration includes:
- Callback URLs:
https://{{domain}}.ino.cx/api/authclients/hbdnakz/fzefdzshttps://{{domain}}.ino.cx/api/sso/login/oauth/callback
Note: Replace {{domain}} with your domain name.
- Selected OAuth Scopes:
- Access the identity URL service (id, profile, email, address, phone)
- Manage user data via APIs (api)
- Perform requests at any time (refresh_token, offline_access)
- Access unique user identifiers (openid)
- Flow Enablement:
- ✅ Enable Client Credentials Flow
- ✅ Enable Authorization Code and Credentials Flow
- Security:
- ✅ Require secret for Web Server Flow
- ✅ Require secret for Refresh Token Flow
- ⚠️ Require Proof Key for Code Exchange (PKCE) must remain unchecked
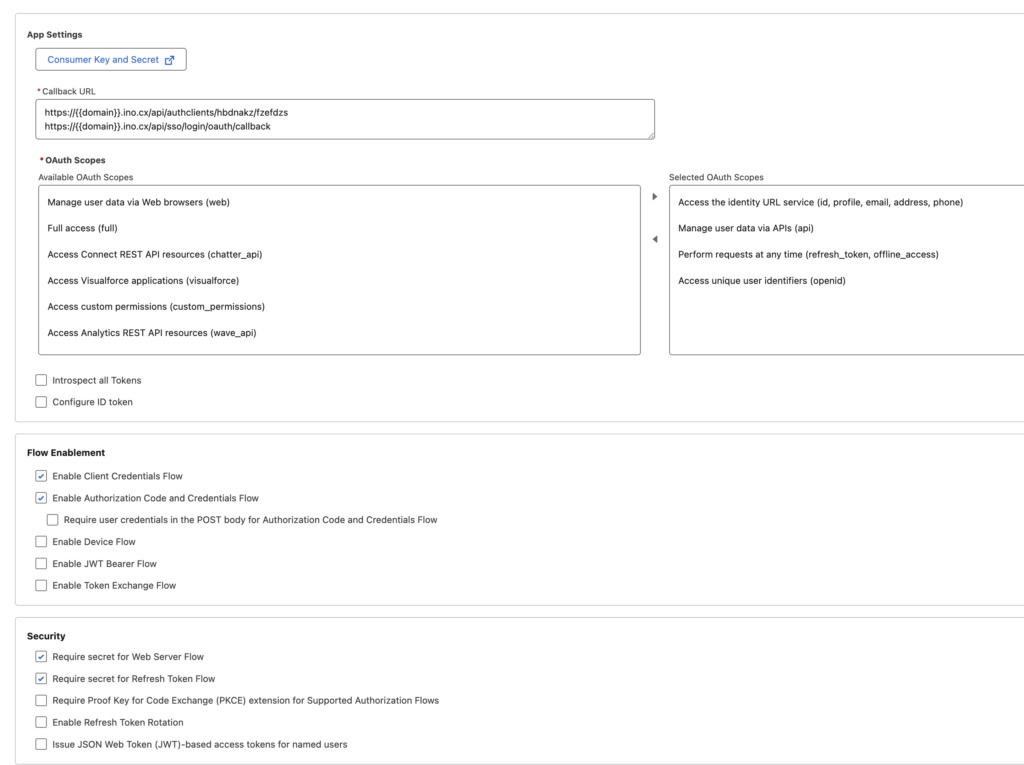
To retrieve the credentials needed for INO cx, click Consumer Key and Secret at the top of the app settings, then note the Consumer Key and Consumer Secret.
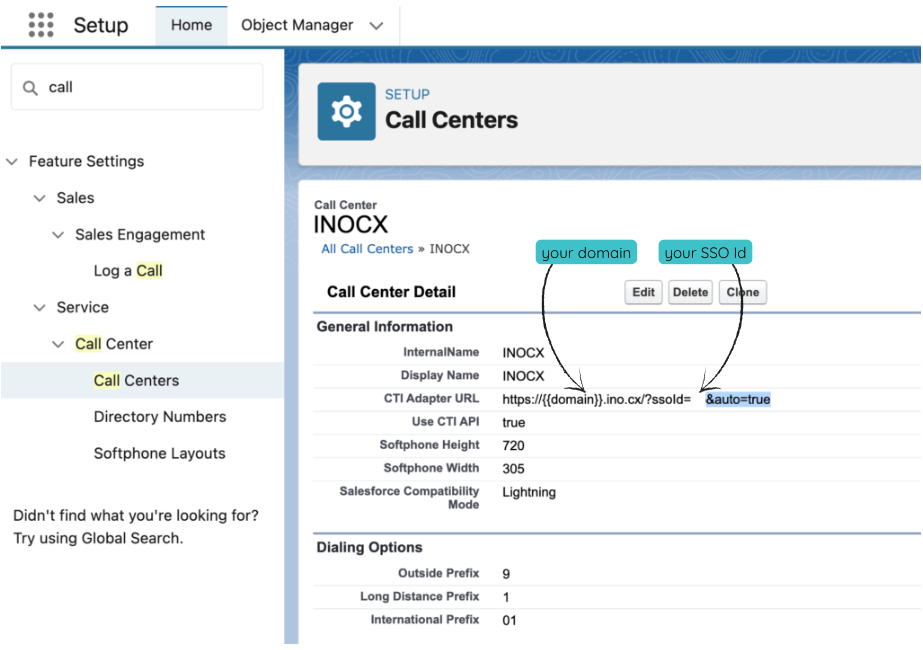
4. Call Center Configuration
- Go to Feature Settings > Service > Call Center > Call Centers.
- Edit the INO cx call center: enter the URL found in the SSO section of this article (see below) and add &auto=true at the end.
- Assign users who should use the call center. Click ‘Manage Call Center Users‘.
5. Custom Fields Management
Custom fields are used to log call activities within the Task object in Salesforce.
They allow INO cx to push detailed call data (such as caller/called number, duration, and recording link) directly into Salesforce.
They are normally created automatically when the package is installed.
Go to Setup > Object Manager.
5.1. Activity Object
Please check that the fields exist under the Activity object in the Object Manager.
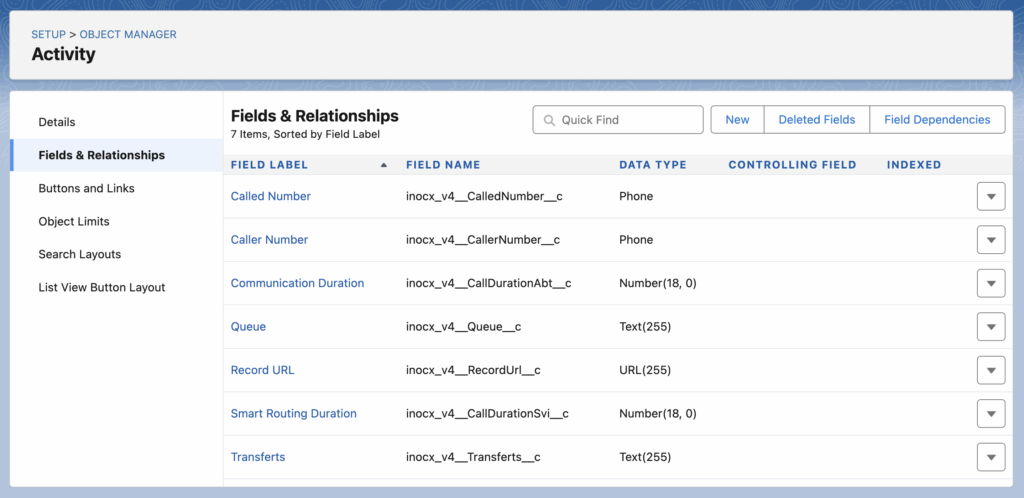
These fields are used to store information about calls made via INO cx.
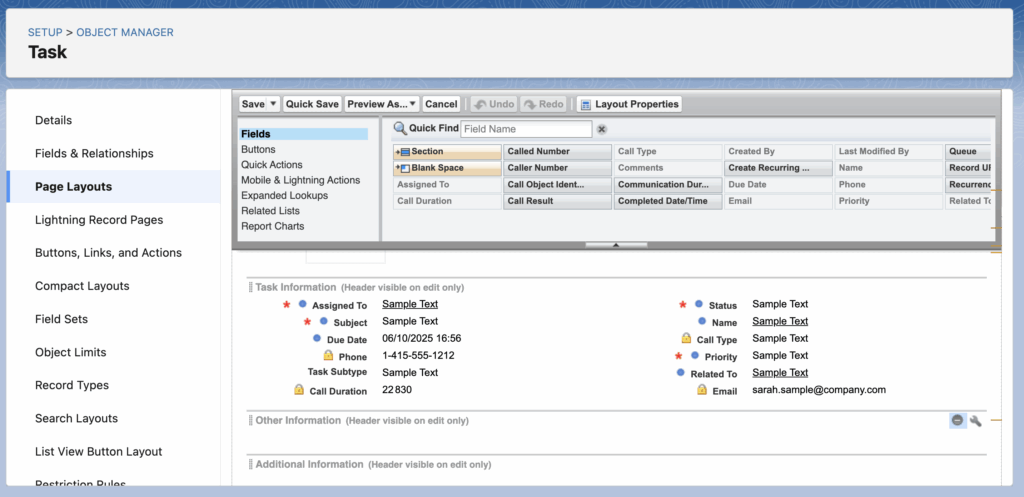
5.2. Task Object
You must also add these custom fields to the Task object layout so that INO cx data is visible within the Salesforce interface.
II- INO cx Configuration
1. Authentication Method
- In INO cx, create a new Authentication Method of type Salesforce.
- Enter the Salesforce subdomain as the environment.
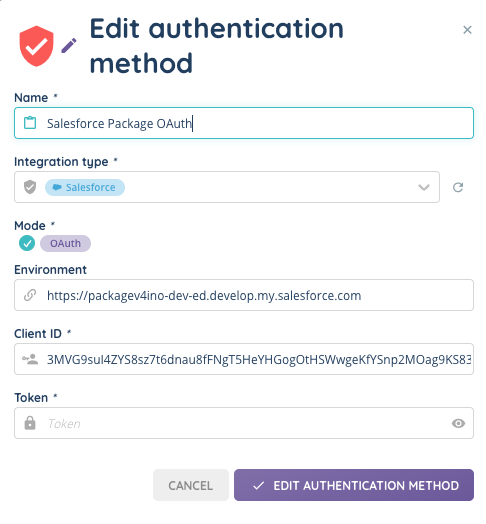
- Enable the OAuth client.

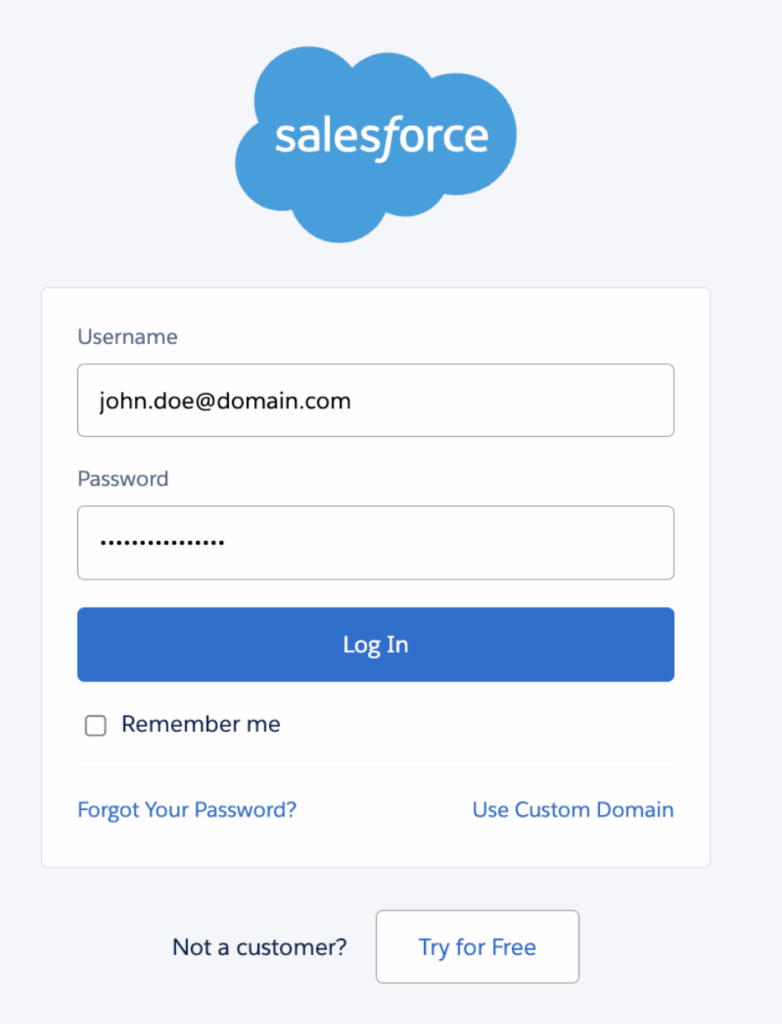
- A pop-up will allow you to log in and validate the connection.
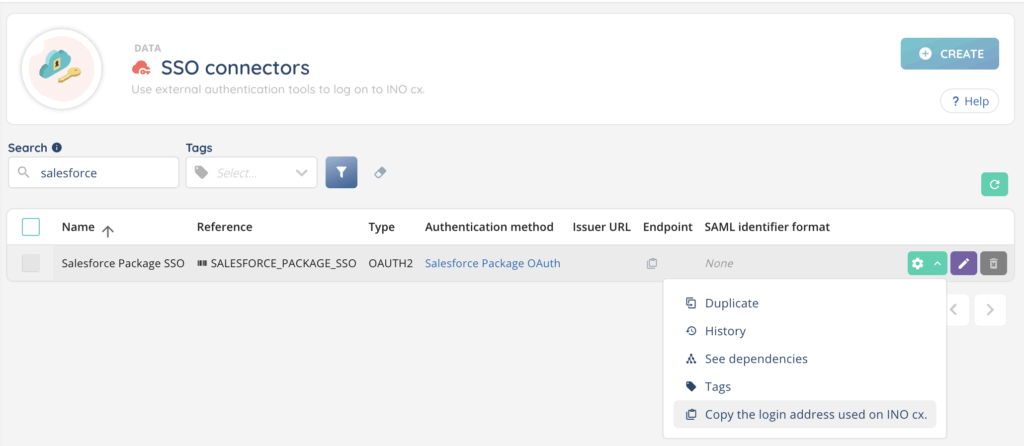
2. SSO Connector
Create an SSO connector using the Salesforce authentication method.
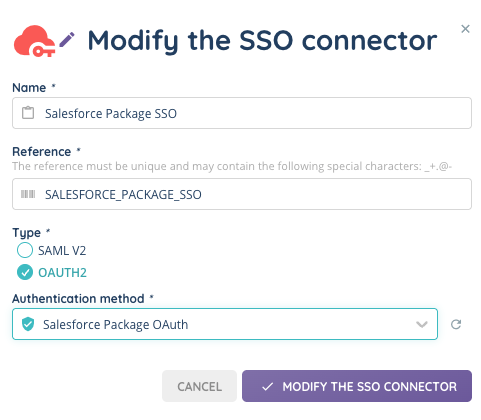
Associate the connector to your user(s) to allow Salesforce-based login into INO cx.
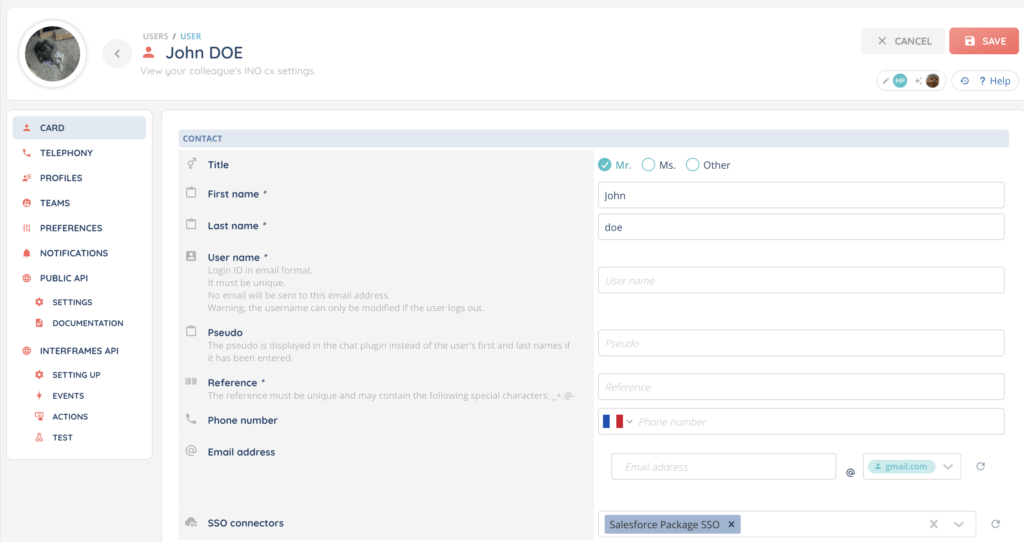
You can use the login URL provided to log in with your user account.
3. CRM v2
You can find here Salesforce API documentation, useful to define CRM objects and fields and configure INO cx.
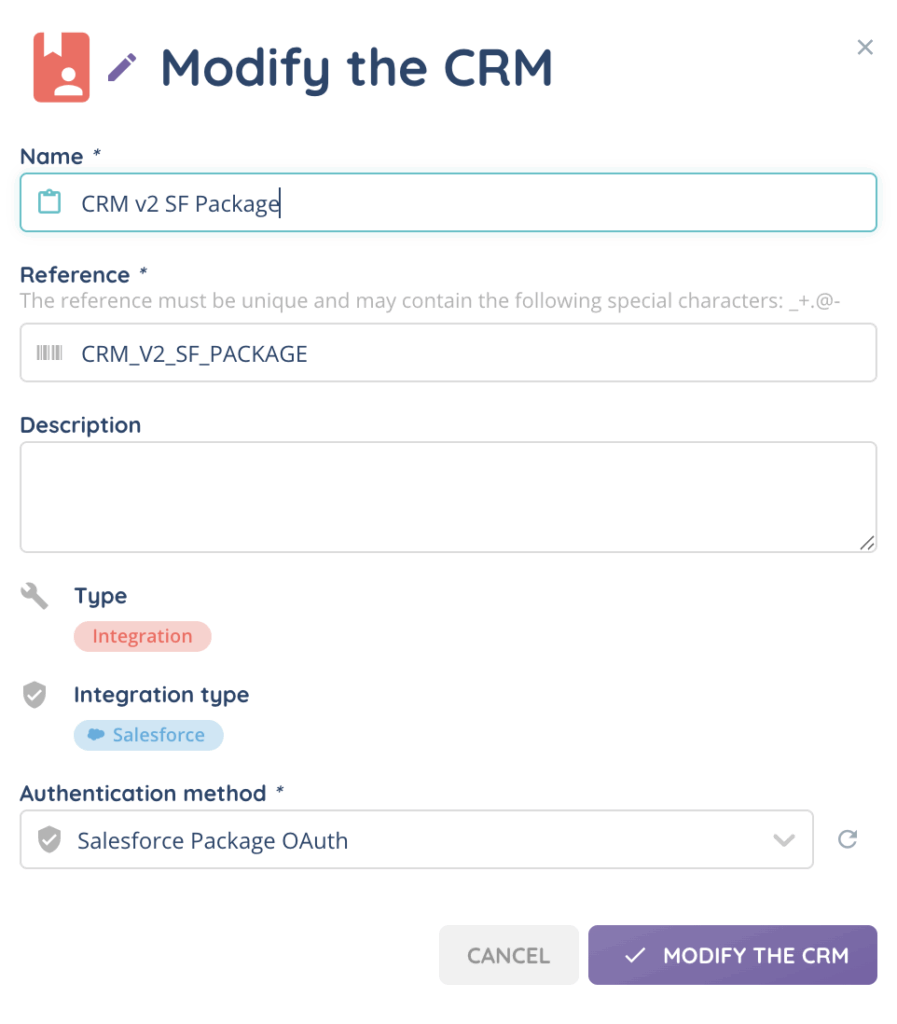
- Create a new CRM v2 of type Salesforce, using the authentication method created earlier.
- Add Salesforce objects (Contacts, Accounts, Tasks, etc.).
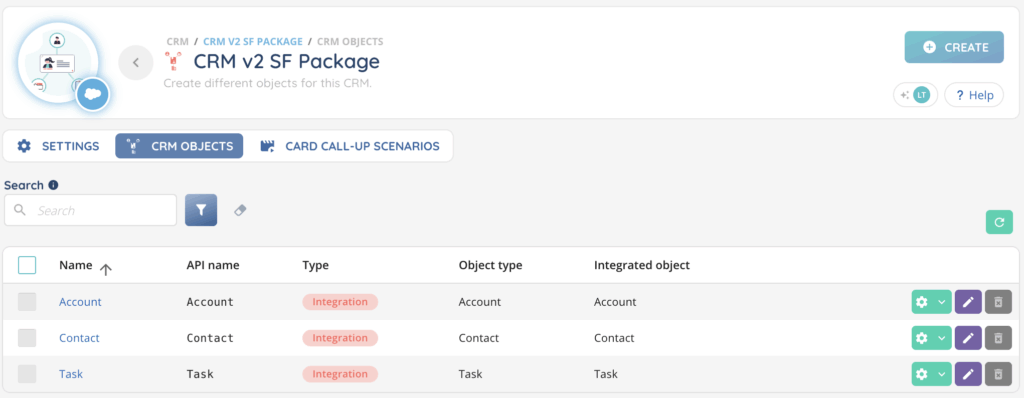
- Add CRM fields to each object.
Recommended fields:
For contact object
- First Name (Short text)
- Last Name (Short text)
- Phone (Phone)
- Email (Email)
For account object
- Account Name (Short text)
- Phone (Phone)
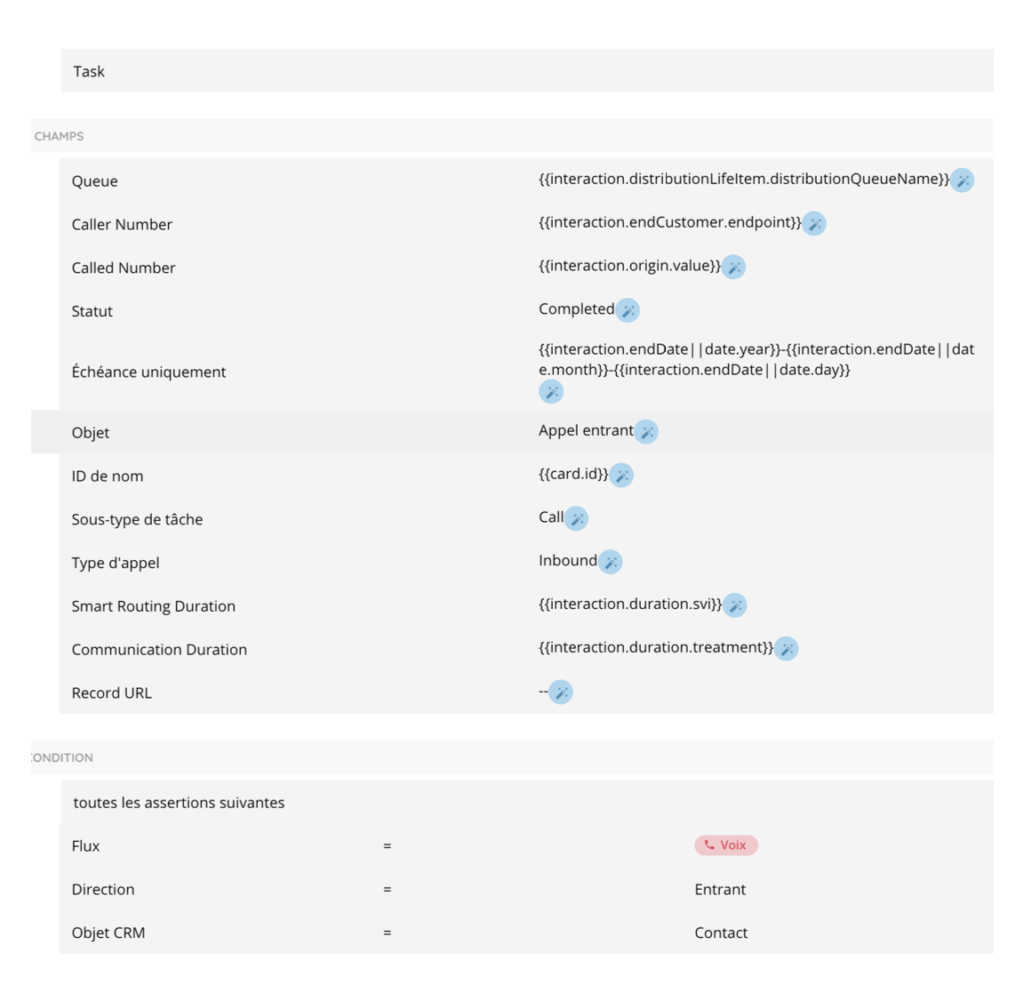
For task object
- OwnerId (Short text) – possible values: Inbound | Outbound | Missed
- ActivityDate (Text)
- WhatID (Short text) – related Account ID
- WhoID (Short text) – related Contact ID
- ID (Short text) – Activity ID
- Subject (Short text) – Object
- Priority (Short text)
- TaskSubType (Short text)
- Status (Short text)
- CallType (Short text)
- Custom INO fields created by the package (see above):
- Called Number (Phone)
- Caller Number (Phone)
- Communication Duration (Numeric)
- Smart Routing Duration (Numeric)
- Voice Recording (URL) – Custom field for storing the public URL of a record, set default to “–”, it will be filled in automatically
4. Scenarios
You can configure CRM v2 scenarios:
- Screen pop: e.g., search in Contact first, then in Account if not found.
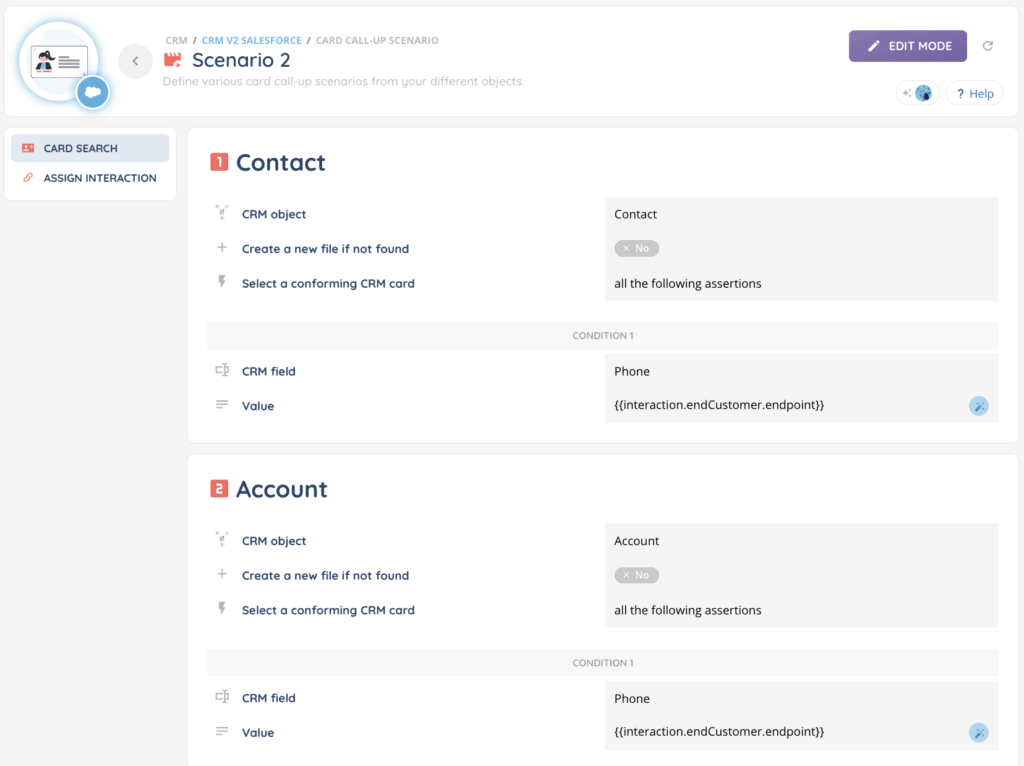
- Interaction assignment: Check Salesforce API documentation. You can use the following criteria:
- Flow: Voice | Email | Messaging
- Direction: Incoming | Outgoing
- CRM object: Contacts | Accounts | Leads
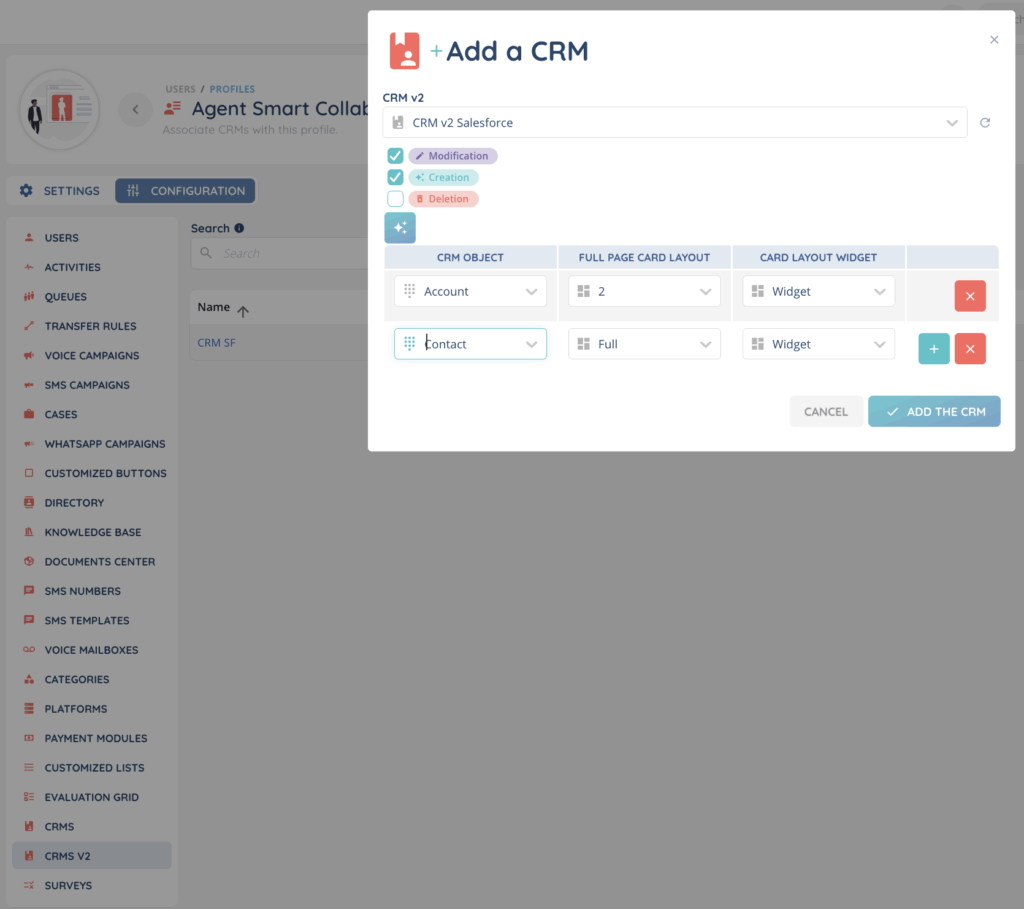
5. Profile Association
To make the CRM available in the Banner, associate the Salesforce CRM v2 with the relevant profiles.