Overview
The interaction tags are checkpoint statistical tools: created in the Maker, they are then inserted in a Smart Routing and their data are used in the Reporter dashboards.
We will see here how to create them and then use them to track the results of an action or a branch. The exploitation of the collected data can be found in the article dedicated to dashboards.
Prerequisites
- Creation: none.
- Data exploitation: access to the Reporter.
Configuring
As mentioned before, the interaction tags are created in the Maker (“toolbox” module). You have to create at least one in order to use the “Insert tag” Smart routing action.

You can then use your interaction tag in a Smart routing tree: it will either record action loops or branches.

Here, you will see each time your client has called before an agent is available. You can also use this action for other purposes: check which branch was the most used for example.
Tips
WIP
Preview
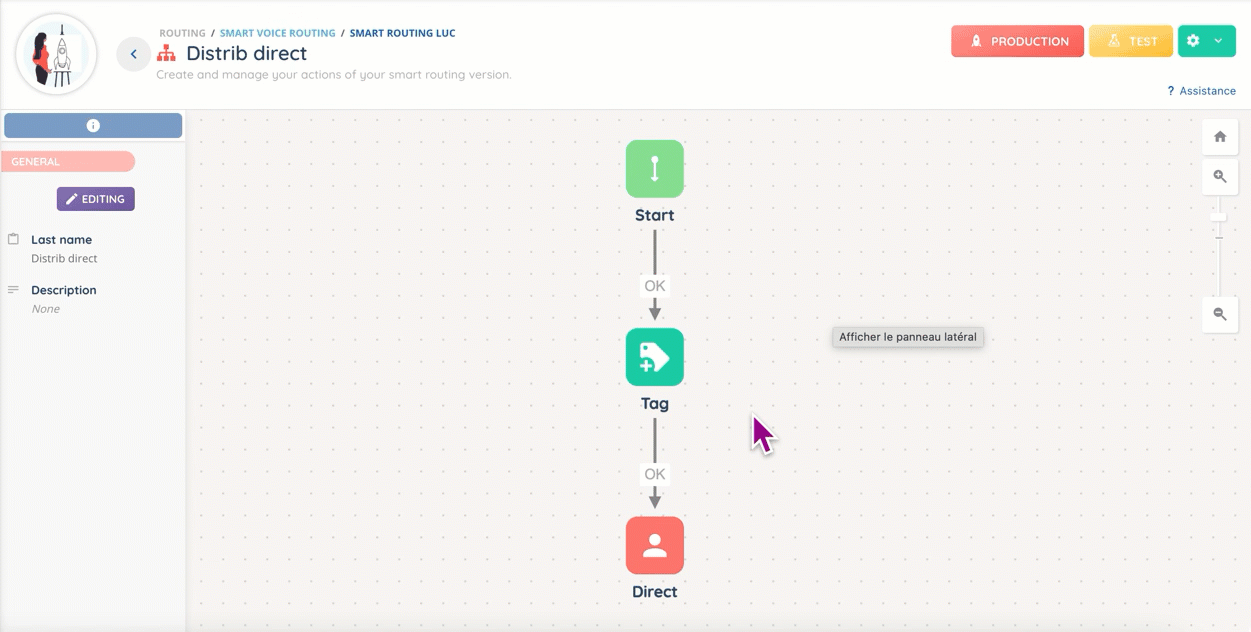
This is what your interaction tag will look like once inserted in a Smart routing.
You can edit the action to change the tag at any time.
Use case
My request: I want to analyze my agents’ attempts to a specific campaign target.
Step-by-step process:
- Open the Maker.
- Go to “Toolbox”, then “Interaction tags”.
- Create your tag.
- Go to “Routing” and then the Smart routing of your choice (or create it).
- If your Smart routing is in production, duplicate it.
- Add the “insert tag” action where you need it. You can create multiple branches for every data you need.

- Put your Smart routing in production/test mode.
- Open the Reporter.
- Create or modify your dashboard.
- Everything is set up 🎉
Frequently asked questions
WIP
Related contents
- Reporte: an overview
- Dashboards (Reporter)
- What is a Smart routing?