[Reading time: 3 minutes]
Overview
This article explains how to configure the Dynamics 365 integration in INO cx.
Once configured, you can authenticate using Microsoft Azure, synchronize CRM objects, raise CRM cards during interactions, and use Dynamics 365 as an identity provider through SSO.
1. Prerequisites
1.1. Microsoft Power Platform
If you do not yet have a Dynamics 365 environment, create one from your Microsoft Power Platform space and assign a suitable user license based on your needs.
1.2. Microsoft Azure
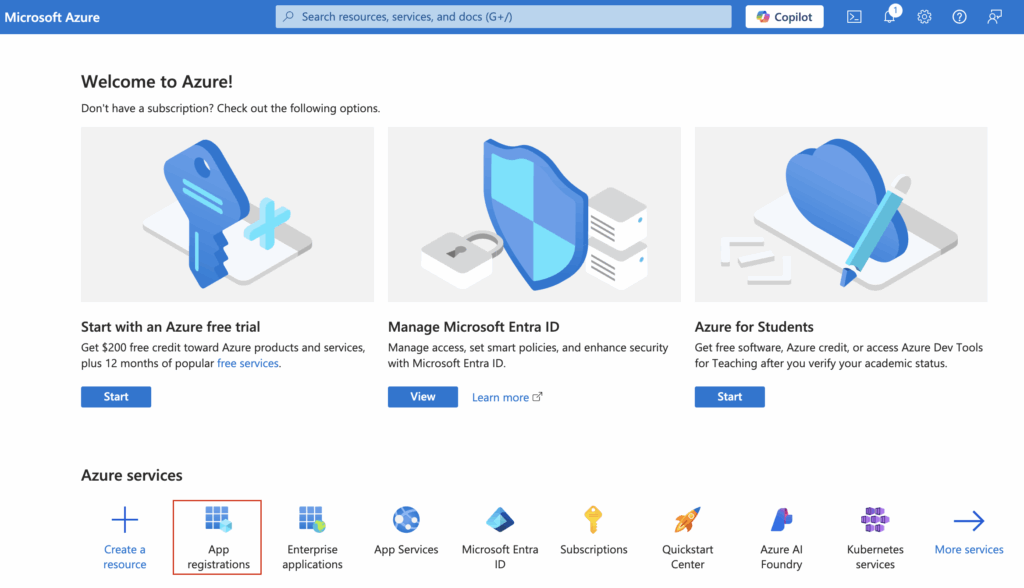
- Log in to your Microsoft Azure portal.
- Register your new application if you have not already done it.

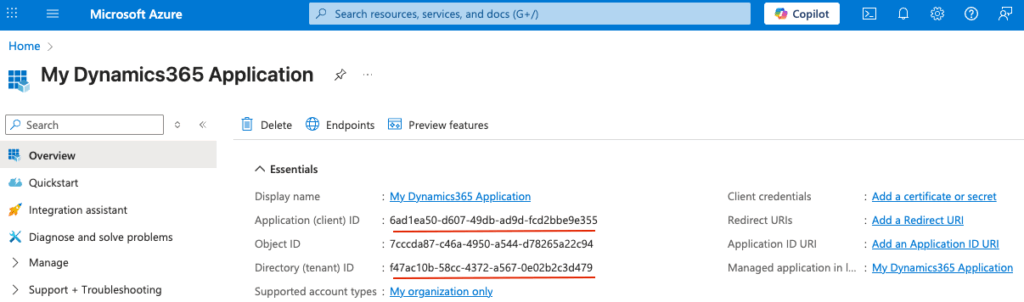
- Note the following information from the application registration:
- Application (client) ID
- Directory (tenant) ID
- Add the following redirect URLs to the application:
https://{{domain}}.ino.cx/api/authclients/hbdnakz/fzefdzshttps://{{domain}}.ino.cx/api/sso/login/oauth/callback

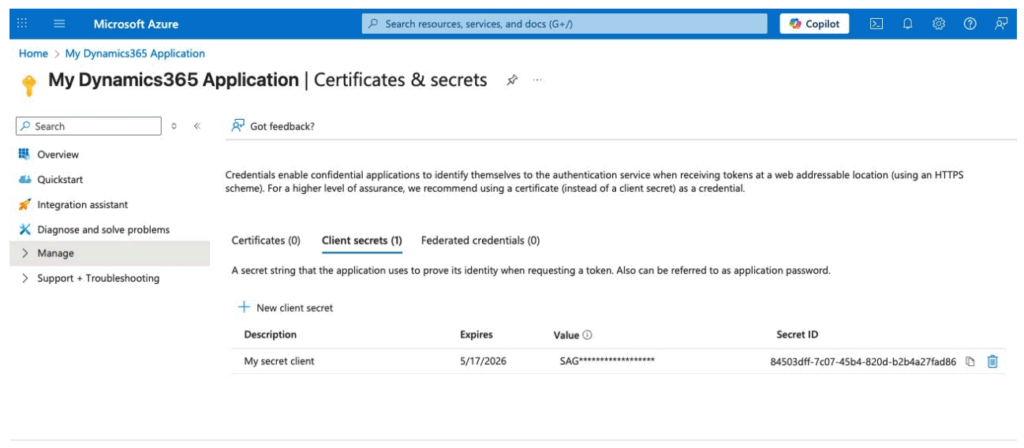
- Add a new client secret.

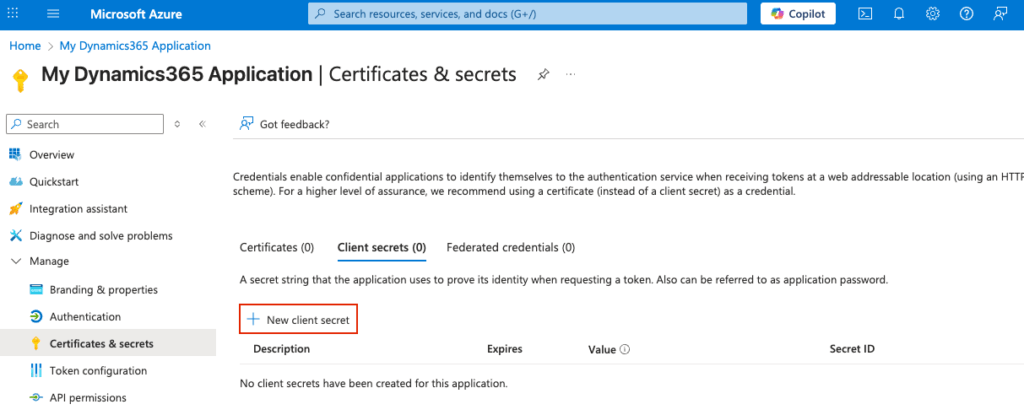
Azure will display the Secret client (Value column) only once. Make sure to store it securely.
2. Dynamics 365 configuration in INO cx
2.1. Authentification method
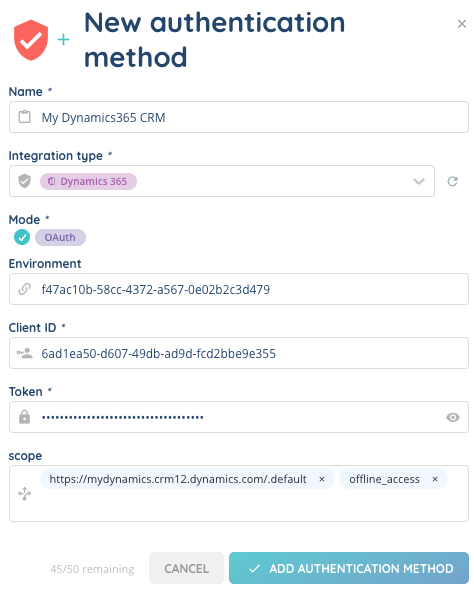
In INO cx, create a new authentication method (Dynamics 365 type).
Use the information collected from Microsoft Azure.
| INO CX field | Microsoft Azure |
|---|---|
| Environment | Directory (tenant) ID |
| Client ID | Application (client) ID |
| Token | Client secret Value |
| Scope | Permissions granted to the application |
2.2. Scopes
The following scopes must be configured:
https://{{domain}}.crm{{region}}.dynamics.com/.default(mandatory)
.default setting automatically uses all permissions (scopes) configured for the Azure application.offline_access(optional but recommended)
Allows automatic refresh of expired or expiring tokens.
Activate the connection. A confirmation window will open to authorize the link between INO cx and Dynamics 365.
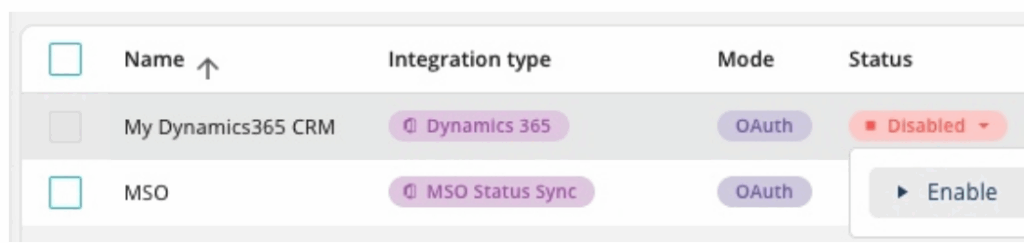
This connection acts as a service token used for features such as CRM scenarios or interaction assignment. If users do not authenticate via SSO, this service token will be used by default.
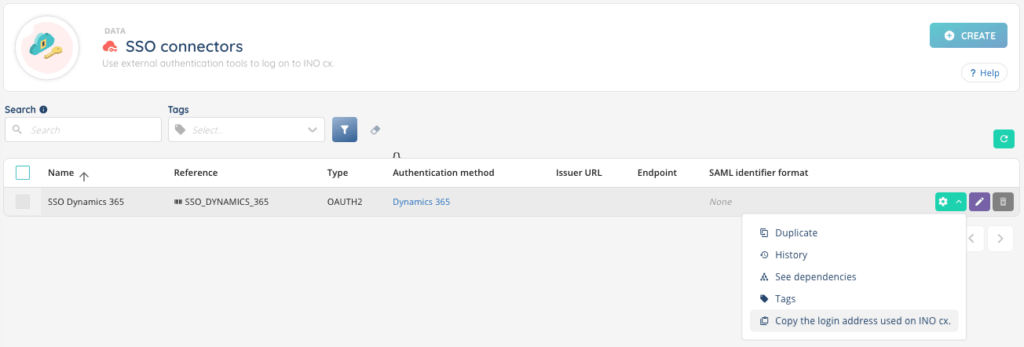
2.3. SSO connector
Create a new SSO connector using the Dynamics 365 authentication method created earlier.
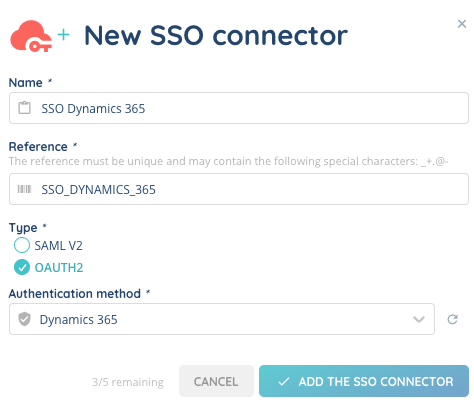
Associate this SSO connector with your users so they can log in to INO cx directly with their Microsoft account.
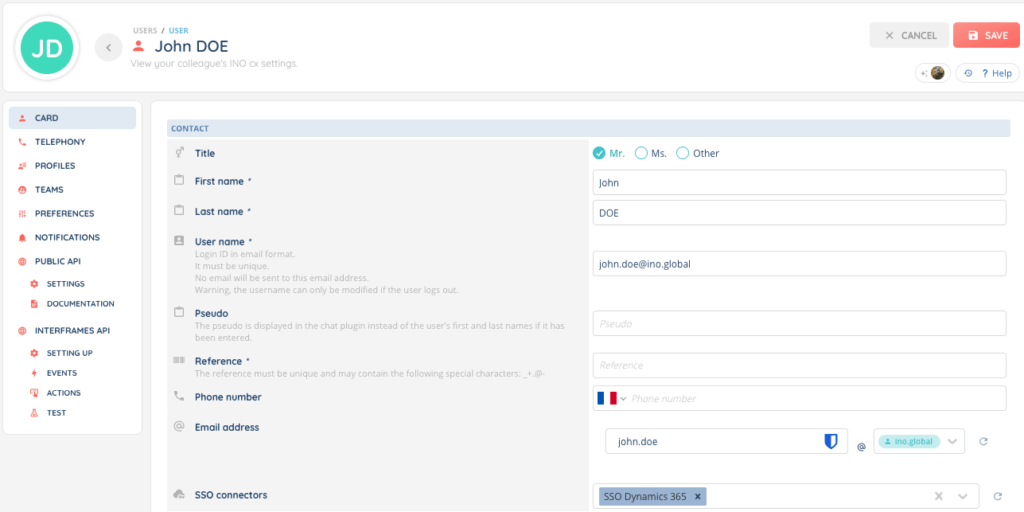
A login URL is provided for this purpose.
Users logging in via SSO receive their own user token, and therefore only access data they are authorized to view.
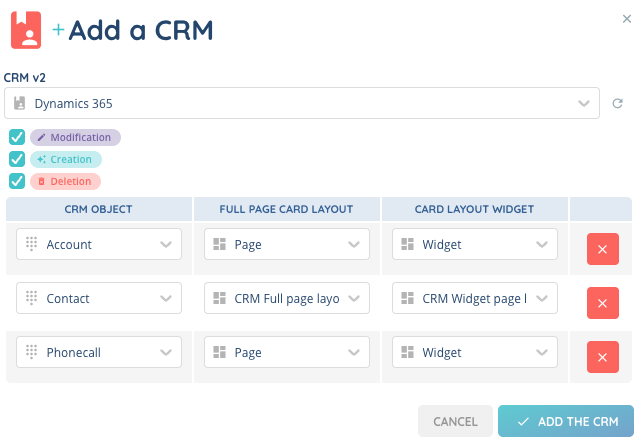
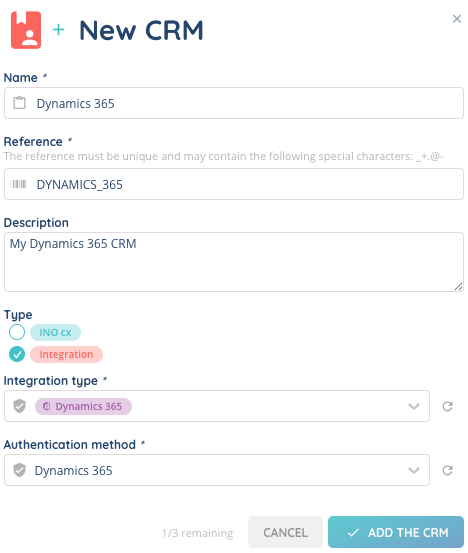
3. CRM v2 configuration
Create a new CRM v2 (Dynamics 365 type) and select the previously configured authentication method.
3.1. CRM v2 objects
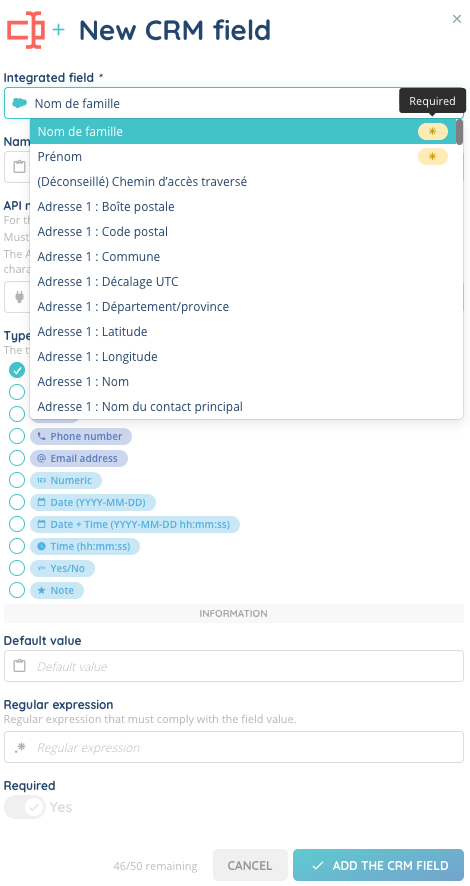
Start creating your CRM objects (Contacts, Accounts, Phonecalls, etc.).

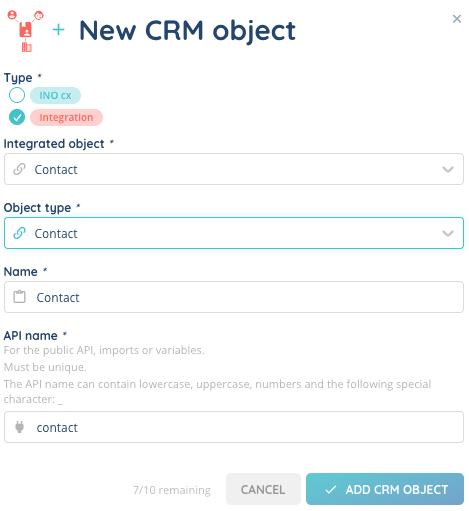
For each object:
- Add the required fields displayed at the top of the list.
These fields are mandatory for correct Dynamics 365 integration. - The field type is automatically selected based on the metadata received from Dynamics 365.

3.2. CRM v2 scenarios
Screen-pop scenario
Example: Displaying a Contact record during an incoming call.
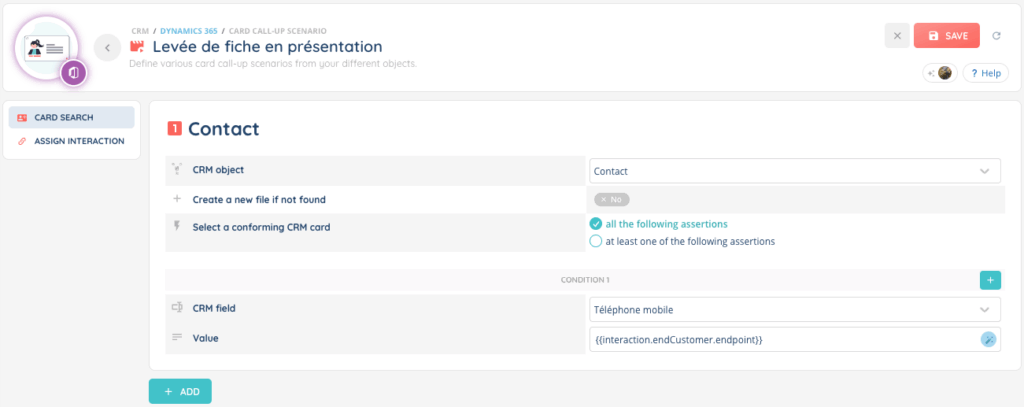
If the caller’s mobile number matches the mobile number of a Contact record in Dynamics 365, the CRM card will be presented to the advisor in the Banner during the interaction.
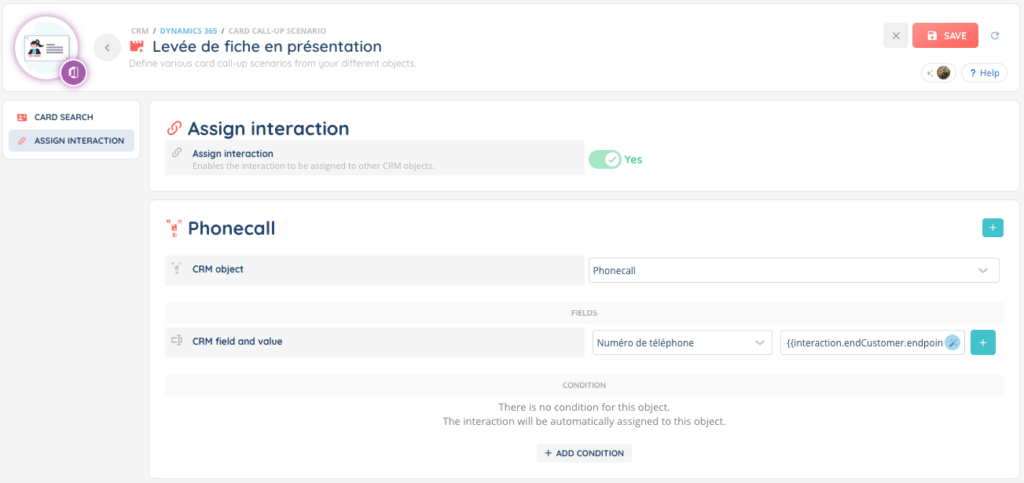
Interaction assignment scenario
Example: Creating a Phonecall from an interaction. Thanks to magic variables, we can
retrieve the customer’s phone number and save it in the equivalent Phonecall object field.
3.3. Profiles association
To make the CRM accessible to advisors, associate the Dynamics 365 CRM v2 with the relevant Profiles in the Maker.
Users will then be able to access CRM data directly from the Banner.