
[Reading time: 3 minutes]
Overview
The Databases module in the Maker allows you to create and manage custom data tables that can later be used across INO cx, including Smart Routing, CRM imports, and Workflows.
This article explains how to create a database, configure its structure, and manage entries.
1. Access the databases module
Open the Maker and navigate to Databases. You will land on the list of all existing databases.
From this list, you can:
- Search by database name
- Search by tags
- Open a database
- Duplicate a database
- View its history
- View its dependencies
- Manage tags
- Edit the database
- Delete the database

A Create button at the top allows you to add a new database.
A cogged wheel icon at the top of the page allows you to export databases. The export will be available under My account > My exports.
2. Create a database
To create a database, click Create and provide a name. No other configuration is required at this stage.
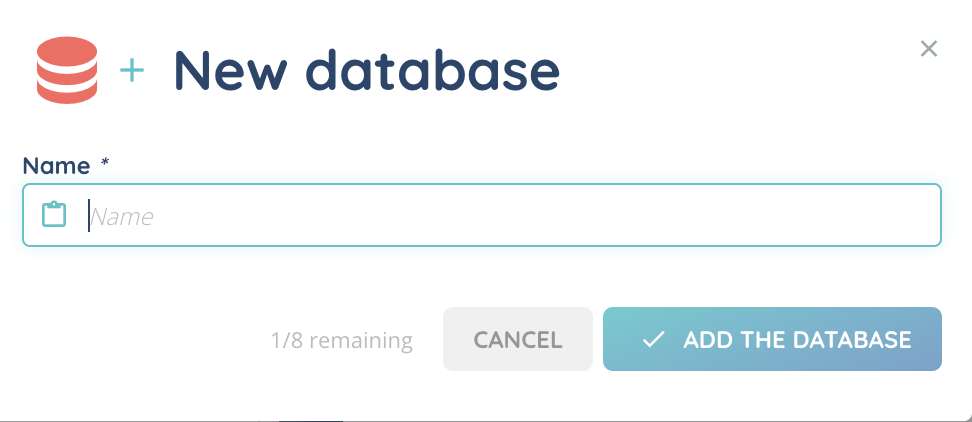
You can add one or more tags afterward. Tags must be created in the Tags module of the Maker.
3. Open and configure a database
Click Open on a database to access its columns.
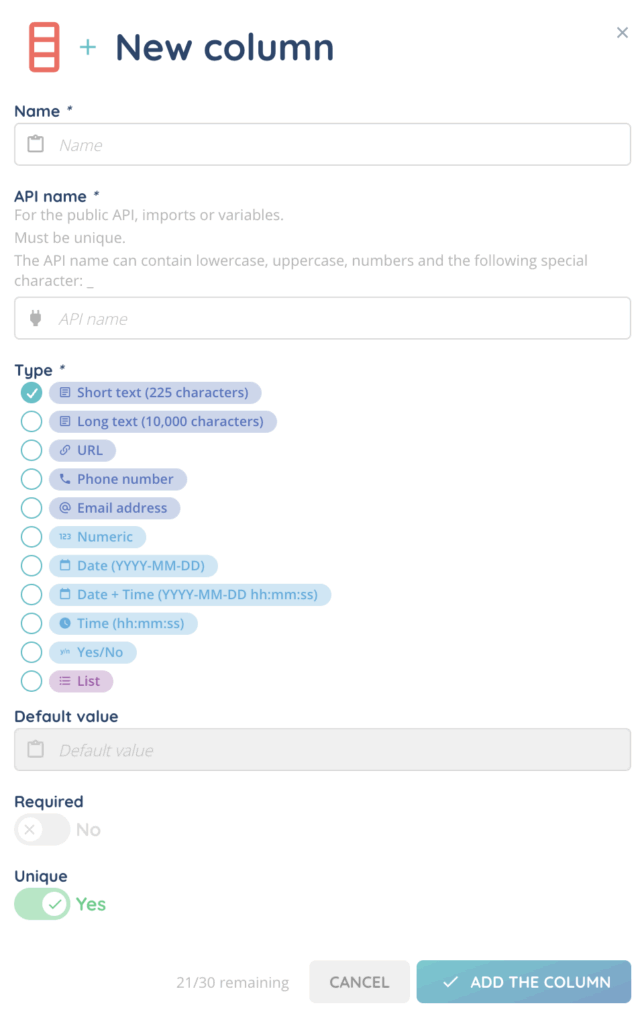
If no columns exist, you must add them using the cogged wheel icon and selecting Add a column.
When creating a column, the following properties must be configured:
- Name
- API name (manually defined, must be unique, accepts lowercase, uppercase, numbers, and
_) - Type
- Default value (optional)
- Required (optional)
- Unique (optional)
3.1. Available column types
- Short text
- Long text
- URL
- Phone number
- Email address
- Numeric
- Date
- Date + time
- Time
- Yes/No
- List
List values are managed in the Maker under Customized lists.
3.2. Column actions
Each column has a cogged wheel icon to modify or delete it.
Clicking a column name sorts the entries.
3.3. Notes
- If entries already exist, a newly created column cannot be set as required.
- Sorting and search are not available for custom list columns.
4. Database options
At the top of the database, the cogged wheel menu includes:
- Database entry import
- Download a CSV template
- Export database entries
- Add a column
- Add an entry
- Empty the database

5. Manage entries
Each row in the database represents an entry.
You can:
- Duplicate an entry
- Modify it
- Delete it
Deleting an entry is immediate and cannot be undone.
When adding a new entry, each column appears as a field to fill.
Duplicating an entry copies all values, and you can edit them before saving.
6. Import entries
The Database entry import option allows you to upload data from a CSV file.
- File size limit: 10 MB
- Headers must be unique
- You may select the delimiter
- You may choose whether valid data is imported if errors exist
Filters can be defined before launching the import.

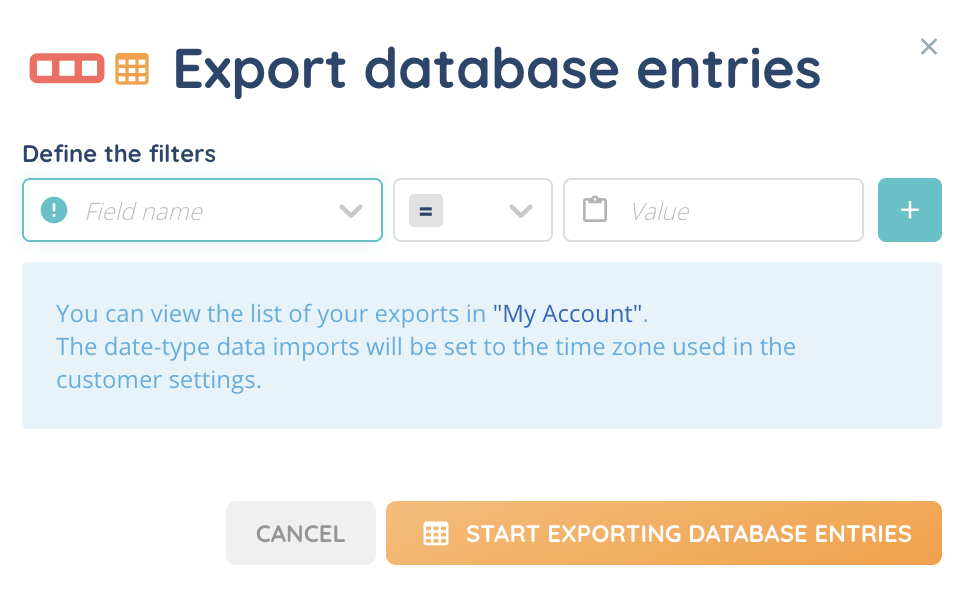
7. Export entries
You can apply filters before exporting entries.
Exports are sent to My account > My exports.
The file format is CSV.
8. Empty a database
The Empty the database option removes all entries but keeps the structure (columns).
A confirmation step is required.
This action is irreversible.
Now you can use your database!