
[Reading time: 3 minutes]
PREREQUISITES
Once you’ve set up the cases and associated profile accesses, agents can start using them in the Banner.
If you need help to set them up first, please click here.
VIEW CASES LIST
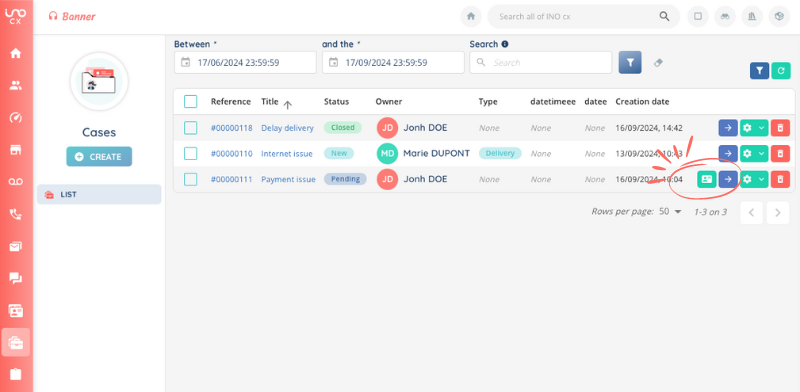
You can find all cases in the Banner, in the “Cases” module.
Once the module is open, you will be presented with a list view. Each column in this list corresponds to one of the different fields you have set up for your layout (in the Maker).
Here you can:
➡️ consult the details of a case
➡️ classify the cases according to the different columns by clicking on the column title
➡️ filter these cases by clicking on the funnel
➡️ search through your cases, using the search bar
You can open up to 10 cases. The case fields from the layout of your active profile will be displayed.
The partitioning principle will only allow you to access cases that you or someone in your team owns.
CREATE A CASE
While creating a case, the agent will have to fill in all the predefined fields associated with the profile layout.
There are 3 ways to create a case:
- From the “Cases” module in the Banner.
- From the “Interactions”module in the Banner.
Note: It is possible to create a case after an interaction, but also during interaction (thanks to the cogwheel).
- From the “CRM cards” module in the Banner.
ASSIGN A CASE
It is possible to assign to a case a CRM card, and/or an interaction. In this way, agents will be able to find all the information on a customer quickly.
ASSIGN INTERACTION(s) TO A CASE
You can assign to a case a smart routing interaction.
An interaction can only be associated with one case, but several interactions can be associated with one case. To ensure proper follow-up of the case, we recommend that you associate all interactions (if there are several) with the right case. In this way, when you open the case, you’ll find a list of the history of interactions, under the “interactions” tab of the case.
How to do it?
- Open the case.
- Click on the cogwheel, then assign an interaction.
- Choose the interaction to link. ⚠️ Please make sur the right interaction is already open in the “interaction history” module.
If an interaction is linked to a case, an icon will appear in the interactions list.
Note: It is possible to create a smart routing that will make it possible to automatically assign a new interaction to an existing case.
ASSIGN A CRM CARD TO A CASE
You can assign to a case a CRM card.
A case can only be linked with one CRM card, but a CRM card can have many cases. The process is the same as above.
If a CRM card is linked to a case, an icon will appear in the cases list.
RESULT
Once the case is linked to an interaction and a CRM card, the agent will be able to open all 3 at the same time, in 3 tabs, to manage the customer relationship. Simply click on the dedicated button.
![]()
TRANSFER A CASE
Depending on the rights that have been set for the profile, an agent can transfer the case ( ➡️ change the owner): to himself, to a member of his team, or to everyone.
To do this, click on the case, then in the ‘owner’ field, click on the arrow. You will be able to become the owner or transfer the case to a person of your choice.
CHANGE THE STATUS OF A CASE
Depending on the rights that have been set for the profile, an agent can change the status, and thus close a case if needed.
To do this, click on the case, switch to edit mode, then in the ‘status’ field select the new status for this case.
DELETE A CASE
Depending on the rights that have been set for the profile, an agent can delete the case, by clicking on the cogwheel then “delete”. Once deleted, the case cannot be retrieved.
Now you can analyse cases in the Reporter!