
[Reading time: 12 minutes]
Overview
A Workflow is an automated process that runs in the background when a specific event happens — for example when an incoming webhook is received, when an outgoing campaign has run, when a database row changes, or when another rule fires it. From the entity description in the platform: “Configure actions to carry out when specific events take place.”
Concretely, a workflow is:
- A sequence (tree) of actions — calling a web service, reading or writing a database, sending an SMS or email, creating a CRM card or a task, inserting a target in a campaign, etc.
- Wired to one or several triggers (webhook events) that decide when it runs.
- Versioned: each workflow has development versions you can iterate on safely, one version in production, and a history of backup versions you can roll back to.
Workflows are the way to automate business processes inside the platform without writing custom code. They share the same visual editor and most of the action library with Smart Routings, but they run outside of an interaction’s lifecycle — they react to events rather than to live interactions.
1. Access and permissions
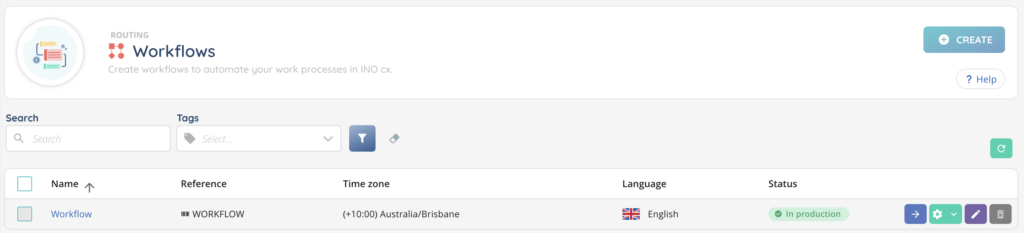
Workflows are configured in the Maker, in the Routing module. From the left menu, open Routing > Workflows.
To access and configure workflows, the user’s role must include the appropriate rights on the Workflows entity (Read / Create / Modify / Delete). These permissions are managed in the Roles module of the Maker.
2. Create a workflow
To create a new workflow:
- Go to Maker > Routing > Workflows.
- Click the + button at the top right.
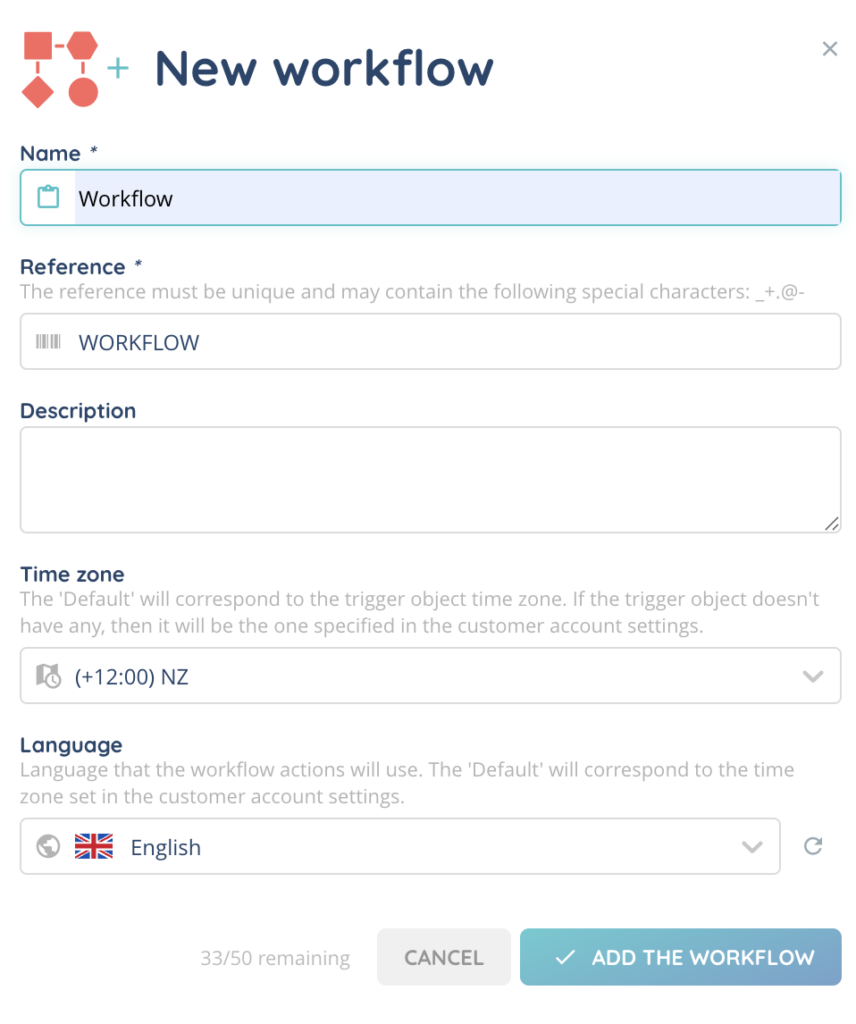
- Fill out the form:
| Field | Required | Description |
|---|---|---|
| Name | Yes | Display name of the workflow. |
| Reference | Yes | Unique identifier used to reference the workflow in your configurations. Must be unique and may contain only the following special characters: _ + . @ - |
| Description | No | Free text describing the purpose of the workflow. |
| Time zone | No | Time zone used by the actions of the workflow (for example for date/time computations). Leave on By default to use the time zone of the object that triggered the workflow, or the customer account default. |
| Language | No | Language used by the actions of the workflow (for example for templates). Leave on By default to use the customer account default. |
- Click Save.
The new workflow appears in the list with the columns Name, Reference, Time zone and Language. Click on its name to open the details page, which is split into three tabs: Settings, Triggers and Versions.
3. Settings tab
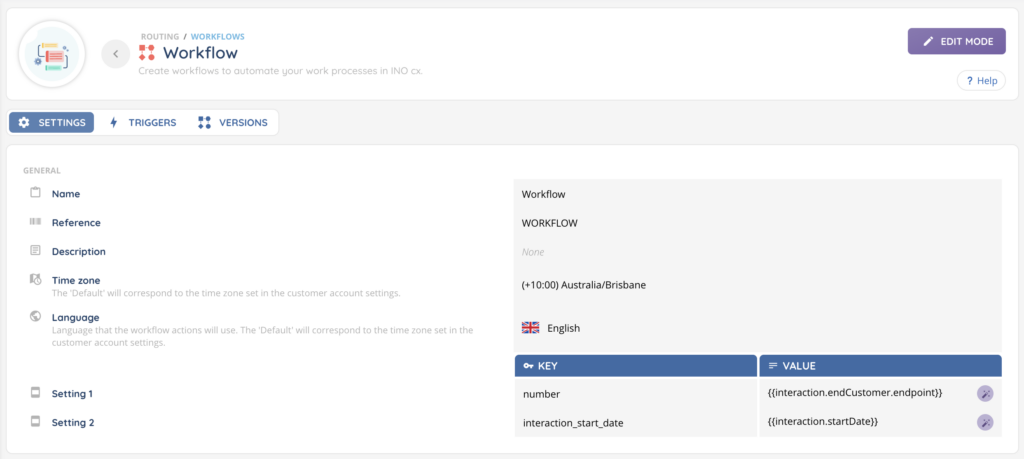
The Settings tab is where you set the global parameters that apply to every execution of the workflow.
- Name, Reference and Description — modifiable at any time. Changing the Reference impacts any place that already references the workflow by its code (for example a Smart Routing action Distribution to a workflow configured by reference).
- Time zone — used by every action that computes a date or a time (Test a schedule, Date and time (retrieval and calculations), Reschedule an attempt, etc.) and by communication actions to time messages correctly. Leave on By default to use the time zone of the object that triggered the workflow (for example, the interaction’s queue) — if the trigger object has none, the customer account default is used.
- Language — used when an action picks a localised resource (an email template, an SMS template, a sound file). Leave on By default to use the customer account default.
Below the general info, a block lets you declare a list of key/value pairs that the workflow itself stores, and that any action of the workflow can reference.
Each row is numbered (Setting 1, Setting 2…) and contains:
- Key — a unique identifier of the setting (for example
support_email,api_url,retry_limit). Two settings cannot share the same key. - Value — the actual value. The value field accepts variables in the
{{variable}}notation (for example{{card.email}}or{{interaction.id}}), so you can derive a setting from data passed by the trigger.
Both fields are required when a row is added. Use the + button at the end of the last row to add another setting, and the delete icon to remove one.
Settings are useful to centralise the constants used by your workflow — when you need to change one, you only edit it here instead of every action that references it. They are also the way to expose configuration to your business team without giving them access to the action tree.
4. Triggers tab
A workflow does not run on its own — it has to be fired by something. The Triggers tab is where you declare what fires it.
4.1. What is a trigger?
A trigger is a predefined event emitted by the platform when something noteworthy happens. The platform ships with a catalogue of webhook triggers grouped by category, including for example:
| Category | Examples of triggers |
|---|---|
| User & agents | An advisor logs in / logs out, an advisor changes activity, etc. |
| Interaction | An interaction starts, ends, is transferred, enters a queue, leaves a queue, is recorded, is joined by an extra participant, etc. |
| Payment | A payment succeeds, an installment is collected, etc. |
| Voice campaign / SMS campaign | A campaign target is processed, an attempt fails, the campaign ends, etc. |
| CRM & cases | A CRM card is created / updated / deleted, a case is created or updated, etc. |
| WhatsApp campaign | A target is inserted or updated, the campaign starts or stops, etc. |
| Tools | A calendar item or a values-table item is edited, etc. |
You cannot create your own trigger — you pick from the catalogue. When the corresponding event occurs anywhere on the platform, every workflow that has subscribed to it is fired one after another. Each firing receives the contextual data of the event (for example an interaction:end trigger provides the interaction, the customer, the queue, the duration, the result, etc.), which the workflow can use in its actions through variables.
4.2. Attach a trigger to the workflow
From the Triggers tab:
- Click Add triggers.
- Pick one or several triggers from the catalogue (the modal shows the triggers that have not been associated yet).
- Confirm.
The newly attached triggers appear in the Triggers list with an Active toggle next to each one. Two situations:
- Active: every time the event fires somewhere on the platform, this workflow runs.
- Inactive: the workflow stays attached to the trigger but no longer runs — useful to pause a workflow temporarily without losing its configuration.
Triggers can also be removed individually or in bulk from the same tab.
4.3. No trigger or no production version = no run
For a trigger to actually do something, two conditions must be met:
- The trigger must be active on the workflow.
- The workflow must have a production version (or a scheduled production version that has reached its date).
If a trigger fires while the workflow only has development versions, nothing happens. A reminder is displayed when you wire a trigger: “Remember to check that the selected workflow has a production or test version. If this is not the case, then the workflow will not run.”
4.4. Other ways to fire a workflow
Triggers are the standard way to launch a workflow, but two other paths exist:
- From a Smart Routing: the action Distribution to a workflow launches a workflow inline during an interaction’s routing tree.
- Manually: from the workflow details page, a Start the workflow action lets you launch the production version on demand. If the workflow has Settings with values still empty, a small form asks you to provide them. This is mostly used to test a freshly-promoted workflow.

5. Versions tab
The Versions tab is where you build and manage the actual logic of the workflow. A workflow can contain several versions at the same time, each one in a different lifecycle state:
| Status | Description |
|---|---|
| In production | The version currently executed when a trigger fires. Only one version can be in production at any time. A production version cannot be edited directly — to make changes, create a development copy. |
| Development | Draft versions you can edit freely. As many as you need, within the configured limit. Used to design and test changes before promoting them to production. |
| Backup | Previous production versions that have been replaced. A backup version can be put back into production at any time, which is the way to roll back to an earlier behaviour. The number of backups kept is capped by a configurable limit. |
| Scheduled for production | A development version that has been planned for an automatic switch to production at a future date. Useful to align a behaviour change with a business deadline. |
Each row of the Versions tab shows the version’s status, the date it was last modified and the available actions (open, modify, put in production, schedule, delete, etc.).
6. Build a version — the action tree
Open a development version to access the action tree editor, the same visual editor used by Smart Routings. Each node of the tree is an action, and links between nodes describe the order — and the conditional branches — in which actions are executed.
Every version starts from a Start node that is created automatically. From there, you add actions and connect them.
6.1. Add an action
A new action is added either by clicking the + output handle of an existing action (or of the Start node, for the very first action), or by right-clicking on an existing action and selecting Add an action.
The action form then opens in the side panel with a choice between two creation modes:
- From zero: start from an empty action and configure it.
- Copy an existing action: duplicate an action that already exists in the version.
6.2. Available actions
A workflow version can chain about thirty action kinds. They cover most of the operations needed to automate a business process:
| Category | Examples of actions |
|---|---|
| Variables and data | Assign values to variables, Values table, Fill in the variables from a database, Save values to a database, Modify database values, Date and time (retrieval and calculations). |
| Tests and branches | Test a value(s), Test a schedule, Test if the number is mobile, Test if it is an even or odd week. |
| Communication | Send an email, Send a SMS. |
| Cases & CRM | Create a new case and associate it with the interaction, Modify a case, Associate the interaction with a CRM card, Create a CRM card, Associate the interaction with a CRM V2 card, Create a CRM V2 card. |
| Tasks & checkpoints | Create a task, Add a checkpoint. |
| Campaigns | Insert a target in a voice campaign, Insert a target in the SMS campaign, Insert a target into a WhatsApp campaign, Check the number of target attempts, Check the result of the target attempts, Reschedule an attempt. |
| Integrations | Web service, Node. |
Not every Smart Routing action is available in a workflow. Channel-specific actions (voice announcement, ASR, recording controls, distribution to a queue, distribution to a user, voicemail, etc.) live in Smart Routings only, since they manipulate a live interaction. Workflows focus on data and back-office automation.
6.3. Link the actions
Each action exposes one or several outgoing branches (success, failure, conditional results, etc.) that you connect to the next action. Each branch has its own + output handle: click the + to add the next action — the link to that new action is created at the same time. You don’t need to draw the link separately.
Two types of links can coexist:
- Normal link: forward progression created when you add a new child action from a + output.
- Unnatural link: a link that goes back to a previous action or jumps across branches, to handle loops or shortcuts. To create one, drag the + of the source branch and drop it onto an existing action in the tree — the link is created without adding a new node.
Existing links remain editable: click on a link to open its side panel and reassign it, or delete it from the right-click menu of the link itself. Actions can be modified (Modify this action) or removed (Delete this action / Delete this action and its entire branch) at any time on a development version.
7. Put a version in production
Once a development version is ready, two options switch it to In production:
- Immediate production: the version becomes the production version straight away. If a previous version was in production, it is automatically moved to Backup.
- Scheduled production: pick a future date and time. The version moves to Scheduled for production, and the platform automatically swaps it in at the scheduled time. Two versions cannot share the same scheduled production date.
To roll back, open a Backup version and put it back in production — the current production version then goes to Backup itself.
8. Edit, duplicate or delete a workflow
From the Workflows list, each row provides the following actions:
| Action | Description |
|---|---|
| Edit | Edit the Name, Reference, Description, Time zone and Language of the workflow. Versions and triggers are managed from the details page. |
| Duplicate | Create a copy of the workflow, including its versions, triggers and configuration. The copy is created without triggers — re-associate triggers manually if needed. |
| Delete | Remove the workflow. Deleting a workflow also removes its versions and its trigger associations. As a good practice, make sure it is no longer referenced (for example from a Smart Routing action Distribution to a workflow) before deleting it. |
Several workflows can be deleted at once by selecting them in the list and using the bulk delete action.