[Reading time: 7 minutes]
Overview
Email smart routings process your emails through various actions. They act as decision trees that qualify and route incoming emails by executing a sequence of configurable actions — such as sending or transferring emails, detecting keywords, testing an email priority, distributing to queues, or calling web services.

Each smart routing contains versions that go through a lifecycle: development → testing → production. This versioning system allows you to prepare and validate changes before deploying them, while keeping previous versions as backups.
An email smart routing can be of two types:
| Type | Description |
|---|---|
| Interaction start | The smart routing is invoked when an interaction occurs (an email is received). |
| Interaction end | The smart routing is invoked when an interaction ends. |
Prerequisites
- A Smart license.
- Access to the Maker.
- The Email smart routing permission enabled in your role (read, create, edit, and/or delete).
- For testing: at least one email mailbox configured as an entry point.
- Recommended: email templates, value tables, variables, and distribution queues pre-configured, as they are commonly used in smart routing actions.
1. Creating an email smart routing
- In the Maker, navigate to Routing > Email smart routings.
- Click New smart routing.
- Fill in the following fields:
| Field | Description |
|---|---|
| Name | Name of the smart routing. |
| Reference | Unique reference code for the smart routing. |
| Description | Optional description. |
| Type | Interaction start (invoked when an interaction occurs) or Interaction end (invoked when an interaction ends). This field cannot be modified after creation. |
- Click Save.
Note: You can also create a smart routing by duplicating an existing one using Copy the smart routing.
2. Version management
Once a smart routing is created, you manage its logic through versions. Each version contains its own action tree and goes through a defined lifecycle.
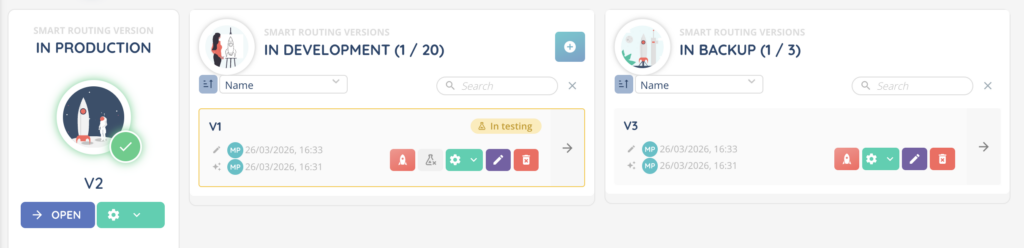
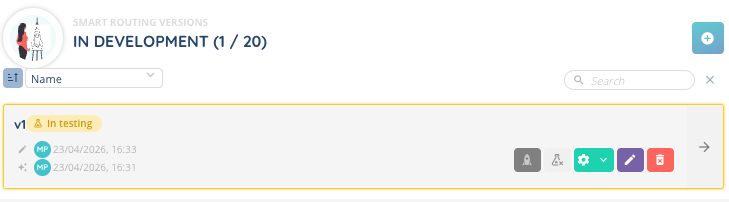
2.1. Version statuses
| Status | Description |
|---|---|
| In development | A working version that can be freely edited. You can have multiple development versions. |
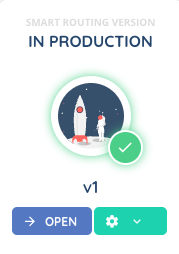
| In production | The active version currently processing incoming emails. Only one version can be in production at a time. |
| In backup | A replaced production version. When a new version is put into production, the previous production version automatically goes into backup. You can put it back into production at any time. |
2.2. Creating a version
- From the smart routing detail page, click Create in the In development section.
- Choose how to create the version:
- From zero: start with a blank action tree.
- Copy an existing action: duplicate an existing version’s action tree.
- Fill in the Name and optional Description.
- Click Create the version.
Note: If no versions exist yet, a helper message is displayed: “Create a version of this smart routing to manage your incoming interactions. You can then place it in production.”
2.3. Version actions
On each version card, depending on its current status, the following actions are available:
| Action | Availability | Description |
|---|---|---|
| Edit | In development | Open the version to modify its action tree and settings. |
| Put in production | In development | Move the version to production. The current production version (if any) automatically goes into backup. The version becomes read-only. |
| Put in test | In development | Activate test mode on this version (see 4. Testing a version). |
| Remove from test | In development (test mode) | Deactivate test mode. |
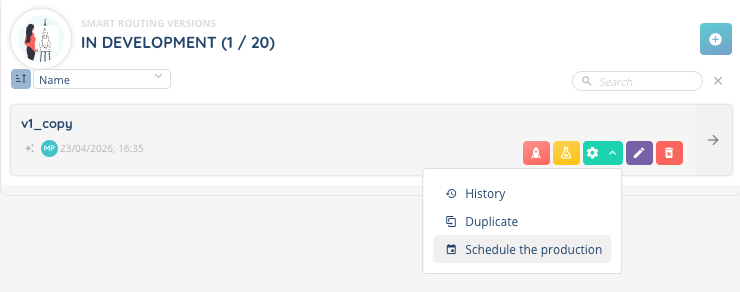
| Schedule the production | In development | Schedule an automatic production at a future date and time (see 6. Scheduling). |
| Remove the planned production from the schedule | In development (scheduled) | Cancel the scheduled production. |
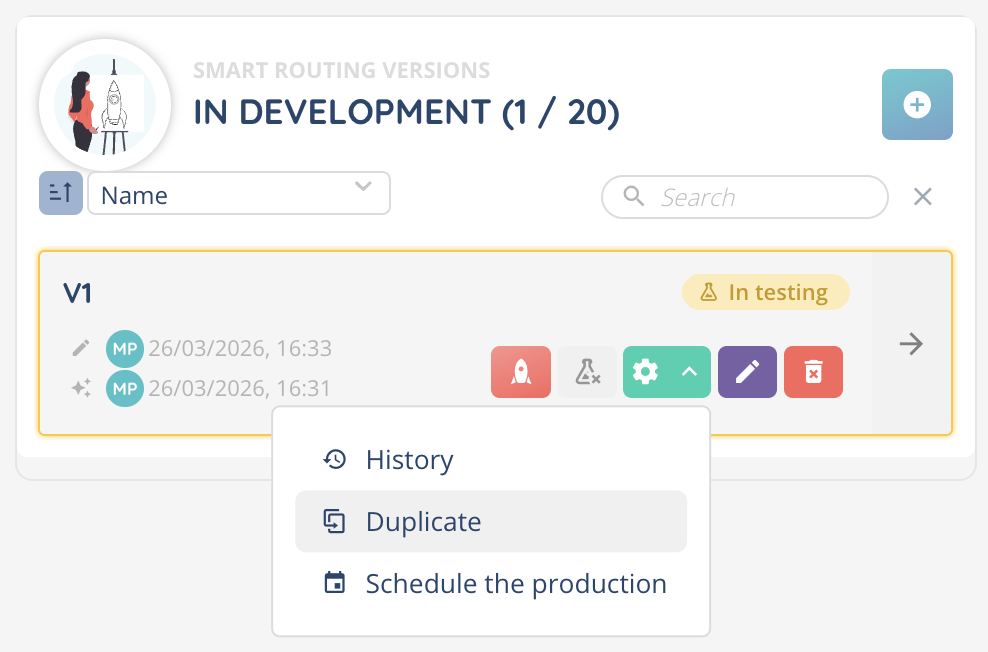
| Duplicate | Any status | Create a new development version by copying this version’s action tree. |
| Delete | In development / In backup | Permanently delete the version. |
Note: A production version cannot be edited. To make changes, you need to create or copy a development version.
3. Building the action tree
Each version contains an action tree — a visual flow of connected actions that define how the smart routing processes emails.
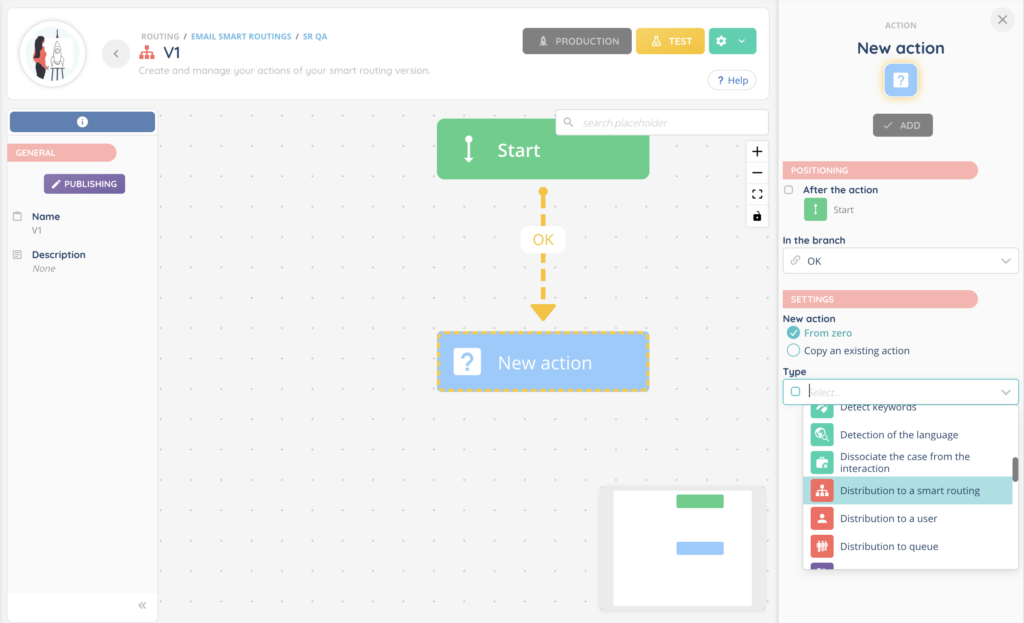
3.1. Adding actions
- Open a version in development.
- The tree starts with a Start action (automatically created).
- Click Add an action to add a new action after an existing one.
- Select the action type, configure its parameters, then save.
Actions can also be added between two existing actions using the “Add an action between these 2 actions” option, or created from zero or by copying an existing action from the same or another version.
3.2. Positioning and connections
When adding an action, you configure:
| Field | Description |
|---|---|
| After the action (Positioning) | The parent action this new action follows. |
| Following action (Connection) | The child action that follows. |
| In the branch | If the parent action has multiple output branches, select which branch this action belongs to. |
| Link | The visual connection between two actions in the tree. Links materialise the flow from one action to the next and can be created, modified, or deleted independently to reorganise the tree without recreating actions. |
3.3. Action tracking
Each action has an optional Record the passage in this action toggle. When enabled, a log is displayed in the interaction events list, allowing you to trace the path taken through the smart routing.
3.4. Available action types
Actions are grouped into categories. The detail of each action’s configuration will be covered in a dedicated article.
Actions and action tree
- Start
- Load sharing
- Add a checkpoint
- Node
Cases & CRM
- Associate the interaction with a case
- Associate the interaction with a CRM card
- Associate the interaction with a CRM V2 card
- Create a CRM card
- Create a CRM V2 card
- Create a task
- Dissociate the case from the interaction
- Create a new case and associate it with the interaction
- Modify a case
- Email to a Salesforce Query
Data
- Assign values to variables
- Test a value(s)
- Values table
- Fill in the variables from a database
- Save values to a database
- Modify the values of a database
- Date and time (retrieval and calculations)
- Check the number of passages
- Check Nth contact
Distribution
- Distribution to queue
- Distribution to a smart routing
- Distribution to a user
Interconnection
- Web service
- Test an email priority
- Detect keywords
- Detection of the language
- Transfer the email
Sending
- Send an email
- Send a SMS
Campaigns
- Insert a target in a voice campaign
- Insert a target in the SMS campaign
- Insert a target in a WhatsApp campaign
Time and dates
- Test a schedule
- Test if it is an even or odd week
Survey
- Survey
Other
- Pay an invoice
4. Testing a version
Before putting a version into production, you can activate test mode to validate its behavior with real interactions.
- From the version card, click Put in test.
- The version is tagged as In testing.
- The mailboxes used as entry points for the test version are displayed on the version card — these are the email addresses you can send test emails to.
Note: A test version is selected when editing an email entry point (mailbox). Once selected, emails received on that mailbox are processed by the test version instead of the production version.
To view the details of the last execution, the History panel tab on the version page shows the test execution history.
To stop test mode, click Remove from test.
5. Putting a version into production
When a version is ready, you can deploy it to production.
- From the version card, click Put in production.
- A confirmation dialog explains:
- The version will become read-only — to make further changes, you will need to create or copy a development version.
- If this smart routing already has a production version, it will automatically go into backup. You can put it back into production at any time.
- Confirm to proceed.
Note: You cannot put a blank version (with no actions) into production.
6. Scheduling an automatic production
Instead of immediately deploying a version, you can schedule it to go into production at a specific date and time.
- From the version card, click Schedule the production.
- Set the Date and time of the automatic production.
- Click Save.
The version card displays an alert: “This version has been put in scheduled production for [date]”.
If a scheduled production is already set, a banner also appears in the production section: “Automatic production of version [name] on [date]”.
To cancel the scheduled production, click Remove the planned production from the schedule on the version card.
Note: The chosen date and time must be in the future. You cannot schedule two productions on the same date.