[Reading time: 4 minutes]
Overview
The Zoho API connector allows you to integrate Zoho Desk with INO cx.
This setup requires:
- Creating application credentials (Client ID and Client Secret) in the Zoho API Console.
- Configuring an authentication method in INO cx.
- Setting up the Single Sign-On (SSO).
- Creating the Zoho Desk integration in INO cx.
Prerequisites
Before setting up the Zoho API connector, make sure you have:
- The appropriate rights in the role to access the Authentication methods, SSO connectors, and CRM v2 modules.
- Access to the Zoho API Console with permissions to create a new client application.
- Your Zoho Desk company URL, available in Zoho Desk ➡️ Settings ➡️ Company Settings.
- At least one Zoho Desk user whose username matches the one used in INO cx (needed for SSO user mapping).
1. Create Zoho API credentials
Before INO cx can connect to Zoho, you need to create application credentials (Client ID and Client Secret) in the Zoho API Console.
1. Go to the Zoho API Console.
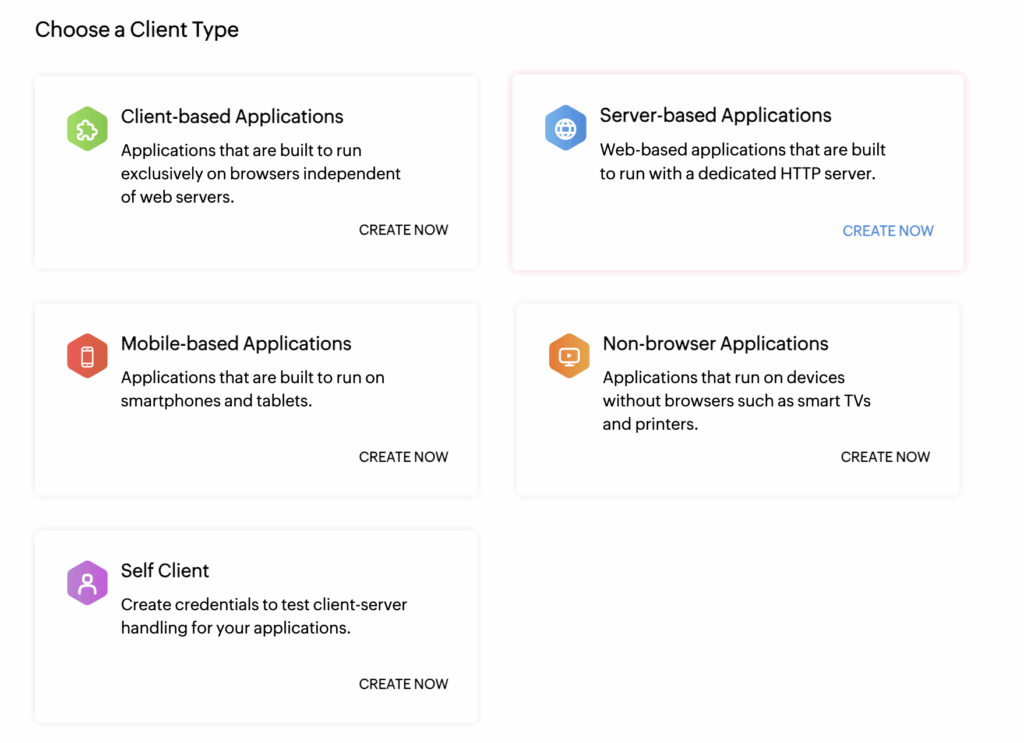
2. Create a new client application:
- Choose Server-based Applications as the client type.
3. In the configuration form, choose a name, add your Homepage URL and the Authorized Redirect URIs.
Replace {{domain}} with your own INO cx domain:
- Homepage : https://{{domain}}.ino.cx
- Authorized Redirect URLs :
- https://{{domain}}.ino.cx/api/authclients/hbdnakz/fzefdzs
- https://{{domain}}.ino.cx/api/sso/login/oauth/callback
- These URIs are used by Zoho to confirm the authorization process.
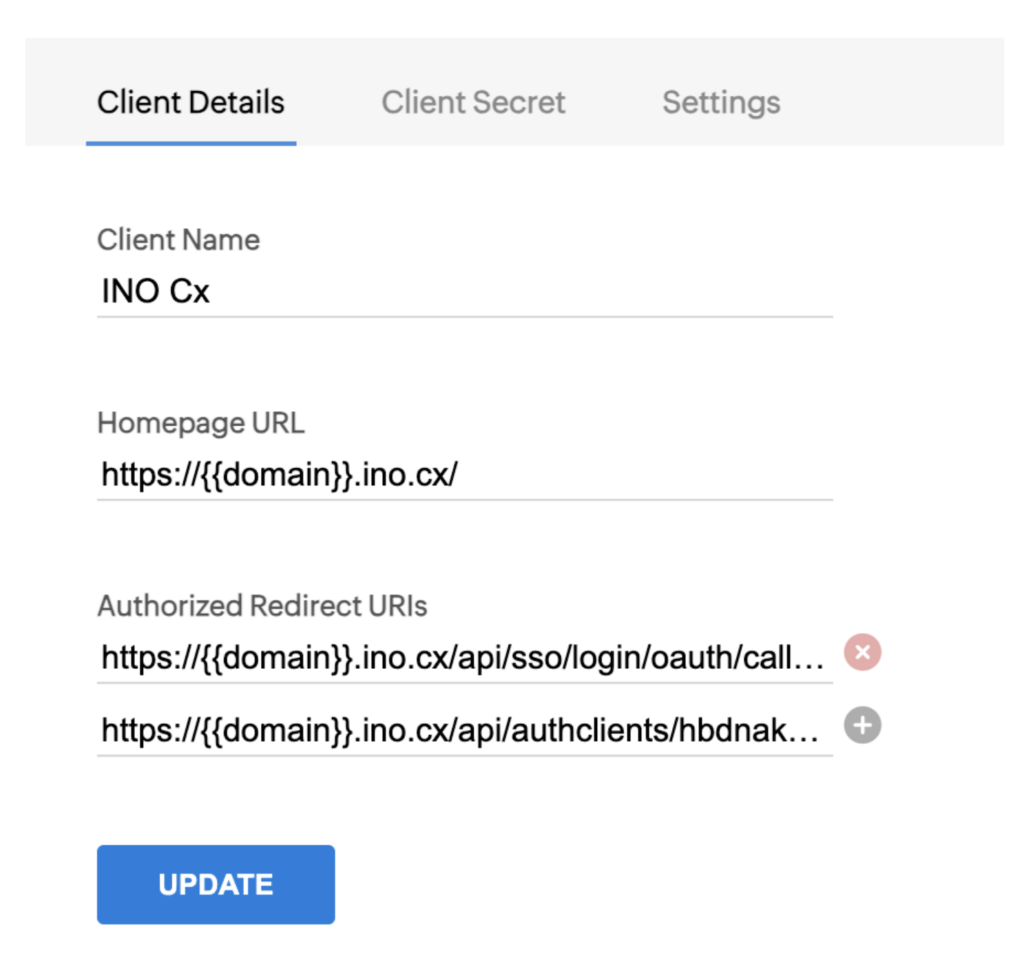
4. Once the client is created, Zoho provides a Client ID and a Client Secret. Keep these values secure — they will be used in INO cx.
2. Configure authentication method
Now that you have the credentials, set up the authentication in INO cx.
1. Go to Maker, Authentication methods module.
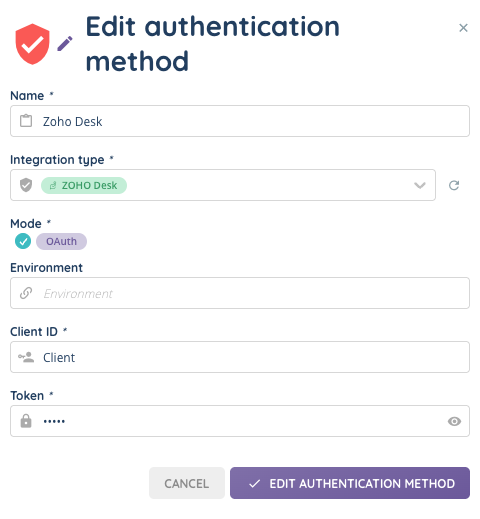
2. Create a new authentication method with the following details:
- Name: e.g., Zoho Desk
- Integration type: Zoho Desk
- Mode: OAuth (default)
- Environment URL: Your Zoho Desk company URL. Not mandatory.
- Client ID and Client Secret/Token: paste the values from the Zoho API Console (step 1).
3. Save the method and enable it by clicking on the Status column.
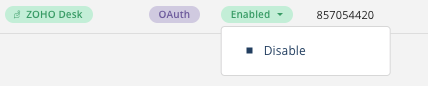
4. A validation window will open — select the appropriate environment (Sandbox or Production).
3. Set up Single Sign-On (SSO)
You can also use Zoho as an SSO provider in INO cx.
1. Go to Maker, SSO connectors module.
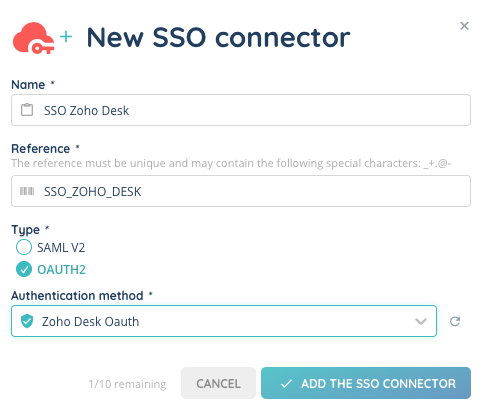
2. Create a new SSO connector:
- Name and Reference: define your own values.
- Type: OAuth 2.0
- Authentication method: select the one created in step 2.
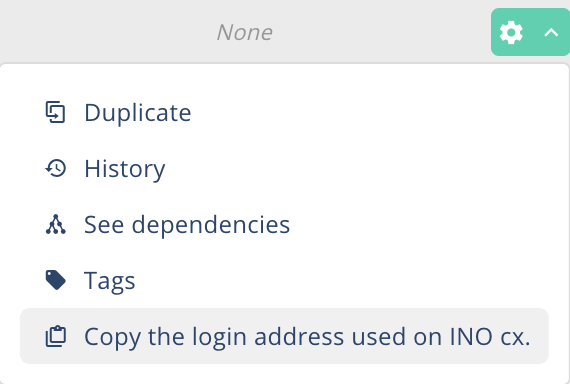
3. After creating it, click the cogged wheel icon to copy the SSO login URL.
- This URL can be used to log in to INO cx with Zoho credentials.
4. Associate the SSO connector with your user account in INO cx. In the Maker, in the “users” module, “card” submodule, click on edit and add the SSO connector you just created.
4. Create the CRM v2 integration
Finally, you can connect Zoho Desk to the new CRM v2 module in INO cx.
1. Go to the CRM v2 module.
2. Create a new CRM of type Integration.
- Integration type:
Zoho Desk - Authentication method: select the one created earlier.
3. Save the CRM.
4. Associate the CRM with the relevant profiles to make it accessible in the banner.
Your CRM v2 integration is now ready.
👉 To learn more about configuring CRM v2 (create objects, fields, scenarios, assign interactions, etc.), see the dedicated article:
Set up CRM v2
5. Recommended CRM objects and fields
For best results, follow Zoho Desk’s official API documentation when defining objects and fields.
When configuring Zoho Desk objects in INO cx, we recommend creating at least the following:
Contacts
- First Name: Short text
- Last Name: Short text
- Phone: Phone number
- Email: Email address
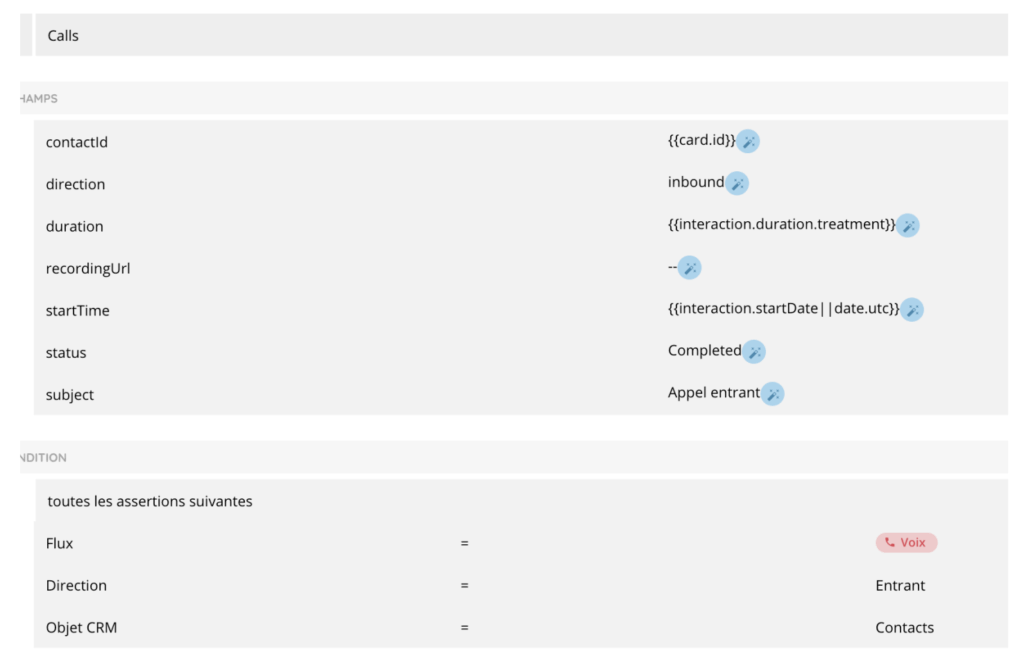
Calls
- ContactId: Short text
- Direction: Short text (Inbound | Outbound)
- Duration: Numeric
- Subject: Short text
- Start time: Short text (format using the filter date.utc)
- Status: Short text (Completed)
- RecordingUrl: URL (custom field to store the public link of a call recording; default value
--, updated automatically)
6. Assing interaction
To assign the interaction, follow the steps in the article on CRMs V2 and consult the Zoho Desk API documentation.
Configure the form as shown below, and set conditions on the flow, direction, and objects.