
[Reading time: 8 minutes]
Overview
Voice campaigns allow you to automatically call a list of targets using different dialing modes and advanced routing rules. They are configured in the Maker voice campaigns module and give you full control over call presentation, processing, post-interaction behavior, and target management.

This article explains how to create a voice campaign, configure its settings, and manage targets.
Prerequisites
Before running a voice campaign, several conditions must be met.
Like all the other modules of the Banner, access to the campaigns tab is conditioned by the rights set up in your profile in the Maker.
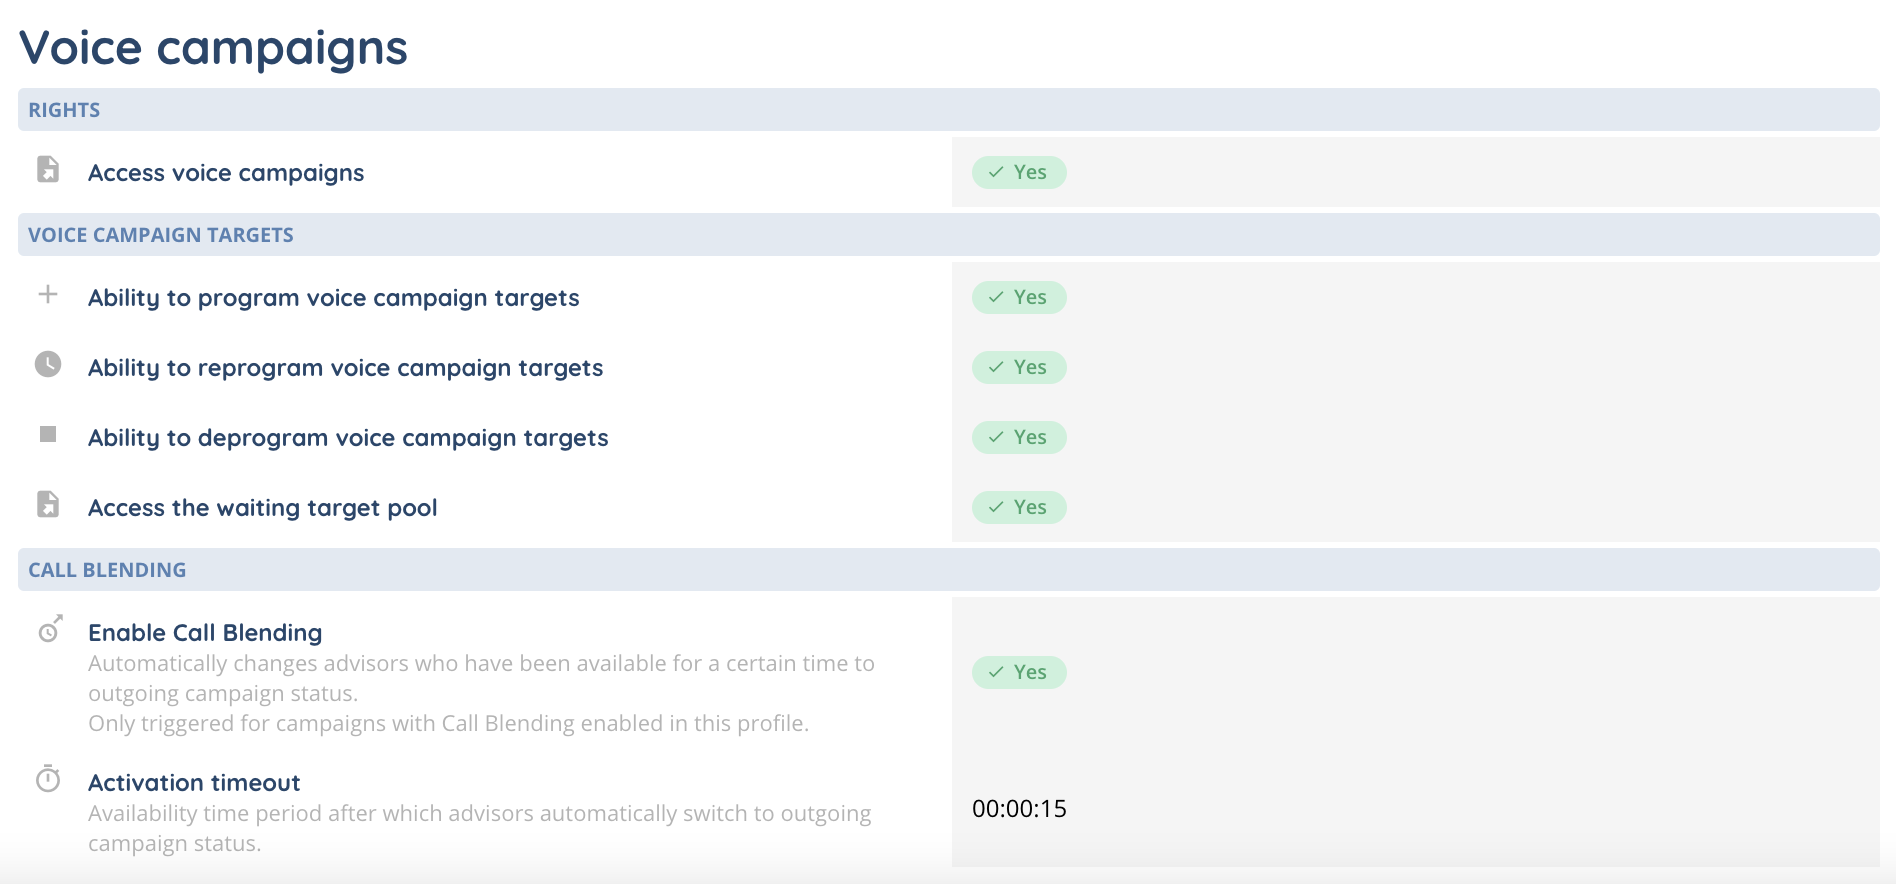
Don’t forget to add your campaigns in the “Configuration” profile tab.

The campaign must be switched ON and contain remaining targets. The campaign must be added to the user profile, and the Manage the campaign right can be enabled to allow switching the campaign ON or OFF from the banner.
All required campaign resources, such as targets and phone numbers, must be properly configured.
1. Access voice campaigns
Voice campaigns are managed from the Maker module.
The main page displays the list of all existing voice campaigns.
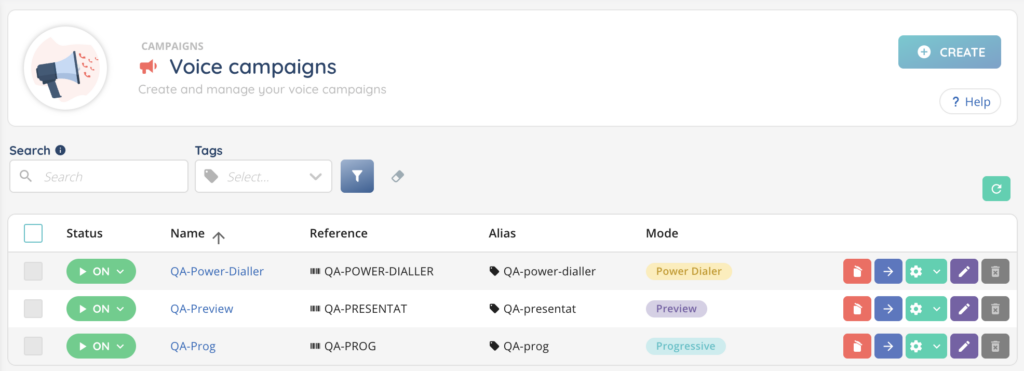
From this page, you can search for a campaign by its name, reference, or alias. A dedicated search bar also allows you to filter campaigns using tags.
2. Create a voice campaign
To create a new voice campaign, click Create from the voice campaigns list.
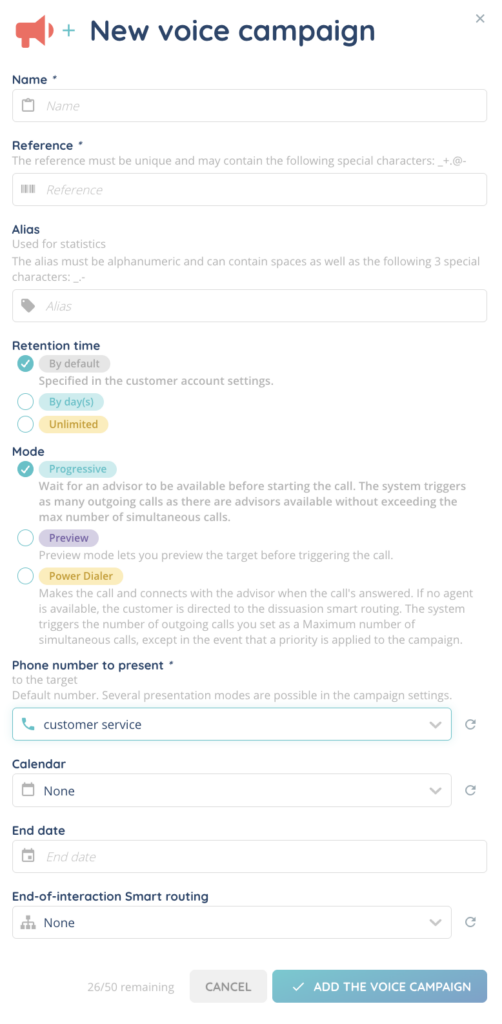
You must first define the campaign name and reference (mandatory), and the alias (optional).
You then choose how long interaction data is retained. You can use the default retention time defined in the client account settings, set a specific number of days between 1 and 365, or keep the data without limitation.
Next, select the dialing mode. Voice campaigns support Progressive (wait until an advisor is available), Preview (preview the target before), and Power dialer (make the call and then look for an available advisor) modes.
You must also select the phone number presented to the target. This number must already be configured in the dedicated Maker module. A default number is selected at creation, but several presentation modes can be configured later in the campaign.
You can optionally assign a calendar that has already been configured, define an end date for the campaign, and select an end-of-interaction Smart routing. When a Smart routing is selected, you must also choose whether to use its test or production version.
Once saved, the campaign is created.
3. Voice campaign list
After creation, the campaign appears in the voice campaigns list. Each campaign is displayed with its status, name, reference, alias, and dialing mode.

Several actions are available directly from the list. You can open the campaign to access its configuration, edit its settings, manage its tags and history, or empty the campaign to remove all targets. A campaign can only be deleted when it is switched OFF.
4. Configure a voice campaign
Opening a campaign gives access to four main tabs: Settings, Targets, Target layouts, and Import.

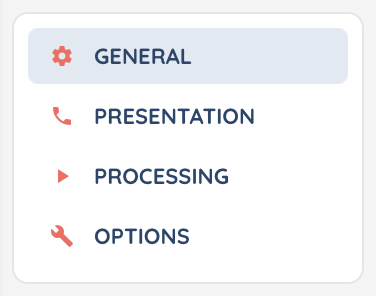
The Settings tab is divided into four sub-tabs: General, Presentation, Processing, and Options.
4.1. General settings
In the General sub-tab, you can modify the core parameters of the campaign by activating Edit mode.
You can update the campaign name, reference, alias, retention time, and dialing mode. You can also define the maximum number of simultaneous calls. Setting this value to 0 means there is no limit.
The campaign weight is used to calculate its priority. When using the Fixed mode, the priority is calculated based on a fictitious load value that you must define between 1 and 100,000. When using the Real mode, the priority is calculated using the real number of remaining targets, with the possibility of applying a percentage weighting to reduce the priority if needed.
You can also configure the refresh time for daily campaign statistics, select the time zone and language, and choose whether callbacks should be prioritized.
Additional options allow you to authorize or block calls to surcharged and short numbers, assign a calendar, define an end date, and enable answering machine detection. When answering machine detection is enabled, calls detected as answering machines are sent to the dedicated Smart Routing.
4.2. Presentation settings
The Presentation sub-tab defines how interactions are presented to both the advisor and the target.
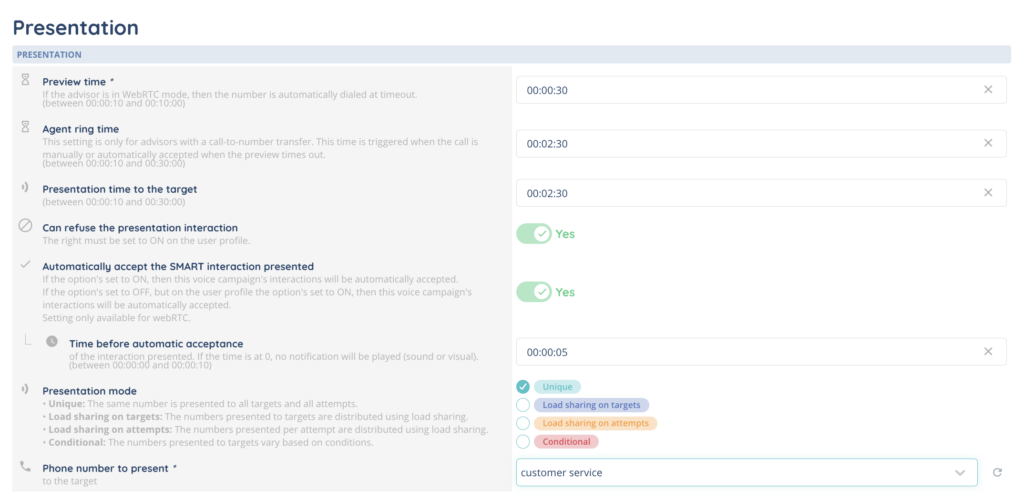
You can configure the maximum presentation time to the advisor and the presentation time to the target. Advisors can be allowed to refuse a presented interaction (if the corresponding right is enabled in their user profile).
For WebRTC campaigns, you can enable automatic acceptance of presented SMART interactions. If enabled, you must also define the delay before the interaction is automatically accepted.
The presentation mode determines how phone numbers are distributed. You can use a unique number for all targets, distribute numbers using load sharing by target or by attempt, or apply conditional rules to vary the number based on defined conditions.
You must also select the phone number or numbers presented to the target.
4.3. Processing settings
The Processing sub-tab controls call handling and recording behavior.
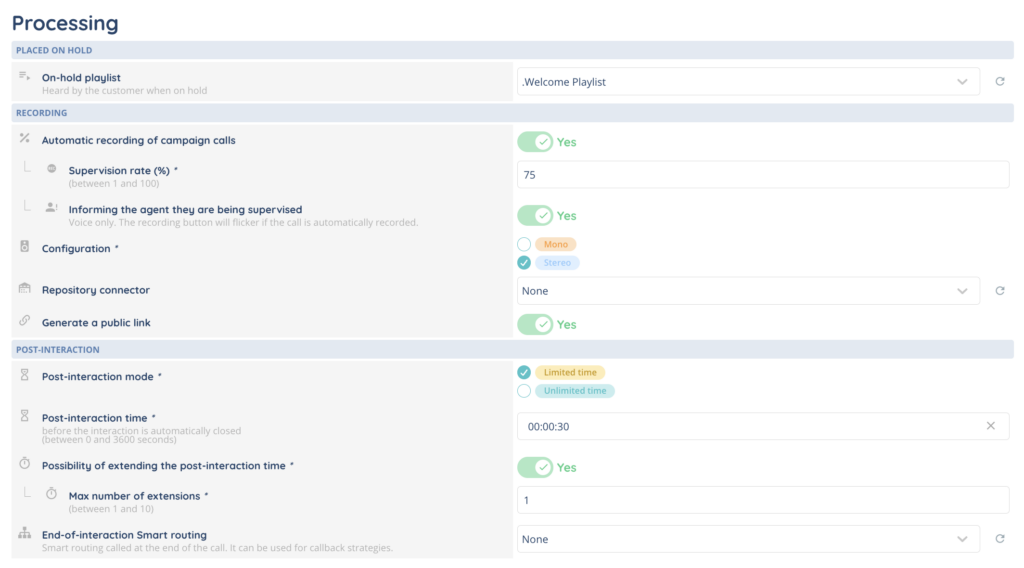
You can define a hold-on playlist that is played to the customer while waiting. Calls can be automatically recorded, with a supervision rate defining the percentage of recorded calls. When supervision is enabled, advisors can be informed that they are being supervised, and the recording button in the small banner will visually indicate that the call is recorded.
You can choose whether recordings are generated in mono or stereo, select a repository connector, and generate a public link if required.
Post-interaction behavior is also configured here. You can choose a limited or unlimited post-interaction mode. When the mode is limited, you must define the post-interaction duration and can allow extensions, with a maximum number of extensions between 1 and 10.
Finally, you can select an end-of-interaction Smart routing, which is triggered once the call ends and can be used for callback strategies.
4.4. Options settings
The Options sub-tab allows you to configure advanced campaign behavior.
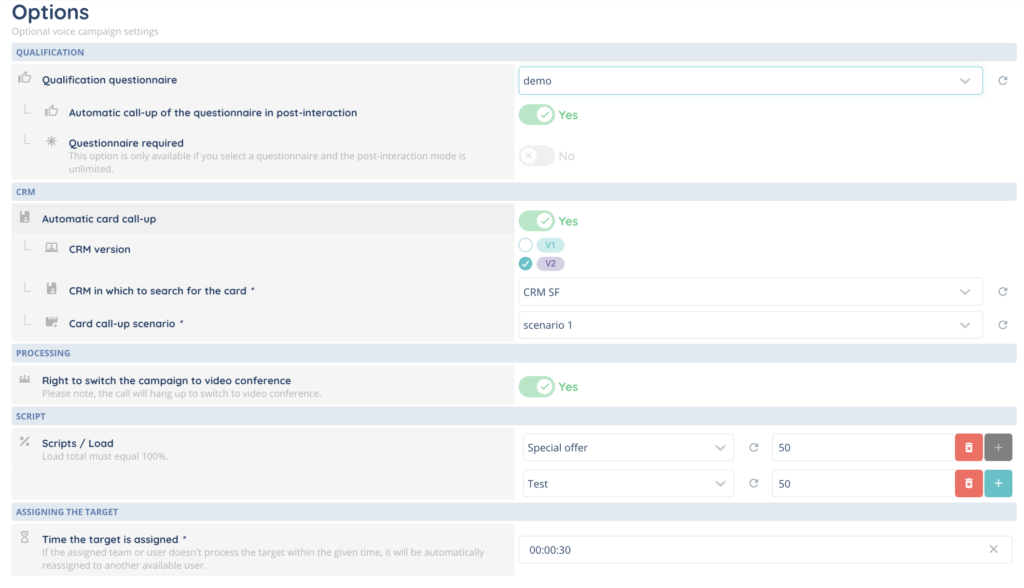
You can associate a qualification questionnaire with the campaign and choose whether it is automatically displayed during post-interaction. When post-interaction is unlimited, you can also require the questionnaire to be completed before closing the interaction.
Automatic CRM card call-up can be enabled. In this case, you must select whether to use CRM v1 or CRM v2, choose the CRM to search in, and decide whether a CRM card should be created if none is found.
You can allow advisors to switch the call to a video conference. Please note that the voice call will be disconnected when switching to video.
Scripts can be assigned to the campaign with a defined load distribution. The total script load must equal 100%.
You can also define how long a target remains assigned to a user or team. If the target is not processed within this time, it is automatically reassigned to another available user.
At the top of the Settings tab, you can switch the campaign ON or OFF, enter Edit mode, or use the settings menu to reset script load counters or empty the campaign.
5. Targets
5.1. Targets tab
The Targets tab is used to manage campaign targets.

From this tab, you can manually create new targets, start or stop target processing, and access additional actions such as exporting targets, applying calibration rules, or emptying the campaign.
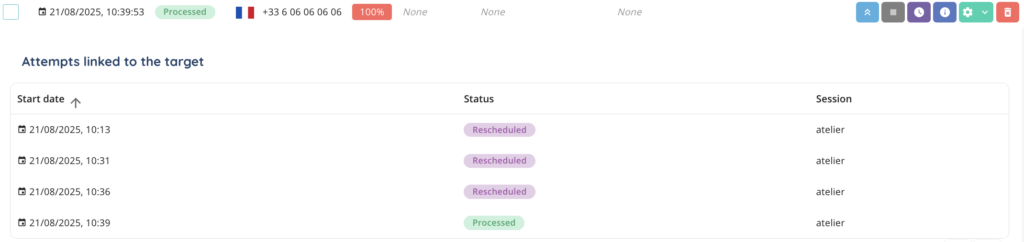
The Targets sub-tab displays the list of all targets in the campaign, including their start date, status, phone number, priority, target model, assignment, and presented phone number.
Depending on the target status, you can view call attempts, reschedule the target, view target details, duplicate the target, edit it, unschedule it, or delete it.
Filtering and advanced filtering options are available, including date filters limited to the last three rolling months, phone number search, and advanced criteria such as priority, status or target layout.
The Attempts sub-tab displays all call attempts for the campaign. Each attempt includes its status, phone number, start and end dates, and session information. Filtering options are available: date, phone nuber, status and session.
5.2. Target layouts tab
The Target layouts tab allows you to associate one or more target layouts with the campaign.
You can add layouts that were previously created in the dedicated Maker module, and enable or disable them using the ON or OFF toggle.
5.3. Import targets
The Import tab is used to bulk import targets into the campaign.
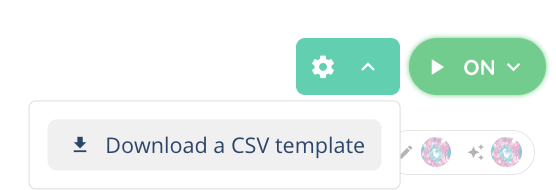
Targets can be imported from a file, a CRM, or a database. When importing from a file, you can download a CSV template.
The CSV file must include specific columns. The startDate must use the YYYY/MM/DD format and be defined as a Date cell. The priority must be a value between 1 and 100. Phone numbers must be formatted using a custom format such as +00000000000. Optional columns include assignedUser (reference of the user), assignedTeam, and displayNumber.
When importing the file, you must select the delimiter and map each CSV column to the corresponding Maker field. The import will only succeed if all required fields are correctly mapped.
Now you can use voice campaigns module in the Banner!