
[Reading time: 3 minutes]
Overview
The SMS Campaigns feature allows you to send predefined SMS messages to a list of targets.
Campaigns are created and managed in the Maker, where you can define the sender, message template, target list, and scheduling options.
I – Campaign list
When you open the SMS Campaigns module, you arrive on the list of existing campaigns.
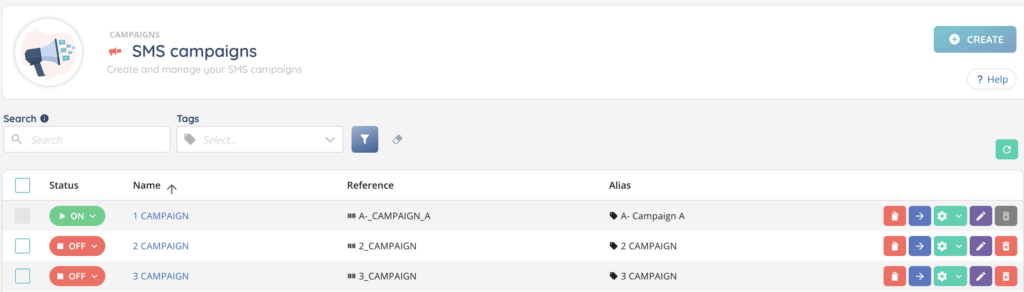
A search bar allows you to search by Name, Reference, or Alias, and an additional bar lets you search by Tags.
Each line in the list represents one campaign. The following columns are available:
- Status (ON or OFF)
- Name
- Reference
- Alias
At the end of each line, a series of action buttons lets you:
- 🗑️ Empty the campaign
- ➡️ Open the campaign
- ⚙️ Duplicate, see history, see dependencies, or manage tags
- ✏️ Edit the campaign
- 🗑️ Delete the campaign permanently
A CREATE button at the top of the page lets you create a new SMS campaign.
II – Creating a new campaign
When creating a campaign, you can configure the following parameters:
- Name, Reference, and Alias
- SMS sender (previously created in the SMS senders module – this name will appear as the sender on the recipient’s phone). Full article here.
- SMS template (previously created in the SMS templates module – defines the message content). Full article here.
- Calendar (optional)
- End date (optional)
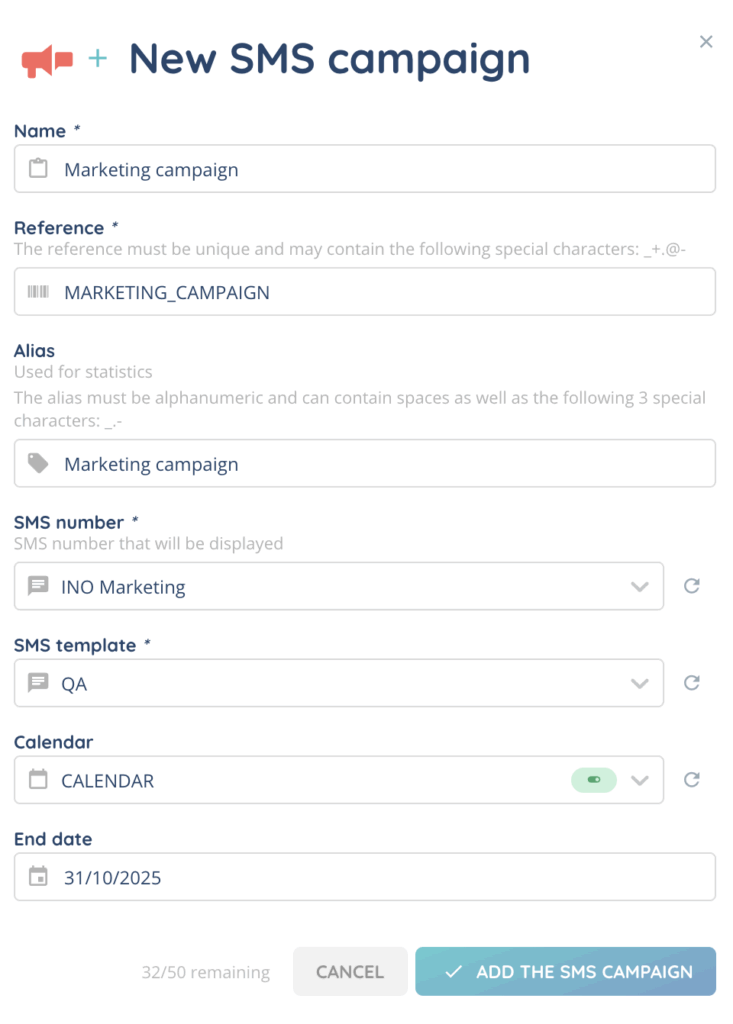
Once saved, the campaign appears in the list and can be opened using the arrow button.
III – Campaign details
Opening a campaign displays four tabs:

1. Settings
You can modify all initial parameters and configure additional options:
- Refresh time
- Time zone
- Language
- Digitalize to the chat flow
2. Targets
This tab includes two sub-tabs:
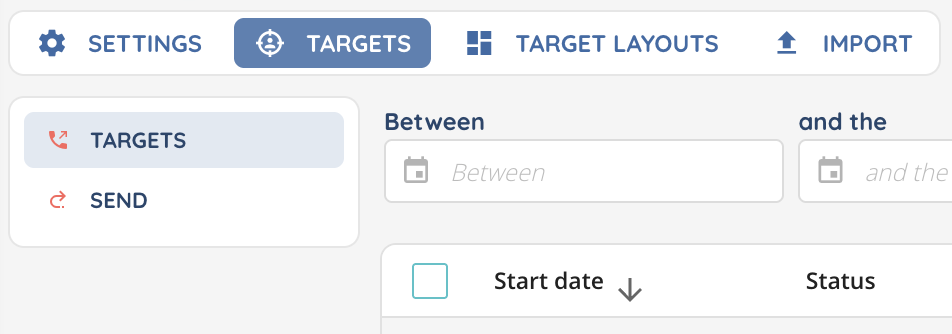
2.1. Targets
Create targets by adding:
- Phone number
- Start date
- Priority
- Insert in case of duplicate
- Target layout (optional)
You can expand each target to view all attempts.
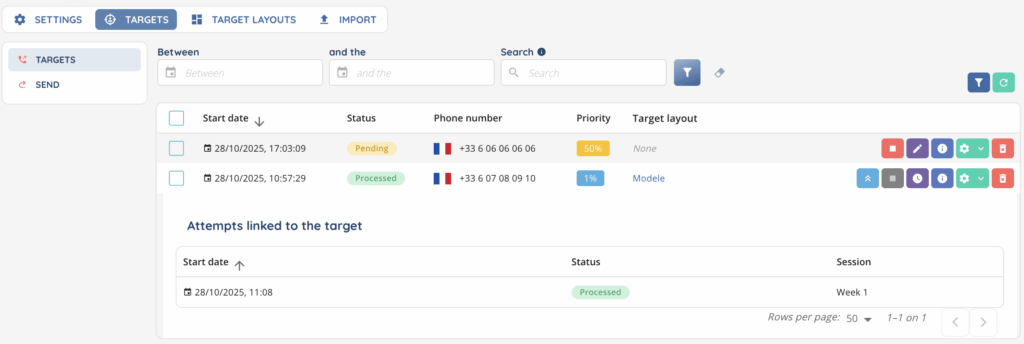
On each target you can perform the following actions:
- Remove a target (while Pending)
- Reschedule a target
- View target information
- Duplicate or delete a target
For all targets, the cogwheel at the top lets you:
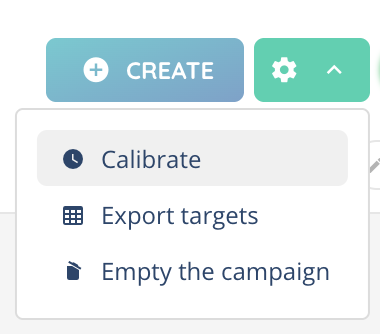
- Calibrate (distribute targets over time)
- Export targets
- Empty the campaign
2.2. Send
Displays the history of SMS messages already sent. You can:
- Filter between two dates
- Search by target phone number
The columns displayed are:
- Status
- Phone number
- Start date
- End date
- Session (used for statistics in the “SMS campaign attempts” data source in the Reporter)
3. Target Layout
You can add one or several target layouts to include additional information about your targets. This information will be displayed by clicking on the small information icon next to the target.

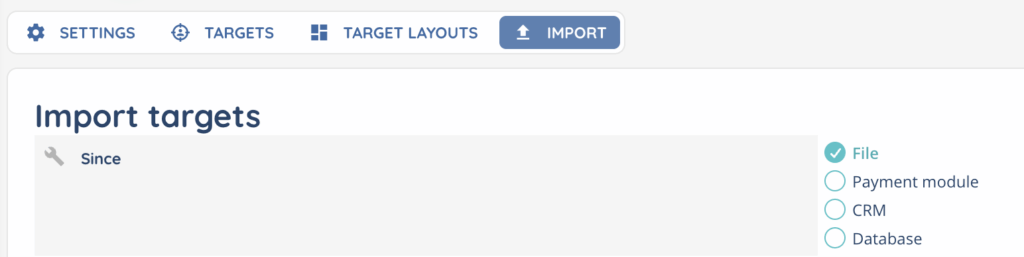
4. Import
Import targets from different sources:
- File
- Payment module
- CRM
- Database
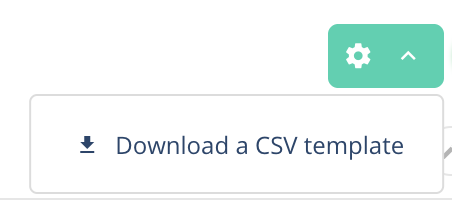
You can also download a CSV template for import.
IV – Launching the campaign
To launch the campaign:
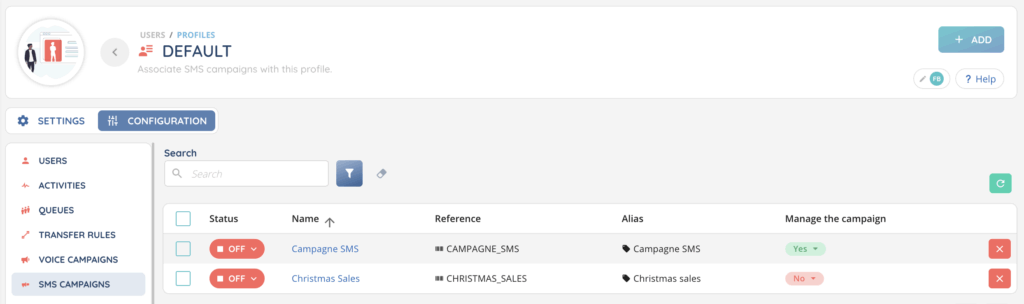
- Add the campaign to the desired profiles.
- Set the campaign status to ON.
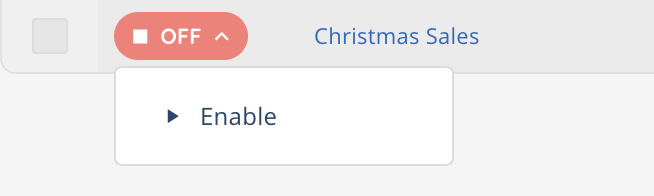
In the Profiles module, the option “Manage campaign” allows advisors to enable or disable the campaign directly from the Banner.
Note: enabling or disabling a campaign in the Banner will automatically enable or disable in the Maker, and vice versa.
A campaign can be deactivated and reactivated by choosing whether or not to carry on the session. This is useful for extending a campaign by adding new targets.
Now, you can use your SMS campaign in the Banner!